Showing posts with label Multifield Component. Show all posts

March 22, 2021
Estimated Post Reading Time ~

How to read custom Touch UI multifiled values in Sightly

Global java implementation for sightly to read TOUCH UI custom multifield values which are stored in Json format
Sample storage of Custom multifield values in repository
{
jcr:primaryType: "nt:unstructured",
products: ["{"productImagePath":"path1","productImgAltText":"altText","cssClass":"test-class"}",
"{"productImagePath":"productImagePath2","productAltText":"","altText2":"test-class2"}"],
jcr:createdBy: "admin",
jcr:lastModifiedBy: "admin",
jcr:created: "Mon Feb 20 2017 20:36:27 GMT+0530",
jcr:lastModified: "Thu Mar 02 2017 18:02:01 GMT+0530",
sling:resourceType: "<component-path>"
}


Crete a class multiFieldJsonHelper
import java.util.ArrayList;
import java.util.HashMap;
import java.util.Iterator;
import java.util.List;
import java.util.Map;
import org.apache.sling.api.resource.Resource;
import org.apache.sling.api.resource.ValueMap;
import org.apache.sling.commons.json.JSONException;
import org.apache.sling.commons.json.JSONObject;
import org.slf4j.Logger;
import org.slf4j.LoggerFactory;
import com.adobe.cq.sightly.WCMUsePojo;
public class MultiFieldJsonHelper extends WCMUsePojo {
private String[] json;
private static final Logger LOG = LoggerFactory.getLogger(MultiFieldJsonHelper.class);
@Override
public void activate() throws Exception {
String resPath = get("resPath", String.class);
String prop = get("prop", String.class);
if (resPath != null && prop != null) {
Resource res = getResourceResolver().getResource(resPath);
ValueMap vm = res.getValueMap();
json = vm.get(prop, String[].class);
}
}
public List<Map<String, String>> getValues() {
List<Map<String, String>> results = new ArrayList<Map<String, String>>();
if (json != null) {
for (String value : json) {
Map<String, String> column = parseItem(value);
if (column != null) {
results.add(column);
}
}
}
return results;
}
private Map<String, String> parseItem(String value) {
Map<String, String> columnMap = new HashMap<String, String>();
JSONObject parsed;
try {
parsed = new JSONObject(value);
for (Iterator<String> iter = parsed.keys(); iter.hasNext();) {
String key = iter.next();
String innerValue = parsed.getString(key);
columnMap.put(key, innerValue);
}
return columnMap;
} catch (JSONException e) {
LOG.info("JSONException occured {}", e.getMessage());
}
return null;
}
}

Reading in HTL (Sighlty) Component
<ul data-sly-use.multiFieldJsonHelper="${'MultiFieldJsonHelper' @resPath=resource.path,prop='products'}"> <sly data-sly-list.product="${multiFieldJsonHelper.values}">
<li class="${product['cssClass']} col-lg-6 col-xs-6">
<img src="${product['productImagePath']}" alt="${product['productImgAltText'] @ i18n}" />
</li>
<sly>
</ul>


By aem4beginner

December 10, 2020
Estimated Post Reading Time ~

Touch UI – Checkbox for multifield

Problem Description: Consider adding a multifield (with checkbox) to a Component Edit dialog in Touch UI.

An author selects one/many checkbox in multifield and saves the Dialog.

Issue: On reopening the dialog, the state of the checkbox is not retained. In other words, no checkbox is selected.

Solution (Verified on AEM 6.2 and ACS-Commons 3.3.0):
1. Install ACS Commons. It would allow the multifield values to be stored via nodestore/jsonstore. Steps on how to create a multifield can be found at below mentioned links:
  • to persist values via NODE_STORE, visit link
  • to persist values via JSON_STORE, visit link
2. Configure ‘value’ configuration for the checkbox as indicated below:

<fieldName
    jcr:primaryType="nt:unstructured"
    sling:resourceType="granite/ui/components/foundation/form/checkbox"
    name="./persistent_property_name"
    text="Field_Label"
    value="some_value"/>

Verify the checkbox by checking, saving dialog & reopening dialog again.


By aem4beginner

October 13, 2020
Estimated Post Reading Time ~

Multifield and Dialog data in jQuery using Coral UI - AEM 6.3

A simple way to get the multifield and dialog data in your clientlib’s jquery to perform any kind of validations in 6.3 and above versions:

Step 1: Creating your clientlibs folder with the following properties:

<?xml version=”1.0″ encoding=”UTF-8″?>
<jcr:root xmlns:cq=”http://www.day.com/jcr/cq/1.0&#8243; xmlns:jcr=”http://www.jcp.org/jcr/1.0&#8243;
jcr:primaryType=”cq:ClientLibraryFolder”
categories=”[cq.authoring.dialog,abc.components.banner]”
dependencies=”[granite.jquery]”/>


Step 2: I am creating a event listener in my case and in that I will be getting the values of multifield.

(function(document, $, ns) {
“use strict”;
$(document).on(“click”, “.cq-dialog-submit”, function(e) {
var $formminmax = $(this).closest(“form.foundation-form”);
var text= $formminmax.find(“[name=’./text’]”).val(); // This will contain the textfield data having name property as idSelector.
var field = $formminmax.find(“[data-granite-coral-multifield-name=’./multi’]”);
var totalLinkCount = field.children(‘coral-multifield-item’).length;
var prodData = []; //This will store the multifield data from the dialog.
for (var i = 0; i < totalLinkCount; i++) {
prodData.push(field.find($(“[name=’./data’]”)[i]).val());
}
});

})(document, Granite.$, Granite.author);


By aem4beginner

Create TouchUI Multifield Component in AEM 6.3

ca:dialog content.xml for multifield:

<?xml version=”1.0″ encoding=”UTF-8″?>
<jcr:root xmlns:sling=”http://sling.apache.org/jcr/sling/1.0&#8243; xmlns:cq=”http://www.day.com/jcr/cq/1.0&#8243; xmlns:jcr=”http://www.jcp.org/jcr/1.0&#8243; xmlns:nt=”http://www.jcp.org/jcr/nt/1.0&#8243;

jcr:primaryType=”nt:unstructured”
jcr:title=”Multifiled”
sling:resourceType=”cq/gui/components/authoring/dialog”
fieldLabel=”Multifield”>

<content
jcr:primaryType=”nt:unstructured”
sling:resourceType=”granite/ui/components/foundation/container”>

<layout
jcr:primaryType=”nt:unstructured”
sling:resourceType=”granite/ui/components/foundation/layouts/tabs”
type=”nav”/>

<items jcr:primaryType=”nt:unstructured”>
<bannerconfig
jcr:primaryType=”nt:unstructured”
jcr:title=”Config”
sling:resourceType=”granite/ui/components/foundation/section”>

<layout
jcr:primaryType=”nt:unstructured”
sling:resourceType=”granite/ui/components/foundation/layouts/fixedcolumns”
margin=”{Boolean}false”/>

<items jcr:primaryType=”nt:unstructured”>
<column
jcr:primaryType=”nt:unstructured”
sling:resourceType=”granite/ui/components/foundation/container”>
<items jcr:primaryType=”nt:unstructured”>

<productid
jcr:primaryType=”nt:unstructured”
sling:resourceType=”granite/ui/components/foundation/container”
name=”./prod”
required=”{Boolean}true”>

<items jcr:primaryType=”nt:unstructured”>
<productid
jcr:primaryType=”nt:unstructured”
sling:resourceType=”granite/ui/components/coral/foundation/form/multifield”
composite=”{Boolean}true”
eaem-show-on-collapse=”EAEM.showProductName”
fieldLabel=”Products”
required=”{Boolean}true”>

<field
jcr:primaryType=”nt:unstructured”
sling:resourceType=”granite/ui/components/coral/foundation/container”
name=”./prodId”>

<items jcr:primaryType=”nt:unstructured”>
<column
jcr:primaryType=”nt:unstructured”
sling:resourceType=”granite/ui/components/coral/foundation/container”>

<items jcr:primaryType=”nt:unstructured”>
<productId
jcr:primaryType=”nt:unstructured”
sling:resourceType=”granite/ui/components/coral/foundation/form/textfield”
fieldDescription=”Product ID”
fieldLabel=”Product ID”
name=”./productid”
required=”{Boolean}true”/>

</items>
</column>
</items>
</field>
</productid>
</items>
</productid>
</items>
</column>
</items>
</bannerconfig>
</items>
</content>
</jcr:root>


By aem4beginner

September 22, 2020
Estimated Post Reading Time ~

Create a simple multifield component in AEM-CQ5

Create a simple multifield component in AEM-CQ5:

1. Create a component "multifield textbox".
2. Create a dialog under "multifield textbox" in this component.
3. Go the last node "tab1" from default created nodes in dialog.
4. Create a node "items" under "tab1" with primaryType=cq:WidgetCollection.
5. Again create a node "text" under "items" with primaryType=cq:Widget.


6. Now add following properties for node "text".
name= ./textbox1
xtype= multifield


Result


By aem4beginner

May 27, 2020
Estimated Post Reading Time ~

How to read custom Touch UI multifield values in Sightly

Global java implementation for sightly to read TOUCH UI custom multifield values which are stored in Json format

Sample storage of Custom multifield values in repository 
{
 jcr:primaryType: "nt:unstructured",
 products: ["{"productImagePath":"path1","productImgAltText":"altText","cssClass":"test-class"}",
 "{"productImagePath":"productImagePath2","productAltText":"","altText2":"test-class2"}"],
 jcr:createdBy: "admin",
 jcr:lastModifiedBy: "admin",
 jcr:created: "Mon Feb 20 2017 20:36:27 GMT+0530",
 jcr:lastModified: "Thu Mar 02 2017 18:02:01 GMT+0530",
 sling:resourceType: "<component-path>"
}

Create a class multiFieldJsonHelper 
import java.util.ArrayList;
import java.util.HashMap;
import java.util.Iterator;
import java.util.List;
import java.util.Map;
import org.apache.sling.api.resource.Resource;
import org.apache.sling.api.resource.ValueMap;
import org.apache.sling.commons.json.JSONException;
import org.apache.sling.commons.json.JSONObject;
import org.slf4j.Logger;
import org.slf4j.LoggerFactory;
import com.adobe.cq.sightly.WCMUsePojo;
public class MultiFieldJsonHelper extends WCMUsePojo {
 private String[] json;
 private static final Logger LOG = LoggerFactory.getLogger(MultiFieldJsonHelper.class);
 @Override
 public void activate() throws Exception {
  String resPath = get("resPath", String.class);
  String prop = get("prop", String.class);
  if (resPath != null && prop != null) {
   Resource res = getResourceResolver().getResource(resPath);
   ValueMap vm = res.getValueMap();
   json = vm.get(prop, String[].class);
  }
 }
 public List<Map<String, String>> getValues() {
  List<Map<String, String>> results = new ArrayList<Map<String, String>>();
  if (json != null) {
   for (String value : json) {
    Map<String, String> column = parseItem(value);
    if (column != null) {
     results.add(column);
    }
   }
  }
  return results;
 }
 private Map<String, String> parseItem(String value) {
  Map<String, String> columnMap = new HashMap<String, String>();
  JSONObject parsed;
  try {
   parsed = new JSONObject(value);
   for (Iterator<String> iter = parsed.keys(); iter.hasNext();) {
    String key = iter.next();
    String innerValue = parsed.getString(key);
    columnMap.put(key, innerValue);
   }
   return columnMap;
  } catch (JSONException e) {
   LOG.info("JSONException occured {}", e.getMessage());
  }
  return null;
 }
}

Reading in HTL (Sighlty) Component
<ul data-sly-use.multiFieldJsonHelper="${'MultiFieldJsonHelper' @resPath=resource.path,prop='products'}">
   <sly data-sly-list.product="${multiFieldJsonHelper.values}">
  <li class="${product['cssClass']} col-lg-6 col-xs-6">
   <img src="${product['productImagePath']}" alt="${product['productImgAltText'] @ i18n}" />
   </li>
 <sly>
</ul>


By aem4beginner

May 19, 2020
Estimated Post Reading Time ~

Creating a dialog with multifield in multifield

Multifield is a very important widget in CQ5. The biggest utility of it is the author can add many as he wants, even reorders with a very simple interface. This makes it an ideal choice for scenarios where there is no fixed count for how many records a component can have(no of items in a list for example). The multifield that comes out of the box is limited by the fact that it can handle a single xtype at a given time. This problem, however, is overcome by creating a custom composite xtype that can hold multiple xtypes within it. The fields are converted into a string separated by a delimiter pattern. With this hack, you can use the multifield that comes out of the box for a wider range of applications as it'd be still dealing with a single xtype.

Something that would be even better would be having a custom multifield in a multifield. My friend Hariprasad Marigowda came up with this brilliant solution. The approach involved in pulling off this is explained below:

The type of widget you want in a multifield is configured through its fieldconfig. You can configure this manually by creating an nt:unstructured node under the multifield node or programmatically through the custom multifield js. The data in a composite field is stored in a hidden form in the dialog. it is this form that the dialog posts to the node when you click OK on your dialog. The data in this hidden form then gets saved in the node.

The OOTB multifield stores the configured data as an array of strings. To work with composite widgets that contain multiple fields, you hack it to store the data as a string separating each pattern by a fixed pattern. Now when it comes to a multifield within a multifield, somehow the data from the inner multifield must be a string; but the multifield saves data as an array of strings. How do you get it to work?

Hari created this custom outer multifield that takes the string array from inner multifield and converts it into a comma-separated string. The form in the outer field is then updated with this value along with the other fields separated by a fixed delimiter.

The inner multifield expects the data to be a string array when it is being rendered.you again fetch the comma-separated string from the node and create string array by splitting it. By doing this the inner multifield is abstracted from the fact it is being used inside a multifield. As far as the inner multifield is concerned it stores an array of strings and renders the dialog by reading an array of strings.

create a custom xtype for the outer multifield fieldconfig by extending the composite field.

override the set value and get value methods in the outer multifield like how you would do for a composite field by separating the fields with a delimiter.

Copy the multifield js from the foundation and replace the multifield xtype in it with custom xtype of your inner multifield. Let's call it innermultifield.

override the set value method in the modified multifield js to split the comma-separated array and set its value using it.


create a custom composite field to be used in the fieldconfig of inner multifield. Let's call it the innerfield.
This again is like any other composite field except that the hidden field of the outer multifield is updated too when there is a change in the inner multifield.

The end result when the dialog is configured will look some thing like this
String array
[0] : a-outer-field1<#-*>a-outer-field2<#-*>a-1-inner-field1<#-#>a-1-inner-field2<#-#>,a-2-innerfield1<#-#>a-2-innerfield2<#-#><#-*>

[1] : b-outer-field1<#-*>b-outer-field2<#-*>b-1-inner-field1<#-#>b-1-innerfield2<#-#>,b-2-innerfield1<#-#>b-2-innerfield2<#-#><#-*>

Source: http://cq5tutorials.blogspot.com/2014/04/cq5-multifield-in-multifield.html


By aem4beginner

Create a Multifield in Multifield without any custom code

Here's a plug and play solution built by chaining adobe's multifield xtype with a couple of open-source widgets.

Problem: Adobe's multiplied solution doesn't work with composite values. It stores the value as a String if only one value is configured and as a String[] if multiple values are configured. A common workaround to overcome this creates a custom composite field that concatenates the individual fields of a composite field into a single string with a delimiter (http://stackoverflow.com/questions/26290908/multifield-component-issue/26294172 ). This workaround fails when you want to have a varying number of composite fields with multifield inside the composite field. A common requirement while creating listing components such as mega menus and accordions. A lot of guys end up dynamically including parsys for every menu column or accordion block. The ideal solution would be to have a multifield in multifield (can be a little confusing for the author, but can be dealt with authoring guide and pointers in the dialog )

Solution: Use three widgets to create the multifield in multifield effect.
1) Multi composite - xtype that stores each multifield entry as a child node with the fields as properties. [Developed by Citytech inc]

2) Multifieldpanel - xtype that stores a multifield as an array of json objects where each field is a property of the json object. [Developed by ACS]

3) Multifield - the out of box multifield xtype.

The fix:  multicomposite  ( outer multifield )
                 |-fieldConfigs
                         |- field A (let's say a textfield, for the menu's column name)
                         |- field B (a pathfield to configure the link for the column name )
                         |- field C (multifield, the inner multifield to hold sub-menu entries)
                                  |-fieldConfig - xtype : multifieldpanel
                                        |- field Ca (textfield to hold title)
                                        |- field Cb (pathfield for the link)

Dialog  JSON -
{
matchBaseName: false,
xtype: "multicompositefield",
name: "./menu",
hideLabel: true,
jcr:primaryType: "cq:Widget",
fieldDescription: " click + to add menu column",
fieldConfigs:
{
jcr:primaryType: "cq:WidgetCollection",
name:
{
width: "500",
fieldLabel: "Name",
xtype: "textfield",
allowBalnk: true,
name: "title",
fieldLabel: "Link Title",
jcr:primaryType: "cq:Widget",
},
link:
{
xtype: "pathfield",
fieldLabel: "Link",
name: "link",
jcr:primaryType: "cq:Widget"
},
submenu:
{
xtype: "multifield",
title: "submenu",
fieldLabel: "Submenu",
name: "submenu",
collapsible: true,
jcr:primaryType: "cq:Widget",
fieldDescription: "Click + to add sub menu entry",
fieldConfig:
{
xtype: "multifieldpanel",
hideLabel: false,
jcr:primaryType: "cq:Widget",
items:
{
jcr:primaryType: "cq:WidgetCollection",
title:
{
key: "title",
xtype: "textfield",
fieldLabel: "Link Title",
jcr:primaryType: "cq:Widget"
},
link:
{
key: "link",
fieldLabel: "Link",
xtype: "pathfield",
jcr:primaryType: "cq:Widget"
}
}
}
}
}
}       

The data is stored in the following format :
{
jcr:primaryType: "nt:unstructured",
menu:
{
jcr:primaryType: "nt:unstructured",
item_1:
{
submenu:
[
"{"title":"Link 1","link":"http://cq5tutorials.blogspot.in"}",
"{"title":"Link 2","link":"http://cq5tutorials.blogspot.in"}"
],
title: "Main Menu Item 1",
jcr:primaryType: "nt:unstructured",
link: "http://cq5tutorials.blogspot.in"
},
item_2:
{
submenu:
[
"{"title":"Sub menu 1","link":"http://cq5tutorials.blogspot.in"}",
"{"title":"Sub menu 2","link":"http://cq5tutorials.blogspot.in"}"
],
title: "Main Menu item 2",
jcr:primaryType: "nt:unstructured",
link: "http://cq5tutorials.blogspot.in"
}
}
}

Notice that the inner multifield (submenu) is stored as an array of json strings. There is a utility in ACS code to read entries from this: http://adobe-consulting-services.github.io/acs-aem-commons/features/widgets.html

Few Drawbacks:
1) This xtype works only when it's on the first tab (or the tab that's active on dialog load ) of the dialog. Multifield doesn't handle all the extjs events like the rest of the widgets, as a result, the inner panels don't get rendered if the widget is not visible on load. Should not cause an issue as long as it's on the first tab of the dialog

2) The xtypes involved do not fire all events like the basic widgets, ex: beforeloadcontent. This can be a problem when you want to write a few custom listeners. If you know your way around extjs, this can still be accomplished by leveraging other events like the before add.


By aem4beginner

May 15, 2020
Estimated Post Reading Time ~

Custom Multifield xtype in AEM

In this blog, I will explain how can we create custom multifield in a dialog and design dialogs.

For creating a custom multifield, Firstly we have to create a node with the properties jcr:primaryType = cq:Widget and xtype = multifield. Under this node we have to create a node named as fieldConfig with the properties jcr:primaryType = cq:Widget and xtype = multifieldpanel.
For the custom multifield xtype we have to include a js file in our clientLibray as given below-

var MyClientLib = MyClientLib || {};
MyClientLib.multifieldpanel = CQ.Ext.extend(CQ.Ext.Panel, {
panelValue: ”,
constructor: function(config){
config = config || {};
MyClientLib.multifieldpanel.superclass.constructor.call(this, config);
},
initComponent: function () {
MyClientLib.multifieldpanel.superclass.initComponent.call(this);
this.panelValue = new CQ.Ext.form.Hidden({
name: this.name
});
this.add(this.panelValue);
var dialog = this.findParentByType(‘dialog’);
dialog.on(‘beforesubmit‘, function(){
var value = this.getValue();
if(value){
this.panelValue.setValue(value);
}
},this);
},
getValue: function () {
var pData = {};
this.items.each(function(i){
if(i.xtype == “label” || i.xtype == “hidden” || !i.hasOwnProperty(“dName”)){
return;
}
pData[i.dName] = i.getValue();
});
return $.isEmptyObject(pData) ? “” : JSON.stringify(pData);
},
setValue: function (value) {
this.panelValue.setValue(value);
var pData = JSON.parse(value);
this.items.each(function(i){
if(i.xtype == “label” || i.xtype == “hidden” || !i.hasOwnProperty(“dName”)){
return;
}
if(!pData[i.dName]){
return;
}
i.setValue(pData[i.dName]);
});
},
validate: function(){
return true;
},
getName: function(){
return this.name;
}
});

CQ.Ext.reg(“multifieldpanel“, MyClientLib.multifieldpanel);

Let’s see with the example:
I created a dialog and in this dialog I created a node named as list with the properties jcr:primaryType = cq:Widget and xtype = multifield as shown in the figure.


Under this node we have to create a node named as fieldConfig with the properties jcr:primaryType = cq:Widget and xtype = multifieldpanel as shown in the figure.

Under this fieldConfig node we have to create a node named as items with the property jcr:primaryType = cq:WidgetCollection as shown in figure.

Under this items node we can create multiple nodes which xtype can be same or different and dName property is mandatory which works as the name property. In my case I created two nodes named as title or link with the property xtype = textfield and pathfield as shown in figure.


Now when we open our dialog, we find our dialog like this:


By aem4beginner

May 13, 2020
Estimated Post Reading Time ~

Pre Populated Multifield in AEM

During my project work, I got a task where I have to prepopulate a multifield with some predefined values. i.e when a multifield is loaded the first time, It should be displayed with some default values. In this post, I will discuss, How I achieve this functionality. So

Agenda of this post
Prepopulate Multifield with default values

For doing this, I am creating a project using adobe maven archetype as I created in my last post. It creates a folder structure under the app directory as shown below


Here I create a component named as a blog.

This component contains a dialog having a tab with a multifield & one listener (nt:unstructured) node under cq:dialog node.

So the final structure looks like –


multifield is created with properties
xtype = multifield
jcr:primaryType = cq:Widget
name = ./names
fieldLabel = Names


fieldconfig node have properties
xtype = textfield
jcr:primaryType = nt:unstructured


Till now whatever we create is simple work that is required to create a simple multifield.

The key point is:
Now the original work starts for prepopulating multifield. As we create an additional node named as listeners under dialog node, jcr:primaryType of this node is nt:unstructured.
here I define a function named load content as type string and Its values are a javascript function that set’s the default value for this multifield. the function value is

function(dialog) {
var field = dialog.getField(‘./names’);
if(field.getValue()){
var values = [“Pre”, “Populated”, “Multifield”];
field.setValue(values);
};
return true;
this node’s properties look like:

Now Everything is done go to a test page drop this component & open dialog. You will see your multifield is prepopulated as desired.

the final output is:


Github repository link
https://github.com/vietankur009/components.git


By aem4beginner

May 10, 2020
Estimated Post Reading Time ~

Use JS to Read Multifield Values

“use strict”;
use(
[“/libs/wcm/foundation/components/utils/AuthoringUtils.js”],
function (AuthoringUtils) {
var itemList = granite.resource.properties[“items”];
var itemArray = [];
if(itemList != null) {
if( itemList.getClass().isArray() ) {
for (var i = 0, l = itemList.length; i < l; i++) {
var temp = JSON.parse(itemList[i]);
itemArray.push(temp.text);
}
}
else {
var temp = JSON.parse(itemList);
itemArray.push(temp.text);

}
}
return {
itemArray : itemArray
};
});


By aem4beginner

May 9, 2020
Estimated Post Reading Time ~

Creating custom Xtype in AEM/Creating multifield in AEM as are follows,

In AEM we can achieve this by creating a widgets clienlibrary, which holds the custom multifield structure and it should call before the comps/page loads in CQ.

Create a clientlibrary in the root folder called apps. Here i am creating a folder called advtraining in apps. In this im creating the clientlibrary called “cqwidgets” having categories as “cq.widgets”.

Custom xtype in cq5 – widget properties

And now we will call js.txt as follows.
Custom Xtype – widgets js txt file 

Now after creating this, place our custom multifield code in the created js file that is here titleUrl.js

The code for the custom multifield as follows,
console.log(“—————-in training titleUrl ————“);
/**
* @class CQ.form.CustomMultiField
* @extends CQ.form.CompositeField
* This is a custom path field with link text and target
* @param {Object} config the config object
*/

/**
* @class Ejst.CustomWidget
* @extends CQ.form.CompositeField
* This is a custom widget based on {@link CQ.form.CompositeField}.
* @constructor
* Creates a new CustomWidget.
* @param {Object} config The config object
*/

CQ.form.CustomMultiField = CQ.Ext.extend(CQ.form.CompositeField, {

/**
* @private
* @type CQ.Ext.form.TextField
*/
hiddenField: null,

/**
* @private
* @type CQ.Ext.form.TextField
*/
linkText: null,

/**
* @private
* @type CQ.Ext.form.TextField
*/
linkTxt: null,

/**
* @private
* @type CQ.Ext.form.TextField
*/
linkUrl: null,

/**
* @private
* @type CQ.Ext.form.CheckBox
*/
openInNewWindow: null,

/**
* @private
* @type CQ.Ext.form.FormPanel
*/
formPanel: null,

constructor: function (config) {
config = config || {};
var defaults = {
“border”: true,
“labelWidth”: 75,
“layout”: “form”
};
config = CQ.Util.applyDefaults(config, defaults);
CQ.form.CustomMultiField.superclass.constructor.call(this, config);
},
//overriding CQ.Ext.Component#initComponent
initComponent: function () {
CQ.form.CustomMultiField.superclass.initComponent.call(this);

// Hidden field
this.hiddenField = new CQ.Ext.form.Hidden({
name: this.name
});
this.add(this.hiddenField);

// Link Title
this.add(new CQ.Ext.form.Label({
cls: “customwidget-label”
}));

this.linkTxt = new CQ.Ext.form.TextField({
cls: “customwidget-2”,
allowBlank: true,
emptyText: “Enter Title”,
width: 335,
listeners: {
change: {
scope: this,
fn: this.updateHidden
},

dialogclose: {
scope: this,
fn: this.updateHidden
}
}
});
this.add(this.linkTxt);

this.add(new CQ.Ext.form.Label({
cls: “customwidget-label”
}));

this.linkUrl = new CQ.form.PathField({
cls: “customwidget-2”,
allowBlank: true,
emptyText: “Specify Url”,
width: 335,
listeners: {
change: {
scope: this,
fn: this.updateHidden
},

dialogclose: {
scope: this,
fn: this.updateHidden
}
}
});
this.add(this.linkUrl);
},

processInit: function (path, record) {
this.linkTxt.processInit(path, record);
this.linkUrl.processInit(path, record);
},

setValue: function (value) {
var link = JSON.parse(value);
this.linkTxt.setValue(link.txt);
this.linkUrl.setValue(link.url);
this.hiddenField.setValue(value);
},

getValue: function () {
return this.getRawValue();
},

getRawValue: function () {
var link = {
“txt”: this.linkTxt.getValue(),
“url”: this.linkUrl.getValue(),
};
return JSON.stringify(link);
},

updateHidden: function () {
this.hiddenField.setValue(this.getValue());
}

});
CQ.Ext.reg(“titleurl”, CQ.form.CustomMultiField);

console.log(“—————-end of training titleUrl————-“);

Here we can track our js file by using the console logs mentioned above.

After succesful calling of our clientLibraries, we need to create component withe created multifield xtype above.

Create a normal component as usually created, and for the child node of “items” which is of type widgetcollection, create a node called “carouselfield”.

Propertis for this node as follows,

filedLabel – String – Specify Fields

name – String – ./carousel

xtype – multifield

FYI
Custom Xtype in AEM – Node properties

Now after creating this, need to create one more node under “carouselfiled” node, called “filedConfig”.

Propertis for this filedConfig node as follows,

xtype – titleurl (“Which xtype we are getting from widgets clientlib”)
Custom Xtype in AEM – custom xtype declaration

Now finally, drag our component into the page . You will be able to get the two text fileds for each adding, one is for Title and other is for URL as specified above. 
Custom xtype AEM – multifield component


By aem4beginner

May 3, 2020
Estimated Post Reading Time ~

Create a custom Granite UI adapter to disable the Multifield component

Adobe Experience Manager's Granite UI introduces the concept of Adapters. Adapters are a client-side device inspired by Apache Sling's Adapters and its adaptTo method. Adapters are an easy and clean way of creating APIs for commonly used functionality associated with specific objects. Adapters attach functionality to DOM elements according to vocabulary. Vocabulary is analogous to Java Interfaces.

The first Adapter that you're likely to encounter is the foundation-ui. The foundation-ui is an object, adaptable from the global window object, that gives you the power of creating Coral UI alerts, notifications, prompts and loading indicators. Try copying the following JavaScript into the console of any Touch UI authoring page.


aemGraniteUIAlert.js
var ui = $(window).adaptTo('foundation-ui');
ui.alert('Notification', 'This alert was created using the Granite UI "foundation-ui" adapter', 'notice');


There are a variety of adapters which you can find in the Granite UI documentation. There are more adapters that are not listed in the documentation such as the foundation-clipboard which allows an easy API to write to local and session storage. So be sure to explore /libs/granite/ui/components/foundation/clientlibs/foundation/js.

It's easy to write your own adapters. Granite UI foundation components come with the foundation-field vocabulary. However, in this example we're going to create an improved adapter with an API that will completely disable the component by disabling the add button, all input fields, the remove and the drag-and-drop reorder buttons. We'll also add an additional method to enable/disable only the add button which could be useful in applying a max limit to the Multifield component.

aemMultifieldAdapter.js
/**
 * Granite UI Multifield adapter
 *
 * Has improved setDisabled method which disables all form input fields, the
 * delete buttons, the reorder buttons and the add button within the Multifield.
 * The adapter also contains a new method to enable and disable just the add
 * button which can be used to limit the size of the multifield.
 *
 * Usage:
 * var field = $('.coral-Multifield').adaptTo('nateyolles-field');
 * field.setDisabled(true|false);
 * field.setDisabledAdd(true|false);
 */
 (function(window, $, undefined) {
    'use strict';

    /**
     * Register button adapter to disable and enable buttons.
     */
    $(window).adaptTo('foundation-registry').register('foundation.adapters', {
        type: 'nateyolles-field',
        selector: '.coral-Button',
        adapter: function(el) {
            var $button = $(el);

            return {
                setDisabled: function(disabled) {
                    $button.attr('disabled', disabled);
                }
            };
        }
    });

    /**
     * Register multifield move adapter that disables and enables the button and
     * prevents drag-and-drop reordering.
     */
    $(window).adaptTo('foundation-registry').register('foundation.adapters', {
        type: 'nateyolles-field',
        selector: '.coral-Multifield-move',
        adapter: function(el) {
            var $button = $(el);

            return {
                setDisabled: function(disabled) {
                    $button.attr('disabled', disabled);
                    $button.toggleClass('js-coral-Multifield-move', !disabled)
                }
            };
        }
    });

    /**
     * Register Multifield adapter to disable and enable the entire multifield
     * component. Since the multifield component is essentially a composite of
     * other components, this adapter simply finds the children components and
     * uses their adapter APIs to enable and disable fields.
     */
    $(window).adaptTo('foundation-registry').register('foundation.adapters', {
        type: 'nateyolles-field',
        selector: '.coral-Multifield',
        adapter: function(el) {
            var $multifield,
                $addButton,
                $reorderButtons,
                $removeButtons,
                $fields;

            $multifield = $(el);
            $addButton = $multifield.children('.coral-Multifield-add');

            /**
             * Disable or enable a jQuery object or collection of objects by
             * adapting it to the provided vocabulary.
             *
             * @param {JQuery} jQuery object or collection to adapt and act upon
             * @param {String} vocabulary to adapt objects to
             * @param {Boolean} true to disable, false to enable
             * @private
             */
            function disable($fields, vocabulary, disabled){
                $fields.each(function(){
                    var api = $(this).adaptTo(vocabulary);

                    if (api && api.setDisabled) {
                        api.setDisabled(disabled);
                    }
                });
            }

            /**
             * Public API methods to disable and enable the entire component or
             * the add button separately.
             *
             * @public
             */
            return {
                setDisabled: function(disabled) {
                    $fields = $multifield.find('.js-coral-Multifield-list > .js-coral-Multifield-input > *:first-child');
                    $reorderButtons = $multifield.find('.coral-Multifield-move');
                    $removeButtons = $multifield.find('.coral-Multifield-remove');

                    disable($addButton, 'nateyolles-field', disabled);
                    disable($reorderButtons, 'nateyolles-field', disabled);
                    disable($removeButtons, 'nateyolles-field', disabled);
                    disable($fields, 'foundation-field', disabled);
                },
                setDisabledAdd: function(disabled) {
                    disable($addButton, 'nateyolles-field', disabled);
                }
            };
        }
    });
})(window, Granite.$);

Use the foundation-registry adapter to gain access to the Registry API where you can register a new adapter. The type of property is the name of the adapter. The convention is to use the application name followed by the topic. The selector attribute identifies eligible objects, usually a DOM element or the window object. The target object to be adapted need not be obtained by using the declared selector, but it must satisfy the selector. The adapter property is where the public APIs are defined and executed.

In this example, we actual register three separate adapters. The Multifield component is essentially a composite of other components, so we'll use the parent adapter to delegate functionality to the children component's own adapters. Input fields such as textfields and selects can use the provided AEM foundation-field adapters, however, we needed to create new adapters for standard buttons as well as drag-and-drop reorderable buttons. The new adapters were created using the application's namespace rather risking collision with future AEM updates.

To make use of the API, use jQuery to get the Multifield component, adapt it to the custom vocabulary, and run the custom disabled method.
aemMultifieldAdapterExample.js
var field = $('.coral-Multifield').adaptTo('nateyolles-field');
field.setDisabled(true);


Multiple adapters can be created for any selector. The AEM provided foundation-field adapter is still available to the .coral-Multifield selector even when the example code is used. To make your adapter available when authoring in the Touch UI, ensure that it's in a clientlib that identifies the cq.authoring.dialog category.


By aem4beginner

Utility Sling Model to expose N level Coral UI AEM Multi-field as JSON without using deprecated JsonItemWriter

With the introduction of Coral UI and Sling models, implementing an N level multi-field in AEM is no longer a difficult job. That too without using ACS Commons!
What are we going to achieve ❓

In this article, I will share an approach to build a three level nested multi-field (which can be extended to N level) and steps on how we can parse the same in our AEM component. The major issue that I wanted to tackle is writing a generic code to parse the multi-field as JSON without using the deprecated JsonItemWriter class and its dump method.

The use case is to display a hierarchy of country, state and city.

This approach is an extension of the one here. Please feel free to suggest improvements in terms of making the code generic and reusable. The code has been tested on AEM 6.4 GA. For AEM 6.3 you might need service pack 2 or more.
Touch UI Dialog:
Touch UI Dialog
Output on UI:

Level 1: Country, Level 2: State, Level 3: City

For this, we will need four sling models to start with (For every extra nested multi-field addition, we will need a new sling model with this approach):
To parse the level 1 multi-field items (list of countries).
To read level 1 multi-field (country) properties and parse level 2 multi-field items (list of states).
To read level 2 multi-field (state) properties and parse level 3 multi-field items (list of cities).
To read level 3 multi-field (city) properties.

Important point about the dialog is to set the composite property to true for each multi-field that is a parent of another nested multi-field.

composite:true to support nesting of multifields

Now the code for sling models:

For this let’s first visualize the content hierarchy.

Resource and countries node below the resource
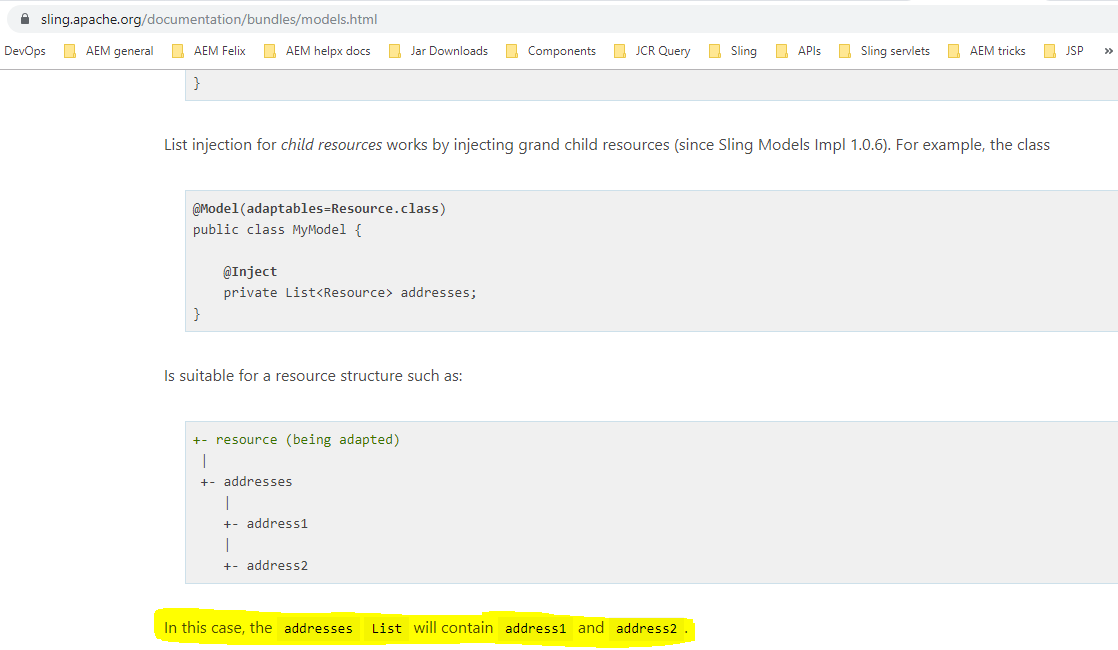
Thus, we need to Inject a List<Resource> and mark it as Optional as it may or may not be present based on the authoring.

The rest of the code simply converts the List of Resource to List of appropriate class i.e. Country in this case. 


    @Inject
    @Optional
    private List<Resource> countries;

    private List<Country> countriesList = new ArrayList<>();

    public List<Country> getCountriesList() {
        return countriesList;
    }

    public void setCountriesList(List<Country> countriesList) {
        this.countriesList = countriesList;
    }
    @PostConstruct
    protected void init() {
        logger.debug("In init of CountriesModel");
        if (countries != null && !countries.isEmpty()) {
            for (Resource resource : countries) {
                Country student = resource.adaptTo(Country.class);
                countriesList.add(student);
            }
        }
    }

This might be confusing as usually Sling models injects properties but countries is a child node. Referring to the official documentation of Sling, it becomes clear that grandchildren injection is allowed for Collections using Inject annotation.

Grandchildren injection for collections in Sling models

We extend the same logic to the country and state nodes which hold the list of states and cities respectively.


Each country has a name and a list of states under it.

    @Inject
    @Optional
    private String country;

    @Inject
    @Optional
    private List<Resource> states;

    @Optional
    private List<State> stateList = new ArrayList<>();


    public List<State> getStateList() {
        return stateList;
    }

    public void setStateList(List<State> stateList) {
        this.stateList = stateList;
    }


    @PostConstruct
    protected void init() {
        logger.debug("In init method of Country model.");
        if(!states.isEmpty()) {
            for (Resource resource : states) {
                State state = resource.adaptTo(State.class);
                stateList.add(state);
            }
        }
    }
And each state has a name with a list of cities under it.
Each state has a name and a list of cities under it.

    @Inject
    @Optional
    private List<Resource> cities;
    @Inject
    @Optional
    private String state;
    @Optional
    private List<City> cityList = new ArrayList<>();
    public List<City> getCityList() {
        return cityList;
    }

    public void setStateList(List<City> cityList) {
        this.cityList = cityList;
    }

    @PostConstruct
    protected void init() {
        logger.debug("In init method of Country model.");
        if(!cities.isEmpty()) {
            for (Resource resource : cities) {
                City city = resource.adaptTo(City.class);
                cityList.add(city);
            }
        }
    }

Thus using Coral UI, you no longer have to worry about writing custom js to populate dialog values in case of nested multi-field. Using sling models it is easy to visualize the code in terms of content hierarchy and write Java code pretty much in the same manner as data is stored in the JCR.

For the complete codebase and more such demos please refer to this project. This project also has the logic to expose the multi-field data as a json using sling models for SPA based implementations. The point to note here is I have tried to do this without using deprecated APIs.

For those interested in how to expose the multi-field data as JSON please refer MultifieldToJson.java file from the repo.

The code simply uses a recursive function to do the following:
Check for properties at each level and add to JsonObject.

2. Check if the node has children. Add a child object to a JsonArray and repeat until no children are left.

3. If the current node has children starting with the item (for multi-field), then add each JsonObject to “items” JsonArray to preserve uniformity.


private JsonObject checkForChildren(Resource resource) throws RepositoryException {
    Node resNode = resource.adaptTo(Node.class);
    JsonObject resourceJson = new JsonObject();
    if (null != resNode) {
        for (PropertyIterator resProp = resNode.getProperties(); resProp.hasNext(); ) {
            Property property = resProp.nextProperty();
            if (!propertiesToIgnore.contains(property.getName()))
                resourceJson.addProperty(property.getName(), property.getValue().getString());
        }
        if (resource.hasChildren()) {
            JsonArray multiJson = new JsonArray();
            for (Iterator<Resource> children = resource.listChildren(); children.hasNext(); ) {
                Resource childResource = children.next();
                JsonObject obj = checkForChildren(childResource);
                //if resource has children, list children as json objects.
                //but for multi use JsonArray
                if (childResource.getName().startsWith("item"))
                    multiJson.add(obj);
                else
                    resourceJson.add(childResource.getName(), obj);
            }
            if (multiJson.size() > 0)
                resourceJson.add("items", multiJson);
        }
    }
    return resourceJson;
}

The items array holds data for each level of multi-field. This code is generic and works for any number of nested multi-fields. Also, there is a utility function that takes the name of the multi-field root node so that this can be re-used for any multi-field as shown in the code below (note how I have passed countries as the name which can be replaced by any other multi-field root node name):

Java:

@Optional
@RequestAttribute
private String name;  //get the name using an optional request param
public String getJsonMulti() throws RepositoryException {
        Resource childResource = request.getResource().getChild(name); //get the root node using name
        if (childResource != null) {
            JsonObject resourceJson =   checkForChildren(childResource);
            return resourceJson.toString();
        }
        return StringUtils.EMPTY;
}

HTL:
<div data-sly-use.multi2Items=”${‘org.namaste.aem.core.models.MultifieldToJson’ @name=’countries’}”> Multi Json : ${multi2Items.getJsonMulti}</div>

For a quick glance at the HTL file refer this.

Below is how the json looks.

Json output for multi-field.
Note: The code in this project is only meant to serve as a reference and you must thoroughly test it before using it in your own project.

Hope this helped. Cheers!


By aem4beginner

May 1, 2020
Estimated Post Reading Time ~

Touch UI - Hide/Show fields inside coral-3 multifield in AEM by coral dropdown

This post shows how to hide/show fields inside multifield in the Touch UI dialog of AEM.
The resourceType used here for composite multifield, selection dropdown, textfield, and numberfield are coral 3 ui components.

For Example: granite/ui/components/coral/foundation/form/multifield and it has been tested in aem 6.3.

This method uses granite:class attribute added as a property to add a class in the fields and granite:data node with data key-value added as a property to add data attributes in the fields.
Implemented 4 steps are mentioned below:

1. Add granite: class attribute to the selection field as shown below
granite:class: cq-dialog-dropdown-showhide1


2. Add granite:data node inside selection field with data key-value added as property as shown below:
cq-dialog-dropdown-showhide-target1 : .list-option-listfrom-showhide-target


3. Add granite:class attribute to each of the fields which you want to show/hide based on the dropdown selection which matches the data-target attribute of selection field as shown below:
granite:class: list-option-listfrom-showhide-target1


4. Add granite:data node inside each of the fields which you want to show/hide with showhidetargetvalue key
and value equal to dropdown options value as shown below:
showhidetargetvalue : textval


To avoid any confusion, the cq_dialog xml I created is pasted below.

<?xml version="1.0" encoding="UTF-8"?>
<jcr:root xmlns:sling="http://sling.apache.org/jcr/sling/1.0"
xmlns:granite="http://www.adobe.com/jcr/granite/1.0"
xmlns:cq="http://www.day.com/jcr/cq/1.0"
xmlns:jcr="http://www.jcp.org/jcr/1.0" xmlns:nt="http://www.jcp.org/jcr/nt/1.0"
jcr:primaryType="nt:unstructured"
jcr:title="Multi ShowHide Component"
sling:resourceType="cq/gui/components/authoring/dialog"
helpPath="https://www.adobe.com/go/aem6_3_docs_component_en#Image - HTL">
<content
jcr:primaryType="nt:unstructured"
sling:resourceType="granite/ui/components/foundation/container">
<layout
jcr:primaryType="nt:unstructured"
sling:resourceType="granite/ui/components/foundation/layouts/tabs"
type="nav"/>
<items jcr:primaryType="nt:unstructured">
<multi
jcr:primaryType="nt:unstructured"
jcr:title="Multi"
sling:resourceType="granite/ui/components/foundation/section">
<layout
jcr:primaryType="nt:unstructured"
sling:resourceType="granite/ui/components/foundation/layouts/fixedcolumns"
margin="{Boolean}false"/>
<items jcr:primaryType="nt:unstructured">
<custom
jcr:primaryType="nt:unstructured"
sling:resourceType="granite/ui/components/foundation/container">
<items jcr:primaryType="nt:unstructured">
<heading
jcr:primaryType="nt:unstructured"
sling:resourceType="granite/ui/components/foundation/heading"
class="coral-Heading coral-Heading--4"
level="{Long}4"
text="Composite Multifield"/>
<well
jcr:primaryType="nt:unstructured"
sling:resourceType="granite/ui/components/foundation/container">
<layout
jcr:primaryType="nt:unstructured"
sling:resourceType="granite/ui/components/foundation/layouts/well"/>
<items jcr:primaryType="nt:unstructured">
<fieldenter
jcr:primaryType="nt:unstructured"
sling:resourceType="granite/ui/components/coral/foundation/form/multifield"
composite="{Boolean}true">
<field
jcr:primaryType="nt:unstructured"
sling:resourceType="granite/ui/components/coral/foundation/container"
fieldLabel="Products Container"
name="./products">
<items jcr:primaryType="nt:unstructured">
<listFromMulti
granite:class="cq-dialog-dropdown-showhide1"
jcr:primaryType="nt:unstructured"
sling:resourceType="granite/ui/components/coral/foundation/form/select"
fieldLabel="Select Multi showhide"
name="listFromMulti">
<items jcr:primaryType="nt:unstructured">
<text
jcr:primaryType="nt:unstructured"
text="Text field"
value="textval"/>
<num
jcr:primaryType="nt:unstructured"
text="Num field"
value="numval"/>
</items>
<granite:data
jcr:primaryType="nt:unstructured"
cq-dialog-dropdown-showhide-target1=".list-option-listfrom-showhide-target1"/>
</listFromMulti>
<multitext
granite:class="list-option-listfrom-showhide-target1"
jcr:primaryType="nt:unstructured"
sling:resourceType="granite/ui/components/coral/foundation/form/textfield"
fieldLabel="Multi Text"
name="multitext"
showhidetargetvalue="textval">
<granite:data
jcr:primaryType="nt:unstructured"
showhidetargetvalue="textval"/>
</multitext>
<multinum
granite:class="list-option-listfrom-showhide-target1"
jcr:primaryType="nt:unstructured"
sling:resourceType="granite/ui/components/coral/foundation/form/numberfield"
fieldLabel="Multi Num"
name="multinum"
showhidetargetvalue="numval">
<granite:data
jcr:primaryType="nt:unstructured"
showhidetargetvalue="numval"/>
</multinum>
</items>
</field>
</fieldenter>
</items>
</well>
</items>
</custom>
</items>
</multi>
</items>
</content>
</jcr:root>

Now to toggle fields using selection dropdown inside composite multifield independently, use below jquery logic written in a js file inside the clientlibs folder of the component with category cq.authoring.dialog.

(function(document, $) {
"use strict";

// when dialog gets injected
$(document).on("foundation-contentloaded", function(e) {
// if there is already an inital value make sure the
//according target element becomes visible
showHideHandler($(".cq-dialog-dropdown-showhide1", e.target));
});

$(document).on("change", ".cq-dialog-dropdown-showhide1", function(e) {
showHideHandler($(this));
});

function showHideHandler(el) {
el.each(function(i, element) {
// handle Coral3 base drop-down
Coral.commons.ready(element, function(component) {
showHideCustom(component, element);
component.on("change", function() {
showHideCustom(component, element);
});
});
})
}

function showHideCustom(component, element) {
// get the selector to find the target elements.
//its stored as data-.. attribute
var target = $(element).data("cq-dialog-dropdown-showhide-target1");
var $target = $(target);
var elementIndex = $(element).closest('coral-multifield-item').index();

if (target) {
var value;
if (component.value) {
value = component.value;
} else {
value = component.getValue();
}
$(element).closest("coral-multifield-item").find(target)
.each(function(index) {
var tarIndex = $(this).closest('coral-multifield-item').index();
if (elementIndex == tarIndex) {
$(this).not(".hide").parent().addClass("hide");
$(this).filter("[data-showhidetargetvalue='" + value + "']")
.parent().removeClass("hide");
}
});
}
}

})(document, Granite.$);

The screenshot of how the dialog looks like and how it to toggle fields is shown below


You can also find this component in my github project here.


By aem4beginner

Retrieve Composite Multifield child values in AEM through Java (WCMUsePojo)

In this post, we'll use the Java WCMUsePojo API to retrieve the multifield child values in our sightly code.

Since the multifield values stored in the page is stored as child nodes as shown below:


First, we'll create the MultiList bean having the same properties as in our dialog with getters and setters as shown below:

package com.foo.community.core;

public class MultiList {

private String multitext;
private String multinum;
private String multicheck;

public String getMultitext() {
return multitext;
}

public void setMultitext(String multitext) {
this.multitext = multitext;
}

public String getMultinum() {
return multinum;
}

public void setMultinum(String multinum) {
this.multinum = multinum;
}

public String getMulticheck() {
return multicheck;
}

public void setMulticheck(String multicheck) {
this.multicheck = multicheck;
}
}

And then, we'll create a class extending WCMUsePojo where we'll get the current node and then get the products node (where child values of multifield are stored) and iterate over that and set the retrieved property values in List of MultiList bean created above. Below is the implementation of this process:

package com.foo.community.core;

import java.util.ArrayList;
import java.util.List;
import com.adobe.cq.sightly.WCMUsePojo;
import javax.jcr.Node;
import javax.jcr.NodeIterator;

public class MultiListComponent extends WCMUsePojo{

private List multiItems = new ArrayList();

@Override
public void activate() throws Exception {

Node currentNode = getResource().adaptTo(Node.class);
if(currentNode.hasNode("products")){
Node productsNode = currentNode.getNode("products");
NodeIterator ni = productsNode.getNodes();

String multitext;
String multinum;
String multicheck;

while (ni.hasNext()) {

MultiList multiItem = new MultiList();
Node child = (Node)ni.nextNode();

multitext= child.hasProperty("multitext") ?
child.getProperty("multitext").getString(): "";
multinum = child.hasProperty("multinum") ?
child.getProperty("multinum").getString(): "";
multicheck = child.hasProperty("multicheck") ?
child.getProperty("multicheck").getString(): "";

multiItem.setMultitext(multitext);
multiItem.setMultinum(multinum);
multiItem.setMulticheck(multicheck);
multiItems.add(multiItem);
}
}
}

public List getMultiItems() {
return multiItems;
}
}

And use below sightly code (blog.html) to render values in the html:
<div data-sly-use.blog="com.foo.community.core.MultiListComponent">
<h4>Composite Multifield</h4>
<ol data-sly-list.product="${blog.multiItems}">
<li>
${product.multitext} has ${product.multinum} with boolean
${product.multicheck}
</li>
</ol>
</div>


By aem4beginner

Composite Collapsible Multifield in AEM 6.3 Touch UI

This post discusses how to create a composite collapsible multifield touch ui dialog which uses Granite UI Coral3 multifield in AEM 6.3.

We'll be using OOTB coral multifield provided by AEM 6.3 for storing multifield values as child nodes (NODE STORE): granite/ui/components/coral/foundation/form/multifield, and we'll retrieve the authored multifield values in our sightly code by using JS Use-API (To retrieve values via WCMUsePojo API, refer this post here).

The advantage of using JS Use-API here is you can get the node of multifield values stored in pages and pass it to the sightly code in few lines of code as compared to more lines of code when using JAVA for this.

Also, you won't need to use acs-commons package or any other custom multifield here for storing composite multifield values.

To make the multi-fields collapsible we'll be using the foundation layout type inside the container as granite/ui/components/foundation/layouts/collapsible, thus we would not need to write customization code in clientlibs for this.
The touch ui dialog structure is shown below:


<?xml version="1.0" encoding="UTF-8"?>
<jcr:root xmlns:sling="http://sling.apache.org/jcr/sling/1.0"
    xmlns:cq="http://www.day.com/jcr/cq/1.0" xmlns:jcr="http://www.jcp.org/jcr/1.0"
    xmlns:nt="http://www.jcp.org/jcr/nt/1.0"
    jcr:primaryType="nt:unstructured"
    jcr:title="Blog Component"
    sling:resourceType="cq/gui/components/authoring/dialog"
    helpPath="https://www.adobe.com/go/aem6_3_docs_component_en#Image - HTL">
    <content
      jcr:primaryType="nt:unstructured"        
      sling:resourceType="granite/ui/components/foundation/container">
      <layout
         jcr:primaryType="nt:unstructured"
         sling:resourceType="granite/ui/components/foundation/layouts/tabs"
         type="nav"/>
        <items jcr:primaryType="nt:unstructured">
            <multi
                jcr:primaryType="nt:unstructured"
                jcr:title="Multi"
                sling:resourceType="granite/ui/components/foundation/section">
                <layout
                    jcr:primaryType="nt:unstructured"
       sling:resourceType="granite/ui/components/foundation/layouts/fixedcolumns"
                    margin="{Boolean}false"/>
                <items jcr:primaryType="nt:unstructured">
                    <column
                        jcr:primaryType="nt:unstructured"                       
       sling:resourceType="granite/ui/components/foundation/container">
                        <items jcr:primaryType="nt:unstructured">
                            <fieldenter
                                jcr:primaryType="nt:unstructured"
       sling:resourceType="granite/ui/components/coral/foundation/form/multifield"
                                composite="{Boolean}true"
                                fieldLabel="Composite Multifield">
                                <field
                                    jcr:primaryType="nt:unstructured"
                                    jcr:title="Click to Expand"                              
       sling:resourceType="granite/ui/components/foundation/container"
                                    fieldLabel="Products Container"
                                    name="./products">
                                    <layout
                                     jcr:primaryType="nt:unstructured"                                 
       sling:resourceType="granite/ui/components/foundation/layouts/collapsible"/>
                                    <items 
                                     jcr:primaryType="nt:unstructured">
                                        <multitext
                                            jcr:primaryType="nt:unstructured"
       sling:resourceType="granite/ui/components/foundation/form/textfield"
                                            fieldLabel="Multi Text"
                                            name="multitext"/>
                                        <multinum
                                            jcr:primaryType="nt:unstructured"
       sling:resourceType="granite/ui/components/foundation/form/numberfield"
                                            fieldLabel="Multi Num"
                                            name="multinum"/>
                                        <multicheck
                                            jcr:primaryType="nt:unstructured"               
       sling:resourceType="granite/ui/components/foundation/form/checkbox"
                                            name="multicheck"
                                            text="Multi Check"
                                            value="{Boolean}true"/>
                                    </items>
                                </field>
                            </fieldenter>
                        </items>
                    </column>
                </items>
            </multi>
        </items>
    </content>
</jcr:root>

Touch UI Dialog authoring interface is as shown below:


The multifield values stored in the page is stored as child nodes as shown below:


You can use below JS Use code (blog.js) to fetch the node and pass to sightly:


"use strict";
use(function() {
    var resourceResolver = resource.getResourceResolver();
    return {
      node : resourceResolver.getResource(currentNode.getPath() + "/products"),
    };
});

And use below sightly code (blog.html) to render values in the html:


<div data-sly-use.blog="blog.js">
    <h4>Composite Multifield Values: </h4>
    <ol data-sly-list.product="${blog.node.listChildren}">
      <li>
          ${product.multitext} has ${product.multinum} with boolean 
          ${product.multicheck}
      </li>
    </ol>
</div>


By aem4beginner
