Recently, one of our clients looked to add a custom field in the Adobe Experience Manager (AEM) Content Fragment Model Editor. If you’re wondering what AEM Content Fragments are, check out Dan Klco’s post, as he does a great job explaining.
Content Fragment Models are built with elements from various out-of-the-box data types, including single-line text, multi-line text, number, boolean (only for checkboxes), date/time, enumeration (only for static dropdown values), tags, and content reference.
Adding a Custom Field to the AEM Content Fragment Model Editor
After investigating the structure of the Content Fragment Model form builder configuration inside CRXDE, I found that we can easily add most other data types (there are some restrictions for a few datatypes). To extend and customize this form builder configuration of Content Fragment Model Editor, we need to overlay the Content Fragment form builder resource.
In our client’s case, we needed to set the requirement to add the Color Picker field in the Content Fragment Model in AEM 6.5. In this post, I’m going to show you how extended the functionality of the Content Fragment Model to set the Color Picker data type.
How to Set the Color Picker Data Type:
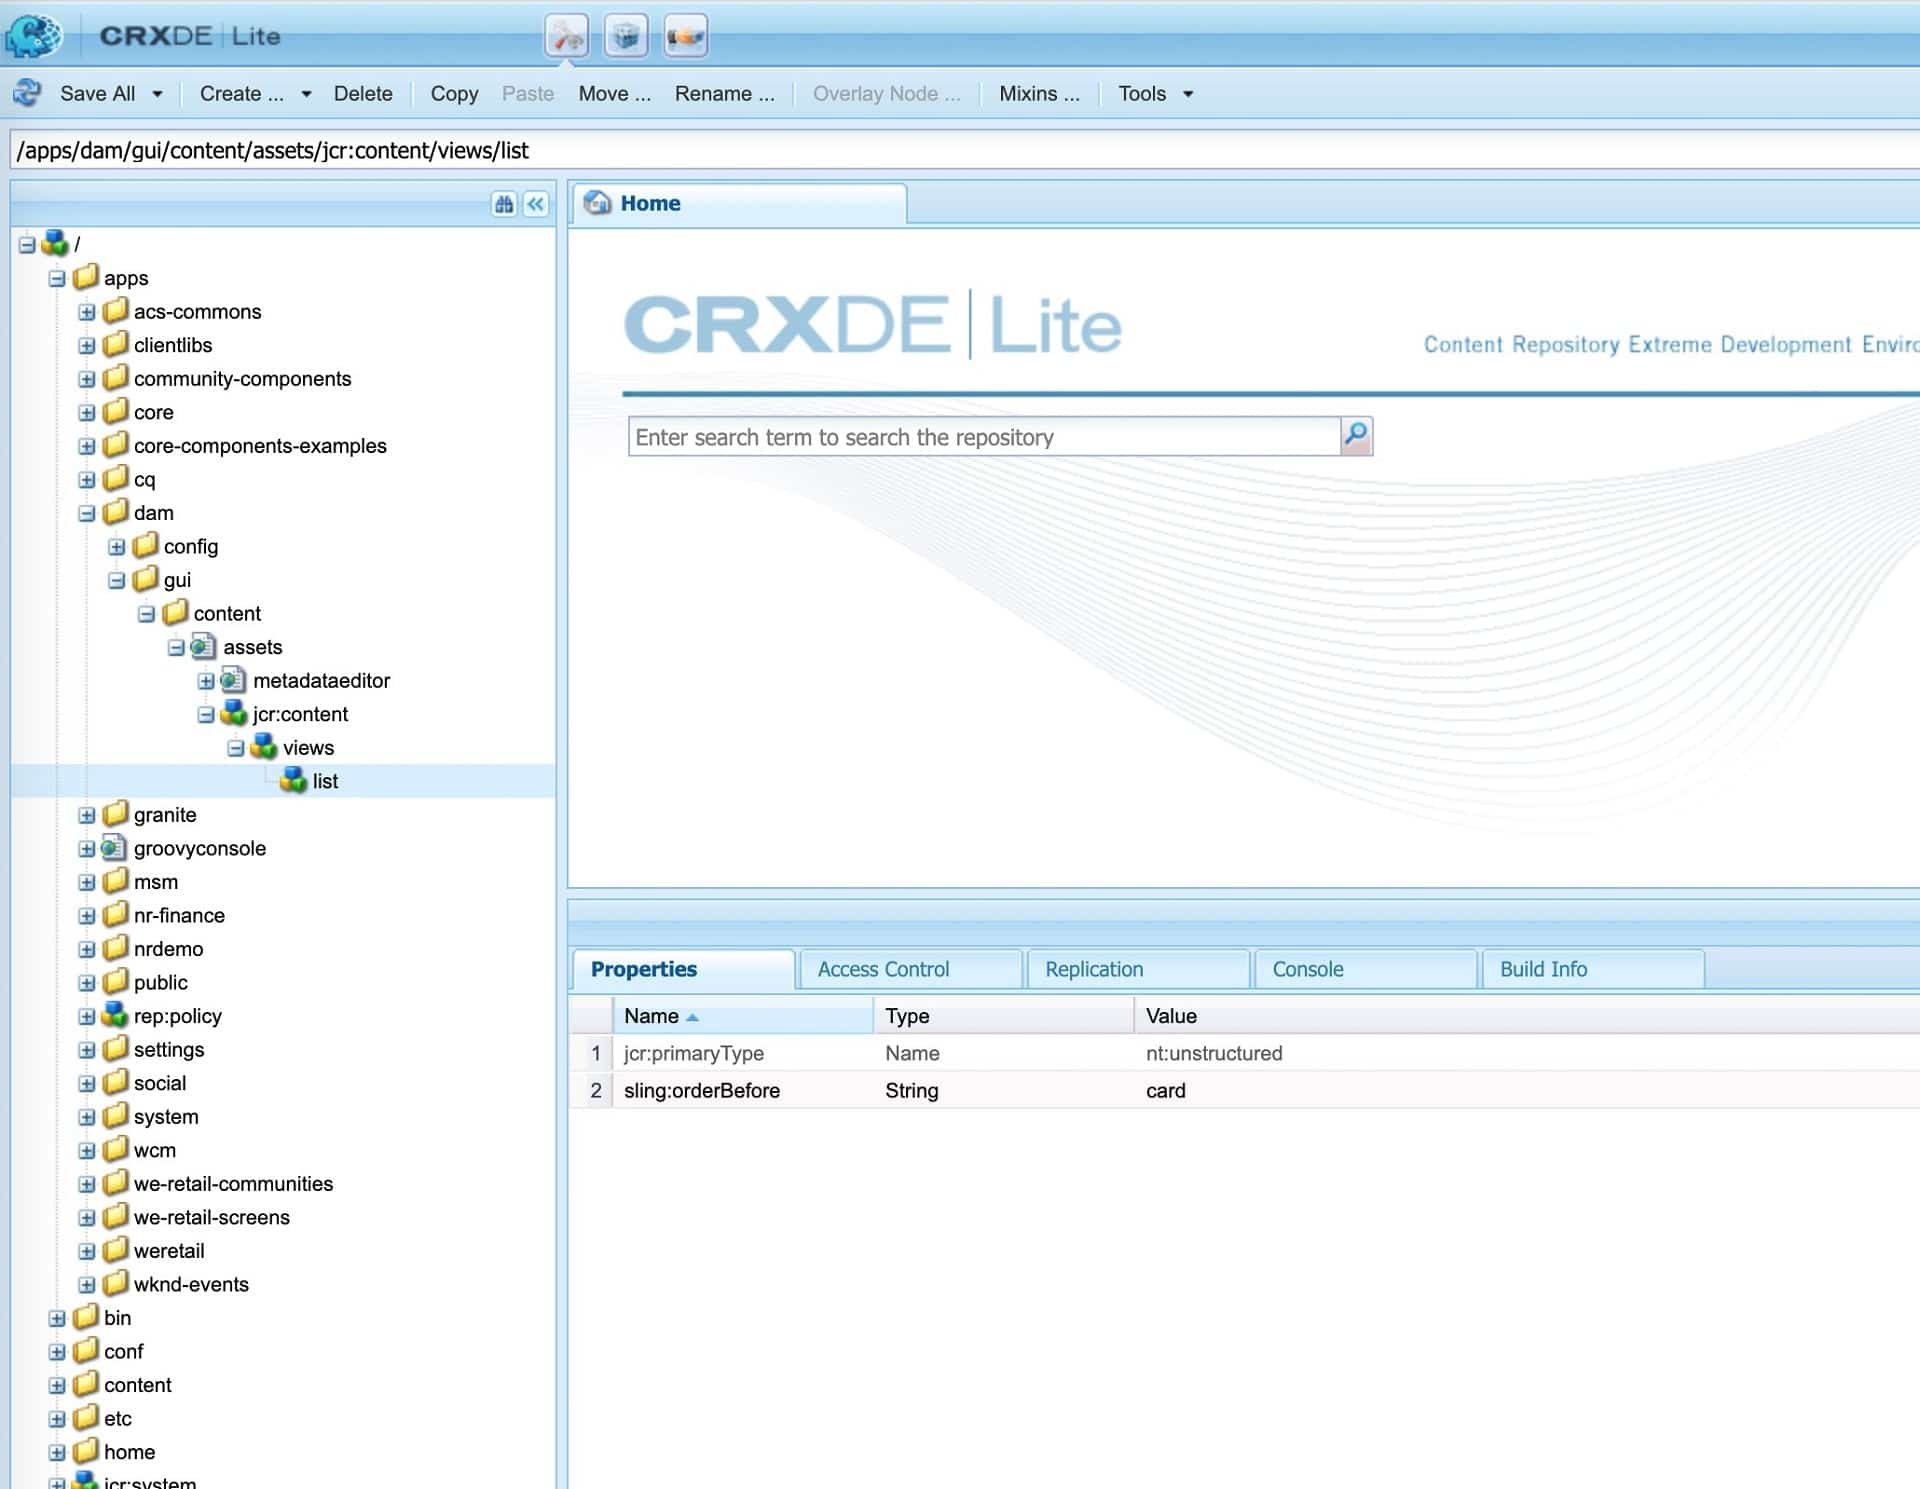
- First, open the CRXDE Lite console http://localhost:4502/crx/de/index.jsp
- Enter the following path in the search bar and hit enter. /libs/settings/dam/cfm/models/formbuilderconfig/datatypes/items
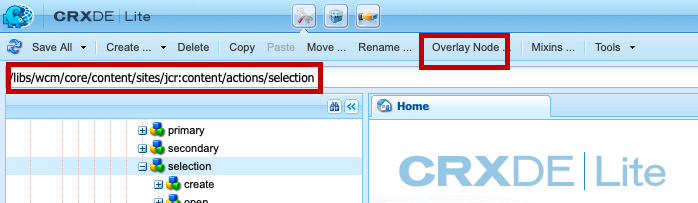
- Right-click on the items node. This will open a pop-up menu.
- Click on Overlay Node Option from the pop-up menu. This will open another model dialog. Then click on select the Match Node Types option. Make sure the model dialog contains the following values.
Path: /libs/settings/dam/cfm/models/formbuilderconfig/datatypes/items
Overlay Location: /apps/
Match Node Types: checked
After verifying the above properties and values, click “OK.” This will overlay the location of /libs/settings/dam/cfm/models/formbuilderconfig/datatypes/items path inside /apps/ folder.
5. Now go to /apps/settings/dam/cfm/models/formbuilderconfig/datatypes/items.
6. Create one child node inside the items node with the name color-picker.
7. Set the following properties on /apps/settings/dam/cfm/models/formbuilderconfig/datatypes/items/color-picker node.
fieldIcon (String)=”colorPalette”
fieldProperties (String [])=”[labelfield,maptopropertyfield,placeholderfield,textvaluefield,requiredfield]”
fieldPropResourceType (String)=”dam/cfm/models/editor/components/datatypes/field”
fieldResourceType (String [])=”[granite/ui/components/coral/foundation/form/colorfield]”
fieldTitle (String)=”Color Picker”
listOrder (String)=”9″
renderType (String)=”text”
valueType (String [])=”[string]”
8. Color-picker Node xml should look like as follows
<?xml version="1.0" encoding="UTF-8"?>
<jcr:root xmlns:jcr="http://www.jcp.org/jcr/1.0" xmlns:nt="http://www.jcp.org/jcr/nt/1.0"
jcr:primaryType="nt:unstructured">
<items jcr:primaryType="nt:unstructured">
<color-picker
jcr:primaryType="nt:unstructured"
fieldIcon="colorPalette"
fieldProperties="[labelfield,maptopropertyfield,placeholderfield,textvaluefield,requiredfield]"
fieldPropResourceType="dam/cfm/models/editor/components/datatypes/field"
fieldResourceType="[granite/ui/components/coral/foundation/form/colorfield]"
fieldTitle="Color Picker"
listOrder="9"
renderType="text"
valueType="[string]"/>
</items>
</jcr:root>

Now you are successfully done with the node overlay and AEM customization process.
9. In order to see the changes, we need to create a configuration for the Content Fragment Model. Go to AEM Start Menu > Tools > General > Configuration Browser and create a configuration for the Content Fragment Model. You can also use the OOTB global configuration if you don’t want to create a custom configuration (it depends upon your requirement). Here I am using AEM OOTB configuration with the name “Global.”
10. Once you are done with the configuration steps, go to AEM Start Menu > Tools > Assets > Content Fragment Model > Global (or go to your custom configuration).
Then create a new custom Content Fragment Model (In this case, I have created a model with the name “Color Picker CFM“) and click on open. Now, take a look at Data Types inside the sidebar. There you will see a new Data type is appearing with the name “Color Picker.“
11. To create your custom Content Fragment Model, drag and drop color picker data type in editor block, and set some properties on the color picker field. I set the following properties.
Field Label: Set Color
Property Name: color
Once you are done with this click on Save Button.
12. Now go to AEM Start Menu > Navigations > Assets > <any Folder> and Create a Content Fragment using Color Picker CFM model. Once it is created, click on the Open button. You will notice the Content Fragment has the color picker field with the label “Set Color.” Now you can select any predefined color from the color palette, or you can create your own color using a color mixer.

You can use these same steps to extend the functionality of the Content Fragment Model whenever you get such a requirement for other data types as well!
Download this package for reference, and don’t forget to drop a comment if you need more help on this.
Source: