We will learn personalization with contexthub step by step.
I am going to explain everything on AEM 6.4 here.
In the personalization section of AEM, we can see three options:
- Activities
- Offers
- Audiences
Here we will discuss audiences first but before that we will talk about contexthub stores. So how AEM personalize content using the information of users visiting the websites.AEM store information of user in the browser somewhere on the basis of which personalization can happen.
Where are these contexthub stores exist in browser?
AEM stores the user information in the ContextHubPersistance Object in the local storage.All the OOTB stores like geolocation,recently viewed etc can be seen under ContextHubPersistance object.
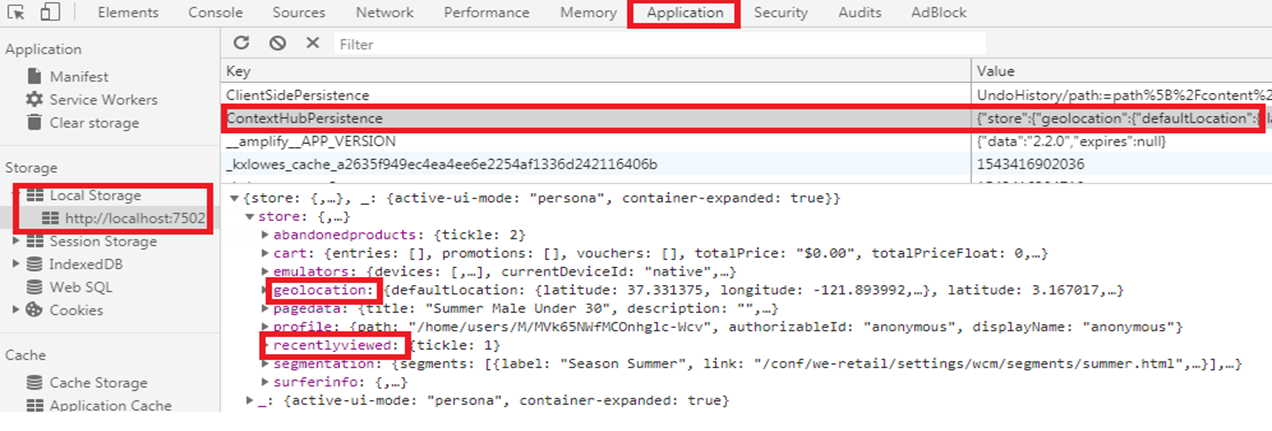
ContextHub Store Available in Browser
So now we have place where the user information is getting stored. Now the next step is we need to create audiences for personalization.
Audiences in Personalization
Audiences means some conditions on the basis of which you want to personalize the content. Right now in audiences, there are only two folders global,we-retail.Now I want to add a new project to create new audience(segments).
Go to: Adobe Experience Manager->General->Configuration Browser or go here
Follow the steps to create a demo-project.
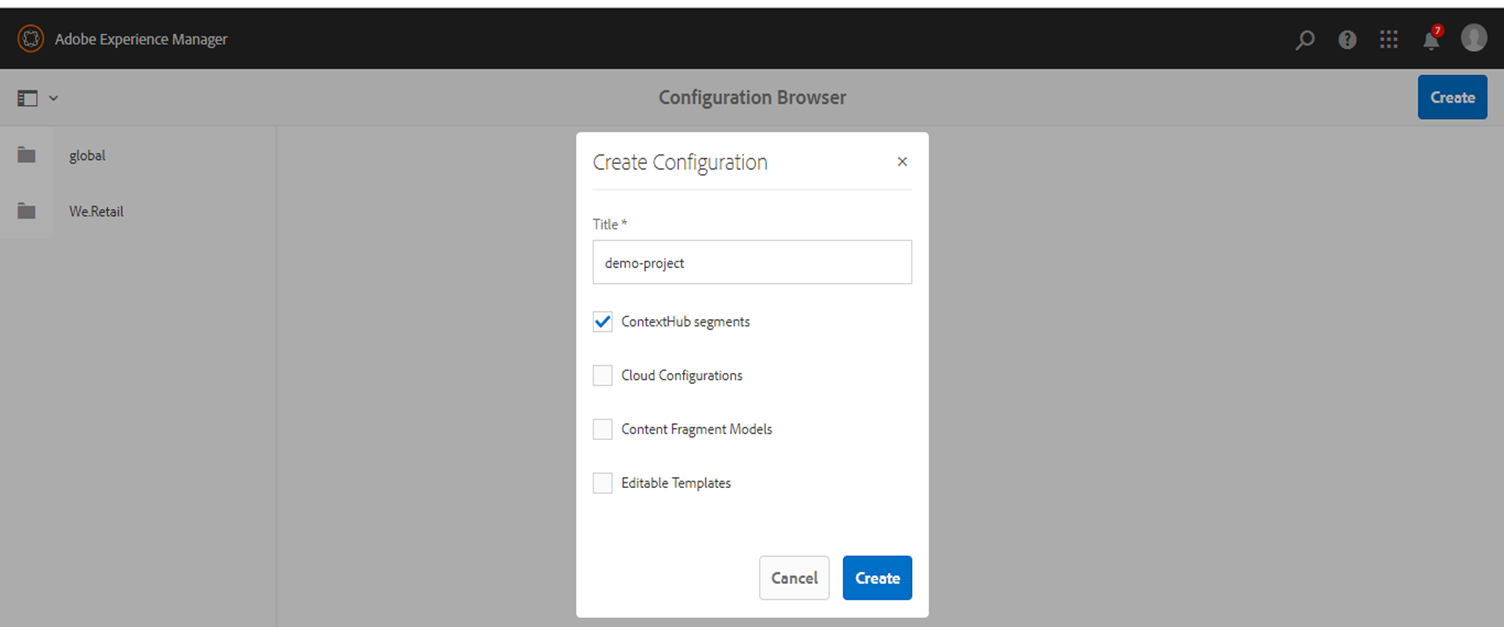
Create a project using Configuration Browser
Note: Please create a new project using lower-case with no space(using hyphen) and go to the hierarchy and change the title.,because if you give space it will create the name of the project with some extra characters .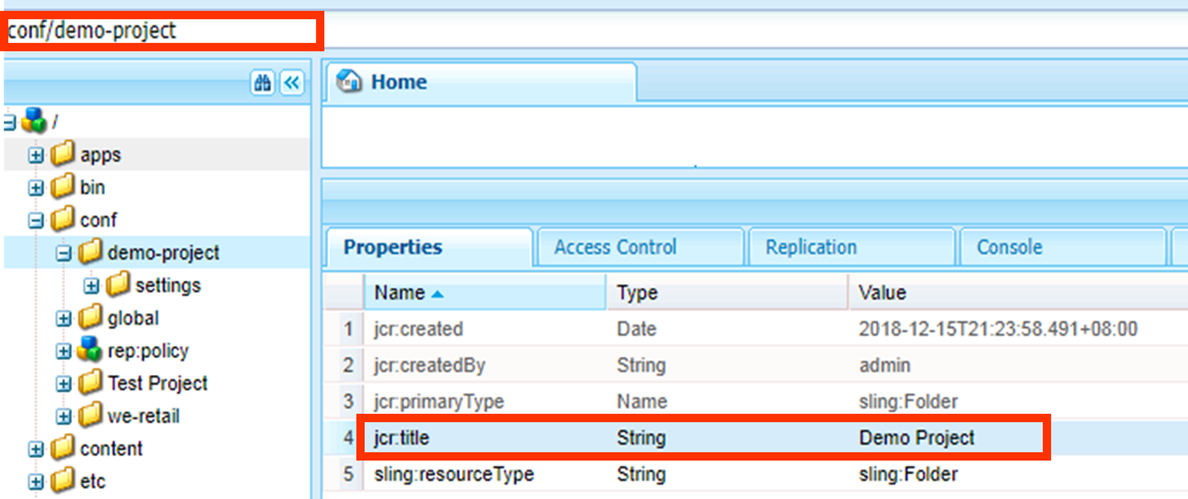
Where are these contexthub stores exist in browser?
AEM stores the user information in the ContextHubPersistance Object in the local storage.All the OOTB stores like geolocation,recently viewed etc can be seen under ContextHubPersistance object.
ContextHub Store Available in Browser
So now we have place where the user information is getting stored. Now the next step is we need to create audiences for personalization.
Audiences in Personalization
Audiences means some conditions on the basis of which you want to personalize the content. Right now in audiences, there are only two folders global,we-retail.Now I want to add a new project to create new audience(segments).
Go to: Adobe Experience Manager->General->Configuration Browser or go here
Follow the steps to create a demo-project.
Create a project using Configuration Browser
Note: Please create a new project using lower-case with no space(using hyphen) and go to the hierarchy and change the title.,because if you give space it will create the name of the project with some extra characters .
Use Case: Let’s go through the use case first. I want to personalize content on the basis of browsers like Google Chrome, Mozilla etc. So to detect which browser it is, we have a OOTB store called "surferinfo". If you see the browser Family of Google Chrome, it is “Chrome” and for Mozilla Firefox it is Firefox. So let’s create the audiences basis of these two conditions.
Steps to create the audience:
Steps to create the audience:
- Go to personalization console and open audiences, you will be able to see a new project named Demo Project or directly click here. Let's make two segments regarding Chrome and Mozilla Firefox browsers.
Note: Below image is showing the browser family for both browsers on basis of which we are creating audiences.

Values of SurferInfo Store in Chrome and Firefox Browsers
Property Name: It is the hierarchy where the property exist in ContextHub Persistence Store.
Operator: It is the condition which you wanna put. It has many options like equal, greater-than,greater-than-or-equal,less-than etc.
Data Type: Here you can select data type of your value on which you are comparing. If you don't want to put data type just put as auto-detect.
Value: This is the value of the property on which you want to put some condition.

Values of SurferInfo Store in Chrome and Firefox Browsers
- Click on Create
- Create ContextHub Segment.
- Add a Title “Any Title(e.g.Chrome Users)“ and Boost value.
- Now click on segment.Open the newly created segment.
- There are so many components in the group ContextHub Segmentation.We will discuss about all the components a bit later. First add a component named Comparison:Property-Value.
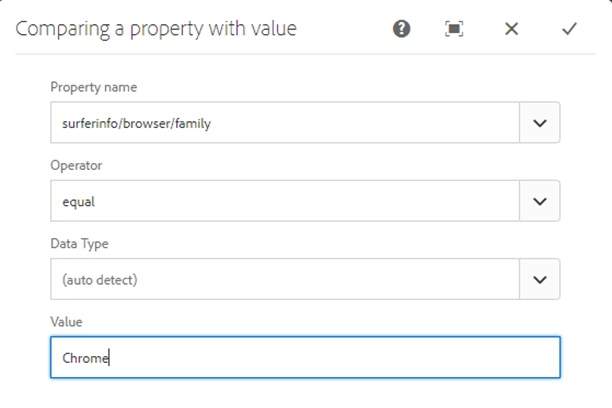
- Add the values as shown in figure below

Condition in Contexthub Segment
Property Name: It is the hierarchy where the property exist in ContextHub Persistence Store.
Operator: It is the condition which you wanna put. It has many options like equal, greater-than,greater-than-or-equal,less-than etc.
Data Type: Here you can select data type of your value on which you are comparing. If you don't want to put data type just put as auto-detect.
Value: This is the value of the property on which you want to put some condition.
- Click OK. If the condition is true the background of component will turn green
Note: It is very important to note here that sometimes background doesn’t get green even if the condition is true. I have gone through this issue. So What to do now.
- First, you can refresh the page and then check if it turned into green
- Second, if still the background is not green there is a technical way to check it. If in the segmentation store, you are able to see any segments that means that segment is getting resolved. In other words, only those segments will be visible in segmentation stores which are resolving for that page.

In the same way create another segment for Mozilla FireFox Browser.
This is how, our audience is ready, Now the next step is creating activities.
Activities: Activities are collecting a same kind of audience(segments) in a brand.
- Go to activities and create a brand
- Add a Title for Brand.
- Click on Create.
 2. Under Brand Create an Activity.
- Add a Title for Activity.
- Click on Create.

A configuration Activity screen will be visible and need to click on Next.

- In the Configure Activity Wizard Screen shown below, “Add Experiences” and “Choose Audience” (segments) related to the activity and give a name to fragments and click on next.

- In the next screen, you can specify the priority of the activity and date-time of start of personalize content which will start showing on a website and end date-time also.

All the prerequisites for personalization is done now it’s time to personalize the page.
To enable personalization on a website, We need to add this line in page component.
<sly data-sly-resource = "${'contexthub' @ resourceType='granite/contexthub/components/contexthub'}"/>
To enable particular segments on a page, you need to go to page properties and add segments path.You can also enable a particular brand from the Brand Configuration.

Page Properties Dialog of the page
Personalize content on a page
Now Go to a page, and click on Targeting mode and select the Brand and Activity been configured in the previous steps and click on Start Targeting.

Choosing Brand and Activity on a page
Now you can see all the audiences configured for that activity. If you want to add more audiences in the particular activity, click on “Add Experience Targeting”.

Different Segments associated with selected activity
Select a component which you want to target and click on target icon It will pop up a message that component is now targeted. Now click on different audience from the right rail,choose the audience and edit the content for that particular audience,after you are done click on next and save.Now you can see the personalize content on the view as published on author instance or publish instance..

Target Icon in a component
Trade Off of Personalization in AEM using ContextHub
The trade off of personalization using contexthub is that there is a lag in loading personalized content on a page.It first load default content on a page and then after some ms it loads personalized content.You can refer demo video to understand this issue more clearly.
When the page gets load it runs contexthub library, resolves the segments and then show personalize,it takes time and that’s the reason this lag is justified. But from the end user perspective, it spoils the user experience also.
Myths of Personalization in AEM using ContextHub
- Using Personalization only content of the component can be changed not the components itself. For instance, you can’t show “Image Component” for audience 1 and “Text Component” for audience 2
- You can’t delete one component for audience 2 which was present for audience 1.

No comments:
Post a Comment
If you have any doubts or questions, please let us know.