They help to publish the content. Replication agents are mapped to publication. So when we need more than one publish environment, we need replication agents for each one.
Access replication agents through Tools>Replication
Publish flow:
Once the site is developed it should be activated by going website> activate
It sends alert to the replication agent, the request will be put in a queue will be formed for it.
We can restrict continuous attempts to publish through Agents>Setting>Extended> connect time out.
Settings
On modification - helps to publish a page immediately after modification
Activating (publishing) more pages together in AEM/Adobe cq
Access replication tree using below url.
http://localhost:4505/etc/replication/treeactivation.html
Now activate more pages by selecting pages or an entire directory.
How to publish a Component immediately after creation or modification?
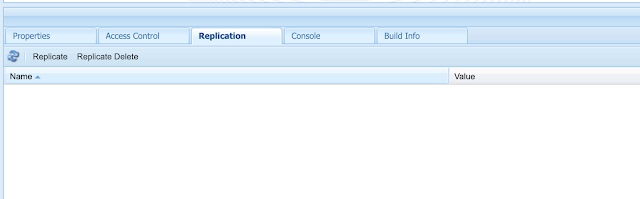
Push component to publish through Crxde lite by selecting component, then go to the replication tab, click on replicate. This will send the component immediately to publish.
We have a manual way of publishing through build bundle-> install to publish the environment. An easier solution to publish content is, we can use direct replicate for the package. For this ensure you configured replication agents.
Digital Asset Manager (DAM):
Thumbnails are created automatically in the DAM because it is defined default by Adobe in the workflow:
http://localhost:4505/cf#/etc/workflow/models/dam/update_asset.html : step> Thumbnail creation
Use sidekick > DAM workflow to create dam related workflows.
All items we uploaded can be seen in CRXDE through http://localhost:4505/crx/de/index.jsp#/content/dam
References section gives the list of all references from pages for an image. Double click on the image and see the right top (renditions, versions, references)
Securities: Change admin or author passwords:
http://localhost:4505/crx/explorer/index.jsp > 'Content explorer' opens below url
http://localhost:4505/crx/explorer/browser/index.jsp
Now Security > change password.
http://localhost:4505/crx/explorer/index.jsp > 'User Administration' opens below url
http://localhost:4505/crx/explorer/ui/usereditor.jsp?ck=1402297401235&Path=/home/users
Select a>admin>change password
Create or delete users can be done through http://localhost:4505/useradmin.
All users’ preferences can be done through the above url.
OSGi component Vs CQ component:
OSGI-Backend part- business component;
CQ-front end part
OSGi bundle can have many OSGi components and each component can have many services.
Debug mode:
In start.bat > CQ_JVM_OPTS parameters : add>
-agentlib:jdwp=transport=dt_socket,server=y,address=30303.suspend=n
Read More:
http://helpx.adobe.com/experience-manager/kb/CQ5HowToSetupRemoteDebuggingWithEclipse.html
On modification - helps to publish a page immediately after modification
Activating (publishing) more pages together in AEM/Adobe cq
Access replication tree using below url.
http://localhost:4505/etc/replication/treeactivation.html
Now activate more pages by selecting pages or an entire directory.
How to publish a Component immediately after creation or modification?
Push component to publish through Crxde lite by selecting component, then go to the replication tab, click on replicate. This will send the component immediately to publish.
We have a manual way of publishing through build bundle-> install to publish the environment. An easier solution to publish content is, we can use direct replicate for the package. For this ensure you configured replication agents.
Digital Asset Manager (DAM):
Thumbnails are created automatically in the DAM because it is defined default by Adobe in the workflow:
http://localhost:4505/cf#/etc/workflow/models/dam/update_asset.html : step> Thumbnail creation
Use sidekick > DAM workflow to create dam related workflows.
All items we uploaded can be seen in CRXDE through http://localhost:4505/crx/de/index.jsp#/content/dam
References section gives the list of all references from pages for an image. Double click on the image and see the right top (renditions, versions, references)
Securities: Change admin or author passwords:
http://localhost:4505/crx/explorer/index.jsp > 'Content explorer' opens below url
http://localhost:4505/crx/explorer/browser/index.jsp
Now Security > change password.
http://localhost:4505/crx/explorer/index.jsp > 'User Administration' opens below url
http://localhost:4505/crx/explorer/ui/usereditor.jsp?ck=1402297401235&Path=/home/users
Select a>admin>change password
Create or delete users can be done through http://localhost:4505/useradmin.
All users’ preferences can be done through the above url.
OSGi component Vs CQ component:
OSGI-Backend part- business component;
CQ-front end part
OSGi bundle can have many OSGi components and each component can have many services.
Debug mode:
In start.bat > CQ_JVM_OPTS parameters : add>
-agentlib:jdwp=transport=dt_socket,server=y,address=30303.suspend=n
Read More:
http://helpx.adobe.com/experience-manager/kb/CQ5HowToSetupRemoteDebuggingWithEclipse.html

No comments:
Post a Comment
If you have any doubts or questions, please let us know.