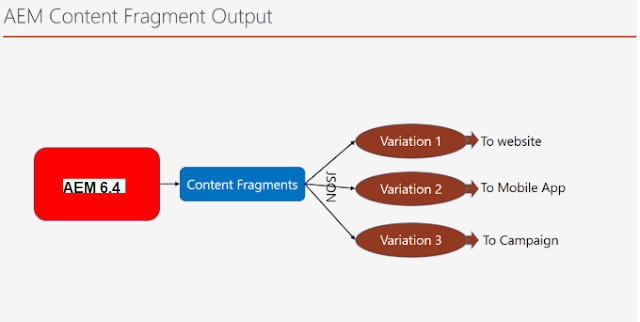
Generally AEM provides default content fragments template called 'Simple Fragment' [at location: /libs/settings/dam/cfm/templates]. But we may need to customize or create new templates based on our needs.
Here I will explain how we can create custom content fragment templates.
Where to create custom content fragment templates?
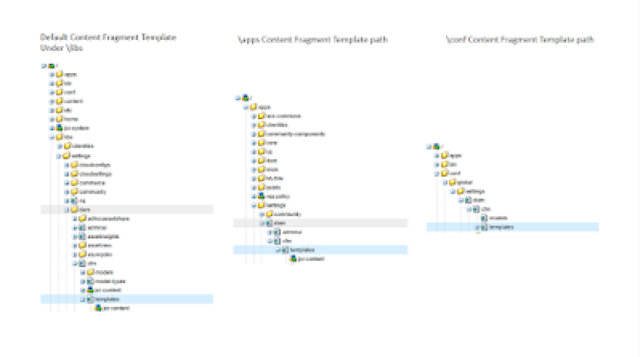
There are multiple places we can create custom content fragment templates.
· Config: When we work with folder specific templates, use this location.
· Apps: Usually general-purpose templates are created here.
Let us create a template under /apps for general purpose use.
Steps
· Traverse to /apps/settings/dam inside CRXDE lite.
· Create a node of type cq:Page and name it 'cfm'
· Under the newly created cfm node, create another node of type cq:Page and name it 'templates'.
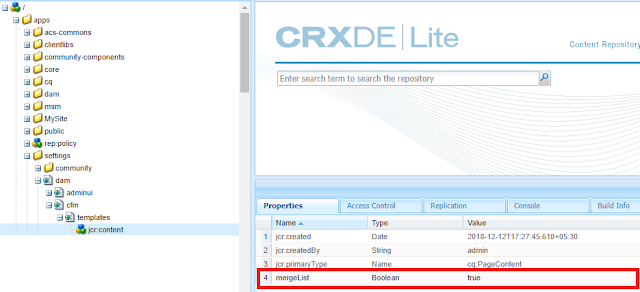
· Under templates node create a node of type cq:PageContent and name it 'jcr:content'.
· Under jcr:content create a new boolean property called 'mergeList' with value 'true', this step ensures our new template is available in addition to /lib content fragment templates for authoring.
· Now do 'Save All'.
Our crx looks like this now
We have the structure ready now, we will add properties for the template now by referring the /lib/ 'Simple Fragment' template.
· Traverse to /libs/settings/dam/cfm/templates and copy 'simple' node.
· Paste it on our structure under /apps/settings/dam/cfm/templates.
· Now do a 'Save All'.
We now have below structure in crx.
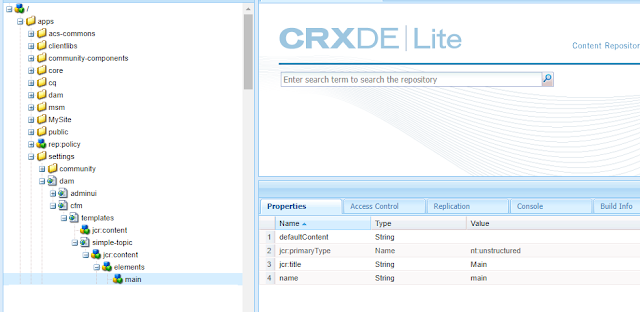
We have a template similar to 'Simple Fragment' now. Let us customize the template for our needs.
We will create a title, description as elements and 2 variations for desktop and mobile.
Let us start by renaming 'simple' node to 'custom'
· Select “jcr:content” under 'custom', Update the value of 'jcr:description' to 'A custom project-specific fragment'.
· Update value of 'jcr: title' to 'Custom Fragment'
· Now rename 'main' under elements to 'title', update its 'jcr:title' to 'Title' and name to 'title'
· Next create a new element – description by copying the main and renaming. Update the 'jcr:title' to 'Description' and name to 'description'.
· Now select node 'jcr:content' under node 'custom' and create a new node of type 'nt:unstructured' and name it 'variations'.
· Create a new node for 'desktop' of type nt:unstructured under variations; add properties 'jcr:title' 'Desktop' and name 'desktop'.
· Create a new node for 'mobile' of type nt:unstructured under variations; add properties 'jcr: title' 'Mobile' and name 'mobile'.
· Now click on 'Save All'.
A new custom template is created now, which is ready for authoring.
Authoring Custom Content Fragment
Now go to AEM Assets >Files, click on 'Create' from top right-hand corner and select 'Content Fragment'.
Here you can see the 'Custom Fragment'
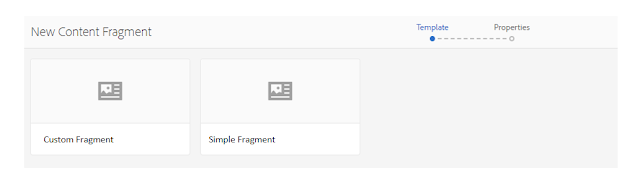
Select the 'Custom Fragment' and click 'next'.
Enter the values for title, description and click 'Create' then click on 'Open'.
Here you can see that a new Content Fragment is available with 'title', 'description'.
Similarly, we can see that variations for 'desktop' and mobile also available for authoring.

No comments:
Post a Comment
If you have any doubts or questions, please let us know.