| SL no | Instance type | Port | URL | OS type |
| 1 | Master server | 4502 | http://localhost:4502/ | Windows |
| 2 | Slave server | 8080 | http://localhost:8080/ | windows |
Step1:
- Go to the Master server topology: http://localhost:4502/system/console/topology
- You can see the unique sling id b6e06f32-20a1-4fa0-869d-7a798282fded with instance and 1 cluster before adding the Slave topology
- Go to the Salve server topology: http://localhost:8080/system/console/topology
- You can see the unique sling id bcd5477c-f9ac-4a99-99c9-e6ed1169caaf with instance and 1 cluster before adding to the Master server topology

Step3: Add the Master connector URL to Slave server topology
- Go to the slave server path: http://localhost:8080:/system/console/configmgr
- Search for Apache sling Oak-based discovery service configuration and open it for edit
- Under the Topology Connector URLs field to enter the Master server connector URL http://localhost:4502/libs/sling/topology/connector
- o Topology Connector URLs=http://localhost:4502/libs/sling/topology/connector
- Save


Step4: Add the Slave server hostname and IP address in the Master server for Apache sling Oak-based discovery service under whitelist
- Go to the path Master server: http://localhost:4502:/system/console/configmgr
- Search for Apache sling Oak-based discovery service configuration and open it for edit
- Enter the hostname and IP address of Slave server
- o Topology Connector Whitelist = localhost,127.0.0.1(in case of localhost)
- Save the changes

Step5: Verify the topology after the adding the Slave server details
- Go to Master server path http://localhost:4502/system/console/topology
- Observe the Both sling IDs – one for master(b6e06f32-20a1-4fa0-869d-7a798282fded ) and one for Slave(bcd5477c-f9ac-4a99-99c9-e6ed1169caaf)
- Shows 2 cluster , 2 instances

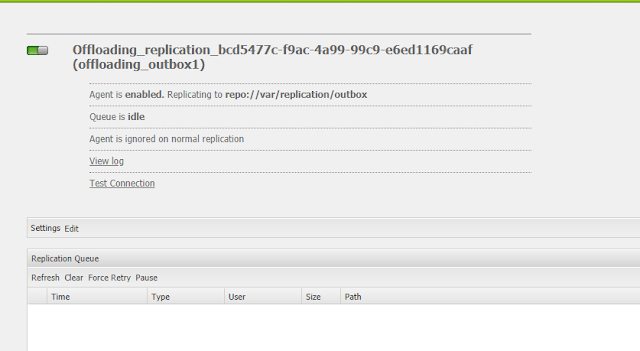
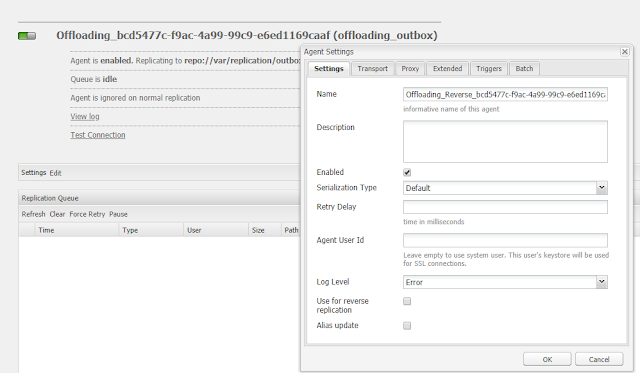
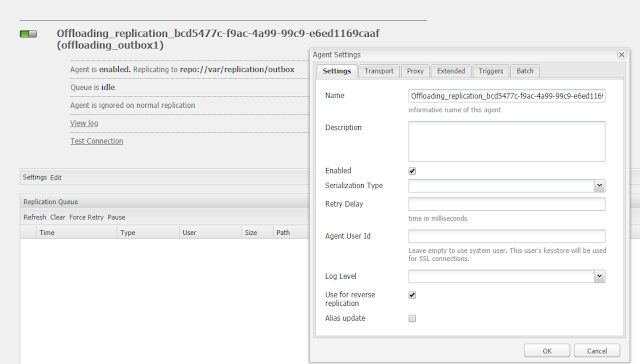
Step6: Configure two offloading replication agents on the master author
Step7: Disable the consumer on Master because it is active on the instance disable the processing upload asset in master and enable for Slave only follow the below steps.


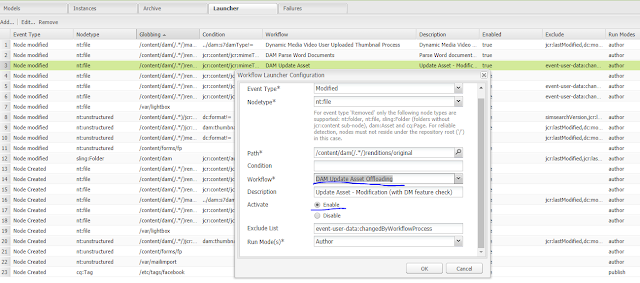
Step8: Change the workflow on the Master server from DAM Update Asset Workflow Launchers to DAM Update Asset Offloading workflow


Step 9: disable the DAM Update Asset Workflow on Slave because assets are not uploaded to Slave server but assets are offloaded from Master to Slave server for processing and replicate back to the Master
Step 10: Upload asset to Master Server
- Go to master server: http://localhost:4502/etc/replication/agents.author.html
- Agents on the author and look for the offloading replication agents and make a copy of the same agent twice to configure below agents
- Agent1- Offloading replication agent – under transport specifies the Slave hostname and port for the replication
- Agent2 – Offloading reverse replication agents: default config with and enable the reverse replication


Step7: Disable the consumer on Master because it is active on the instance disable the processing upload asset in master and enable for Slave only follow the below steps.
- Go to the Granite offloading console http://localhost:4502/libs/granite/offloading/content/view.html
- Search for workflow/offload topic
- You can observe this topic is enabled for master and Salve
- To disable the workflow/offload topic on master and that’s it.


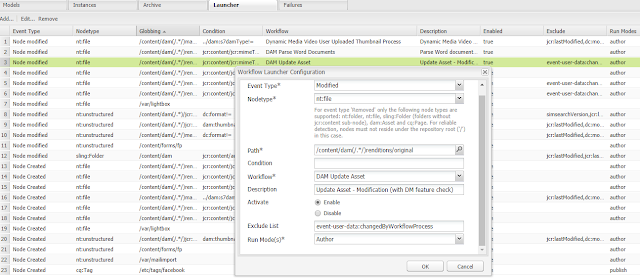
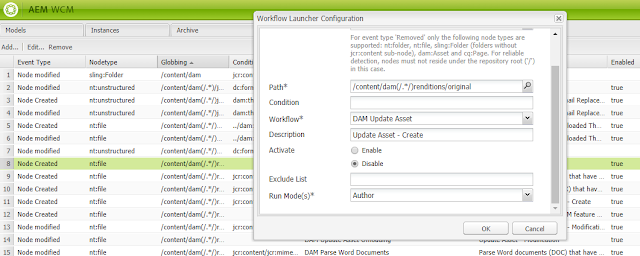
Step8: Change the workflow on the Master server from DAM Update Asset Workflow Launchers to DAM Update Asset Offloading workflow
- Go to this path of master - http://localhost:4502/libs/cq/workflow/content/console.html
- Go to the launcher console
- Identify the DAM Update Asset Workflow node àright click to edit àselect the DAM Update Asset Offloading workflow under the workflow field.
- That’s it, Observe the name of the workflow now changes.


Step 9: disable the DAM Update Asset Workflow on Slave because assets are not uploaded to Slave server but assets are offloaded from Master to Slave server for processing and replicate back to the Master
- Go to this path of master - http://localhost:8080/libs/cq/workflow/content/console.html
- Go to the launcher console
- Identify the DAM Update Asset Workflow node àright click to edit àselect the Disable under the Activate field.
- That’s it.


Step 10: Upload asset to Master Server
- Go to Master Server path:http://localhost:4502/assets.html
- Upload any images to the master server dam console
- Open the offloading replication agents on the master to verify the uploaded assets are updated on the Salve server
- It shows uploaded assets are sent to the Slave server.
- It improves the performance of the author instance.
- Because asset upload and renditions are getting created on the Slave server and through reverse replication mechanism assets with renditions are replicated back to the master server.
- But for the end-user, it always gives a feeling of they are uploading an asset to Master server.
- Master is configured with Dam update asset offloading workflow.
No comments:
Post a Comment
If you have any doubts or questions, please let us know.