AEM Configuration:
Install JDK 8
Install AEM 6.3 server
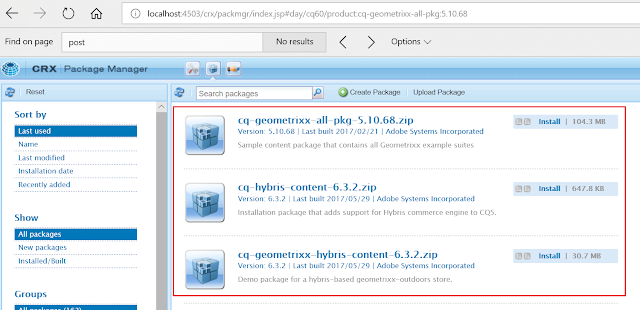
Install cq-geometrixx-all-pkg-5.10.68.zip, cq-geometrixx-hybris-content-6.3.2.zip and cq-hybris-content-6.3.2.zip packages from package share (I am considering geo-metrixx for a demo, we.retail should be the recommended one in AEM 6.3)
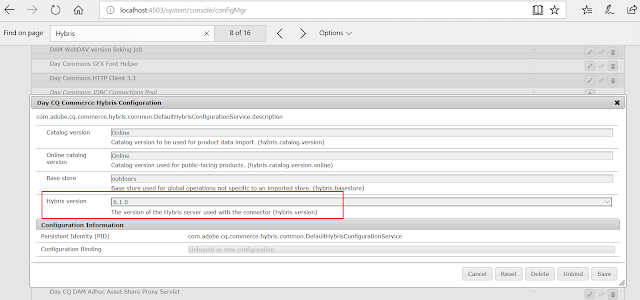
Change the Hybris server version in "Day CQ Commerce Hybris Configuration", ignore to a default value if the specified version is not listed.
Change the Hybris OAuth endpoint in "Hybris OAuth Handler" based on the Hybris version, /authorizationserver/oauth/token for Hybris 6 and later, and /rest/oauth/token for earlier Hybris versions - This step can be ignored for AEM 6.3 as the connectors default the values based on the Hybris version selected in the previous step.

If the OAuth URL is not configured with the correct value then the below exception will be displayed in the error log
com.adobe.cq.commerce.hybris.impl.OAuthHandler Server did not respond with 2xx -> authentication failed.
Hybris configuration:
Install JDK 8(based on the Hybris version, later Hybris 6 versions required JDK 8)
Extract the installer
Execute the below command
cd <hybris-root-directory>/installer
install -r b2c_acc
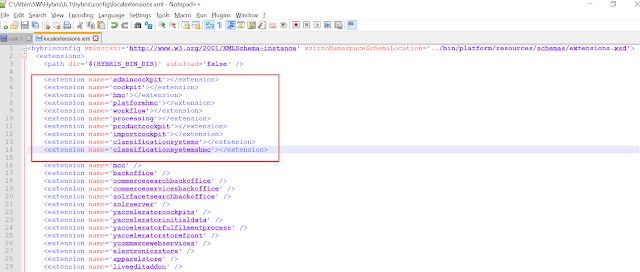
Add the below extensions into HYBRIS_HOME/config/localextentions.xml- the hmc is deprecated in later 6 versions so can be ignored
<extension name='admincockpit'></extension>
<extension name='cockpit'></extension>
<extension name='hmc'></extension>
<extension name='platformhmc'></extension>
<extension name='workflow'></extension>
<extension name='processing'></extension>
<extension name='productcockpit'></extension>
<extension name='importcockpit'></extension>
<extension name='classificationsystems'></extension>
<extension name='classificationsystemshmc'></extension>
Download setup.groovy and place it under Hybris root - Refer https://helpx.adobe.com/experience-manager/6-3/sites/deploying/using/hybris.html to get the file based on the Hybris version.
Change the spring-security path in setup.groovy to "bin/ext-template/ycommercewebservices/web/webroot/WEB-INF/config/common/security-spring.xml" - this step is required only for later 6 Hybris versions
Execute the below commands - the groovy should be installed in the system before executing the below commands
cd ..
groovy setup.groovy
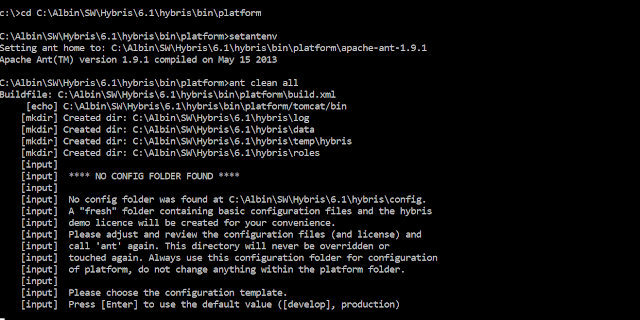
cd bin/platform
setantenv
ant clean all - Select the default configuration template(development)
hybrisserver (starting the server)
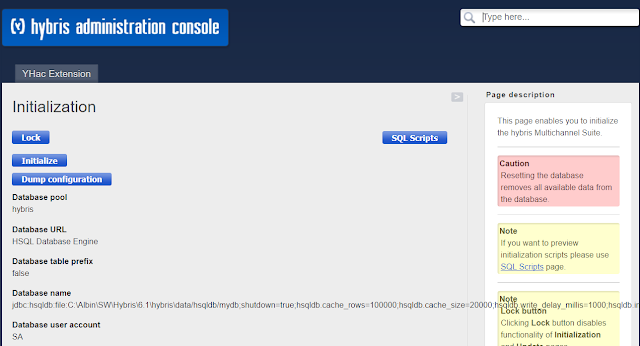
The above step will take some time, after completion Login to https://localhost:9002 and click on initialize and wait for initialize to complete
Download geometrixx-outdoors-export.csv, geometrixx-outdoors-images.zip and base-store.csv(based on the Hybris version) from https://helpx.adobe.com/experience-manager/6-3/sites/deploying/using/hybris.html
Import geometrixx-outdoors-export.csv and geometrixx-outdoors-images.zip:
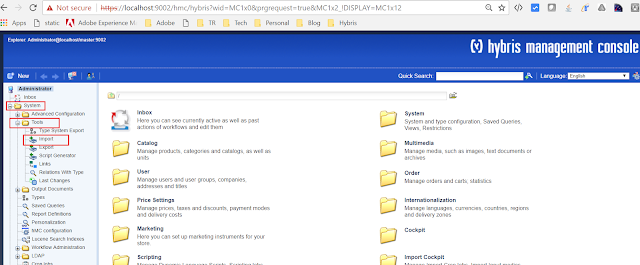
Login to https://localhost:9002/hmc/hybris and navigate to System==>Tools==>Import
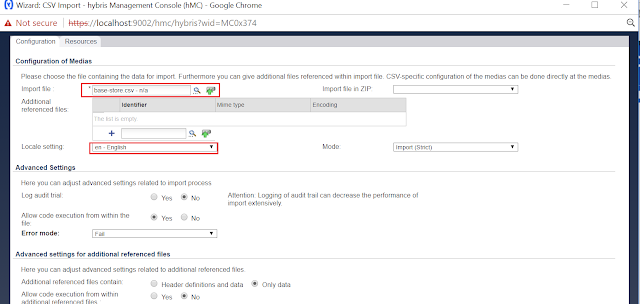
Select import file geometrixx-outdoors-export in the Configuration tab
Select the Locale Setting as en_English
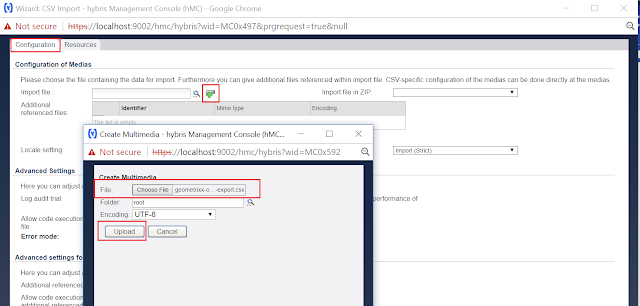
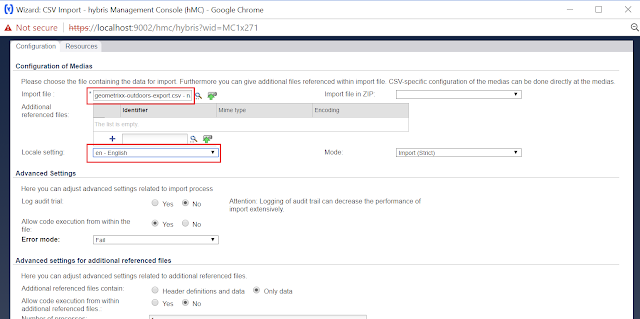
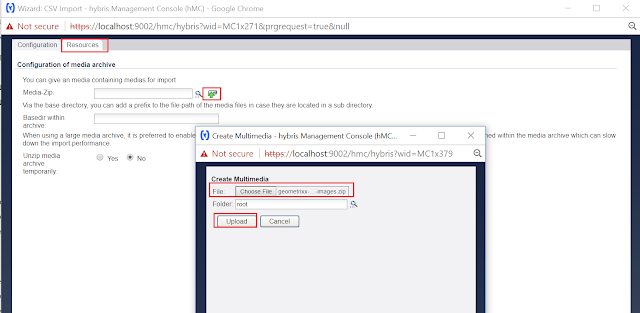
Select geometrixx-outdoors-images in the Resources tab
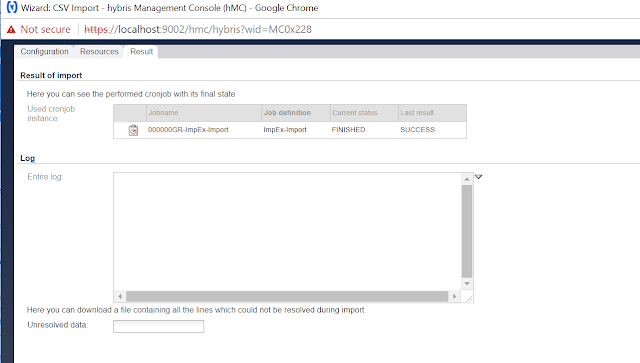
Click on Start - wait for the completion of the import job
Import base-store.csv:
Follow the above steps and import base-store.csv
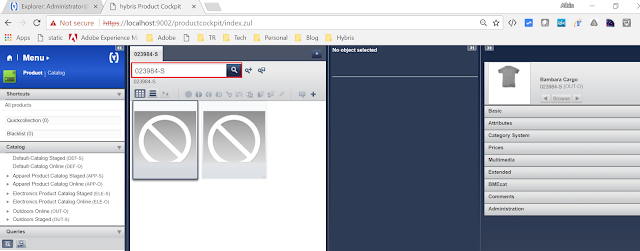
Verify the product - Login to https://localhost:9002/productcockpit and make sure the sample products are imported without any issue
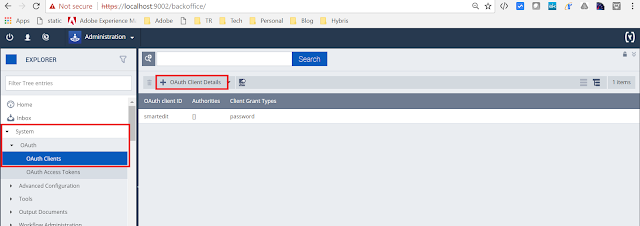
Define OAuth Clients in Hybris:
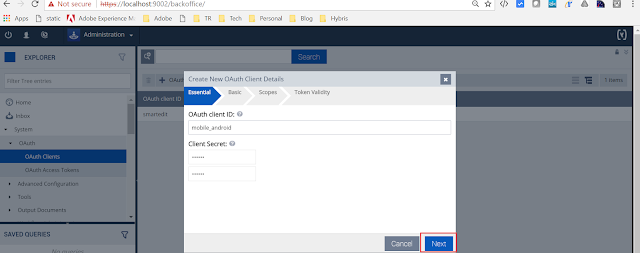
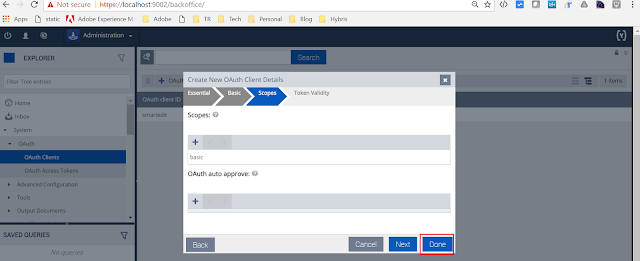
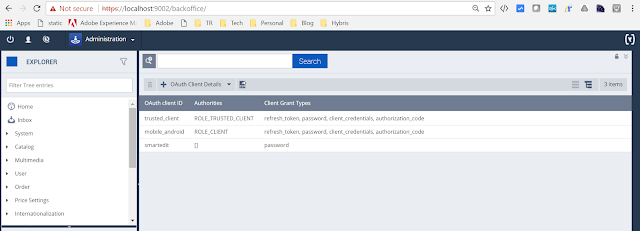
Login to https://localhost:9002/backoffice and navigate to System==>OAuth==> OAuth Clients and define mobile_android and trusted_client with the following configurations
OAuth Client ID - mobile_android
Client secret - secret
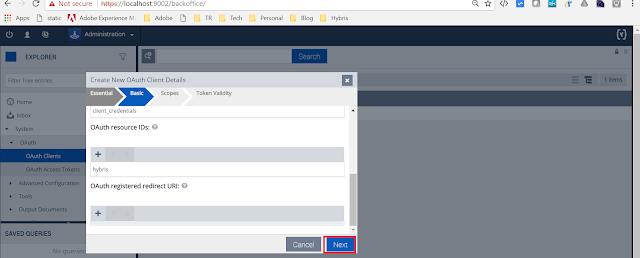
OAuth resource IDs - hybris
scope - basic
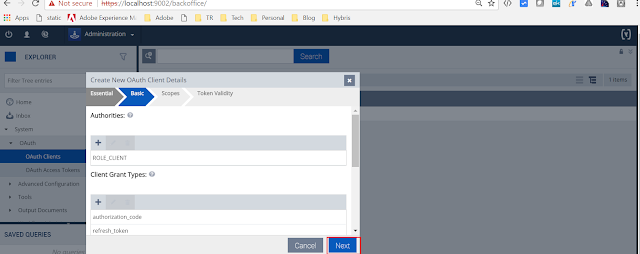
Client Grant Types - authorization_code,refresh_token,password,client_credentials
Authorities - ROLE_CLIENT
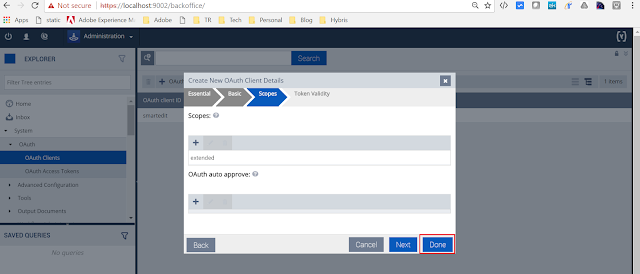
OAuth Client ID - trusted_client
Client secret - secret
OAuth resource IDs - hybris
scope - extended
Client Grant Types - authorization_code,refresh_token,password,client_credentials
Authorities - ROLE_TRUSTED_CLIENT
If the OAuth client is not configured properly then the below exception will be displayed in the AEM error log while accessing the services
com.adobe.cq.commerce.hybris.impl.OAuthHandler Server did not respond with 2xx -> authentication failed.
Set the stock level for a product:
By default, all the products will have the stock level defined as 0, for demo purpose I change the stock level of one product
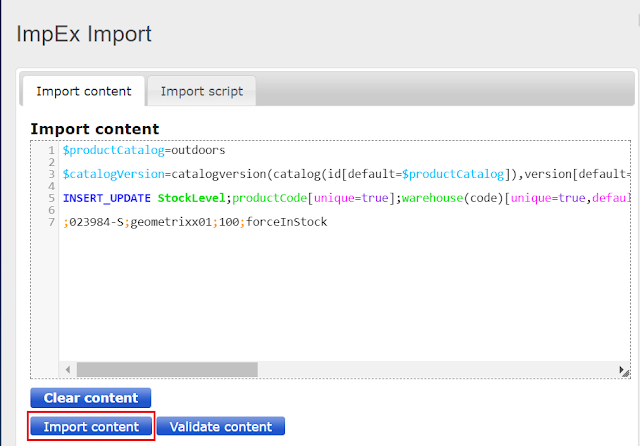
Login to https://localhost:9002/ and navigate to console Impex Import
Execute the below script
$productCatalog=outdoors
$catalogVersion=catalogversion(catalog(id[default=$productCatalog]),version[default=’Staged’])[unique=true,default=$productCatalog:Staged]
INSERT_UPDATE StockLevel;productCode[unique=true];warehouse(code)[unique=true,default=default];available;inStockStatus(code);maxPreOrder[default=1];maxStockLevelHistoryCount[default=-1];overSelling[default=0];preOrder[default=0];reserved[default=0]
;023984-S;geometrixx01;100;forceInStock
Add the name and description for missing delivery modes:
By default the name and description are missing for some of the delivery modes in Hybris, this will create a problem while checking out the order.
Caused by: org.apache.sling.commons.json.JSONException: JSONObject["name"] not found.
at org.apache.sling.commons.json.JSONObject.get(JSONObject.java:360)
at com.adobe.cq.commerce.hybris.importer.DefaultResponseParser.parseDeliveryMode(DefaultResponseParser.java:1329)
at com.adobe.cq.commerce.hybris.importer.DefaultResponseParser.parseDeliveryModes(DefaultResponseParser.java:1318)
at com.adobe.cq.commerce.hybris.importer.DefaultResponseParser.parseDeliveryModes(DefaultResponseParser.java:1304)
at com.adobe.cq.commerce.hybris.common.DefaultHybrisSession.getShippingMethodsInternal(DefaultHybrisSession.java:1680)
To fix the issue add some dummy name and description for delivery modes.
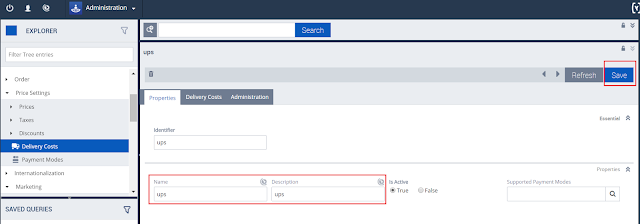
Login to https://localhost:9002/backoffice/ and Navigate to Price Settings ==> Delivery Costs
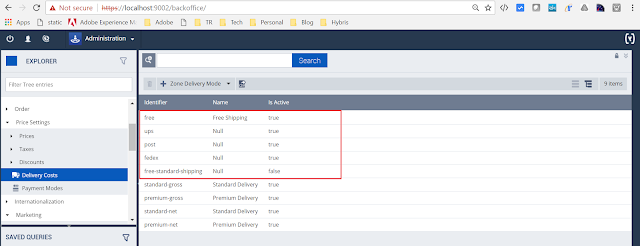
Add the Name and description for missing delivery modes
Now the e-Store can be accessed via http://localhost:4503/content/geometrixx-outdoors/en_US.html
Open http://localhost:4503/content/geometrixx-outdoors/en_US/men/shirts/bambara-cargo.html (as the stock is set for only this product for testing)
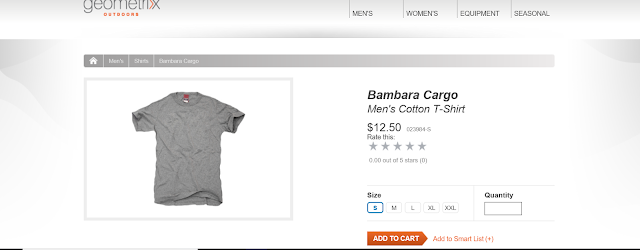
Click on add to cart
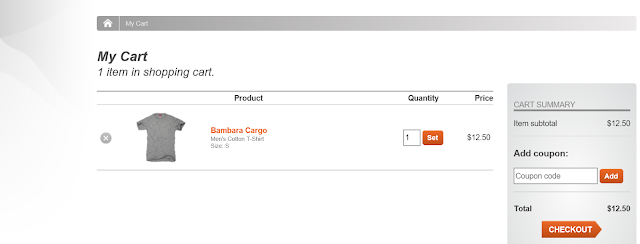
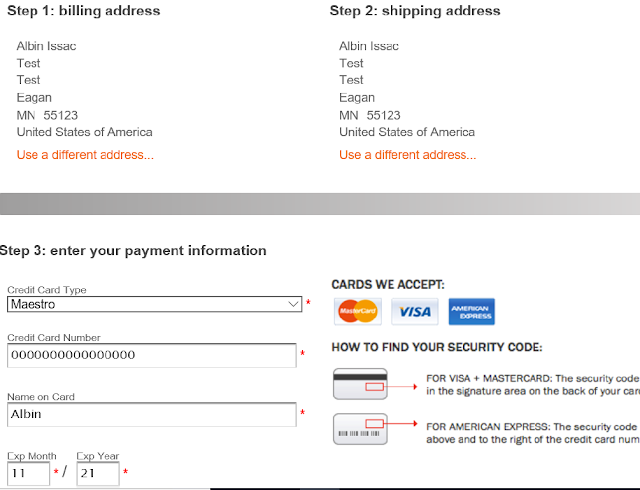
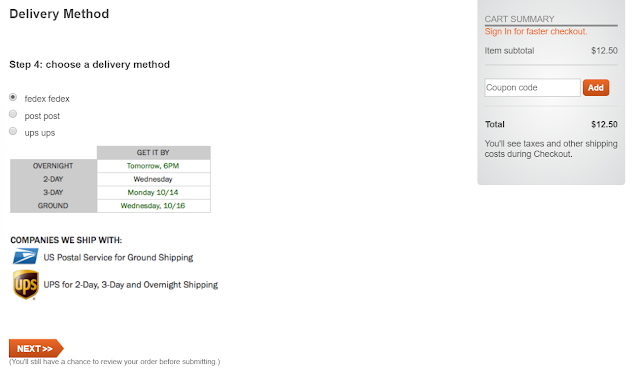
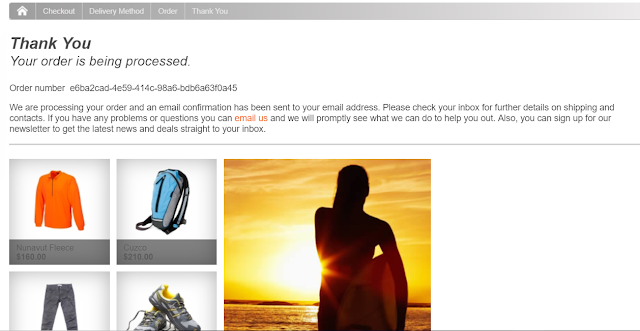
Perform the checkout by entering the address values and card details, use 0000000000000000 as the card number for testing
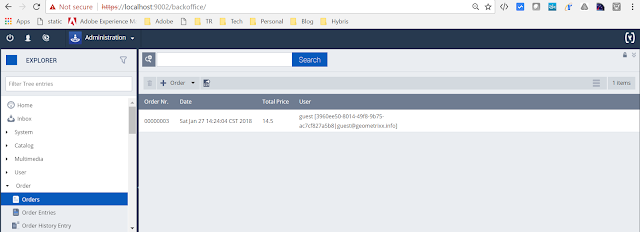
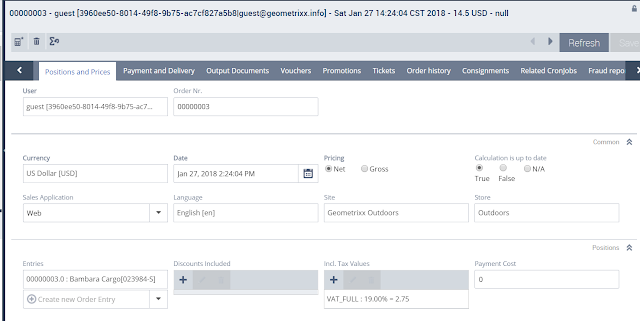
To verify the order from Hybris, log in to https://localhost:9002/backoffice and navigate to Order==>Orders
Download the configuration files - ConfigurationFiles
com.adobe.cq.commerce.hybris.impl.OAuthHandler Server did not respond with 2xx -> authentication failed.
Hybris configuration:
Install JDK 8(based on the Hybris version, later Hybris 6 versions required JDK 8)
Extract the installer
Execute the below command
cd <hybris-root-directory>/installer
install -r b2c_acc
Add the below extensions into HYBRIS_HOME/config/localextentions.xml- the hmc is deprecated in later 6 versions so can be ignored
<extension name='admincockpit'></extension>
<extension name='cockpit'></extension>
<extension name='hmc'></extension>
<extension name='platformhmc'></extension>
<extension name='workflow'></extension>
<extension name='processing'></extension>
<extension name='productcockpit'></extension>
<extension name='importcockpit'></extension>
<extension name='classificationsystems'></extension>
<extension name='classificationsystemshmc'></extension>
Download setup.groovy and place it under Hybris root - Refer https://helpx.adobe.com/experience-manager/6-3/sites/deploying/using/hybris.html to get the file based on the Hybris version.
Change the spring-security path in setup.groovy to "bin/ext-template/ycommercewebservices/web/webroot/WEB-INF/config/common/security-spring.xml" - this step is required only for later 6 Hybris versions
Execute the below commands - the groovy should be installed in the system before executing the below commands
cd ..
groovy setup.groovy
cd bin/platform
setantenv
ant clean all - Select the default configuration template(development)
hybrisserver (starting the server)
The above step will take some time, after completion Login to https://localhost:9002 and click on initialize and wait for initialize to complete
Download geometrixx-outdoors-export.csv, geometrixx-outdoors-images.zip and base-store.csv(based on the Hybris version) from https://helpx.adobe.com/experience-manager/6-3/sites/deploying/using/hybris.html
Import geometrixx-outdoors-export.csv and geometrixx-outdoors-images.zip:
Login to https://localhost:9002/hmc/hybris and navigate to System==>Tools==>Import
Select import file geometrixx-outdoors-export in the Configuration tab
Select the Locale Setting as en_English
Select geometrixx-outdoors-images in the Resources tab
Click on Start - wait for the completion of the import job
Import base-store.csv:
Follow the above steps and import base-store.csv
Verify the product - Login to https://localhost:9002/productcockpit and make sure the sample products are imported without any issue
Define OAuth Clients in Hybris:
Login to https://localhost:9002/backoffice and navigate to System==>OAuth==> OAuth Clients and define mobile_android and trusted_client with the following configurations
OAuth Client ID - mobile_android
Client secret - secret
OAuth resource IDs - hybris
scope - basic
Client Grant Types - authorization_code,refresh_token,password,client_credentials
Authorities - ROLE_CLIENT
OAuth Client ID - trusted_client
Client secret - secret
OAuth resource IDs - hybris
scope - extended
Client Grant Types - authorization_code,refresh_token,password,client_credentials
Authorities - ROLE_TRUSTED_CLIENT
If the OAuth client is not configured properly then the below exception will be displayed in the AEM error log while accessing the services
com.adobe.cq.commerce.hybris.impl.OAuthHandler Server did not respond with 2xx -> authentication failed.
Set the stock level for a product:
By default, all the products will have the stock level defined as 0, for demo purpose I change the stock level of one product
Login to https://localhost:9002/ and navigate to console Impex Import
Execute the below script
$productCatalog=outdoors
$catalogVersion=catalogversion(catalog(id[default=$productCatalog]),version[default=’Staged’])[unique=true,default=$productCatalog:Staged]
INSERT_UPDATE StockLevel;productCode[unique=true];warehouse(code)[unique=true,default=default];available;inStockStatus(code);maxPreOrder[default=1];maxStockLevelHistoryCount[default=-1];overSelling[default=0];preOrder[default=0];reserved[default=0]
;023984-S;geometrixx01;100;forceInStock
Add the name and description for missing delivery modes:
By default the name and description are missing for some of the delivery modes in Hybris, this will create a problem while checking out the order.
Caused by: org.apache.sling.commons.json.JSONException: JSONObject["name"] not found.
at org.apache.sling.commons.json.JSONObject.get(JSONObject.java:360)
at com.adobe.cq.commerce.hybris.importer.DefaultResponseParser.parseDeliveryMode(DefaultResponseParser.java:1329)
at com.adobe.cq.commerce.hybris.importer.DefaultResponseParser.parseDeliveryModes(DefaultResponseParser.java:1318)
at com.adobe.cq.commerce.hybris.importer.DefaultResponseParser.parseDeliveryModes(DefaultResponseParser.java:1304)
at com.adobe.cq.commerce.hybris.common.DefaultHybrisSession.getShippingMethodsInternal(DefaultHybrisSession.java:1680)
To fix the issue add some dummy name and description for delivery modes.
Login to https://localhost:9002/backoffice/ and Navigate to Price Settings ==> Delivery Costs
Add the Name and description for missing delivery modes
Now the e-Store can be accessed via http://localhost:4503/content/geometrixx-outdoors/en_US.html
Open http://localhost:4503/content/geometrixx-outdoors/en_US/men/shirts/bambara-cargo.html (as the stock is set for only this product for testing)
Click on add to cart
Perform the checkout by entering the address values and card details, use 0000000000000000 as the card number for testing
To verify the order from Hybris, log in to https://localhost:9002/backoffice and navigate to Order==>Orders
Download the configuration files - ConfigurationFiles

Can you please link the original blogs? I am seeing multiple blogs were directly copied.
ReplyDeleteRegards
Albin Issac