The Proxy Server allows JMeter to watch and record user activity while they are browsing web application with a normal browser.
In this tutorial, you will learn
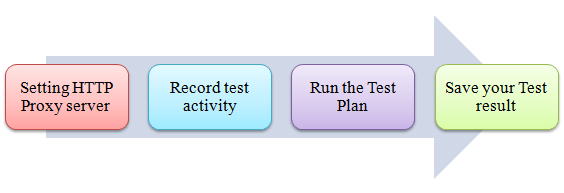
Step 1) Setting HTTP Proxy server
Step 2) Record your activity
Step 3) Run your Test Plan
Step 4) Save your test result
Step 1) Setting HTTP Proxy server
Step 2) Record your activity
Step 3) Run your Test Plan
Step 4) Save your test result
Here is the roadmap of this practical example
Step 1) Setting the HTTP Proxy server
This is a step-by-step guide to setup proxy
Start JMeter
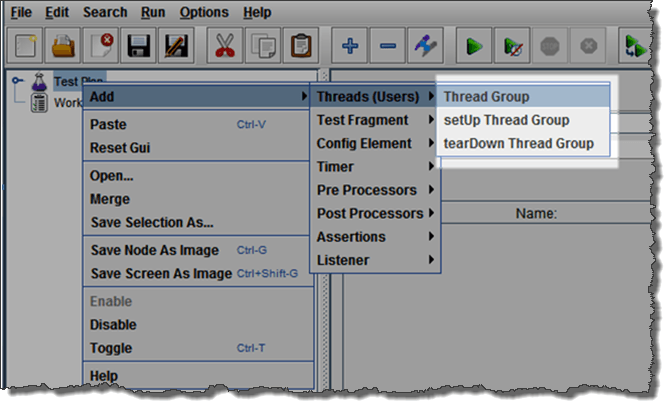
Select Test Plan on the tree
Add Thread Group
Right click on the Test Plan and add a new thread group: Add => Threads (Users) =>Thread Group
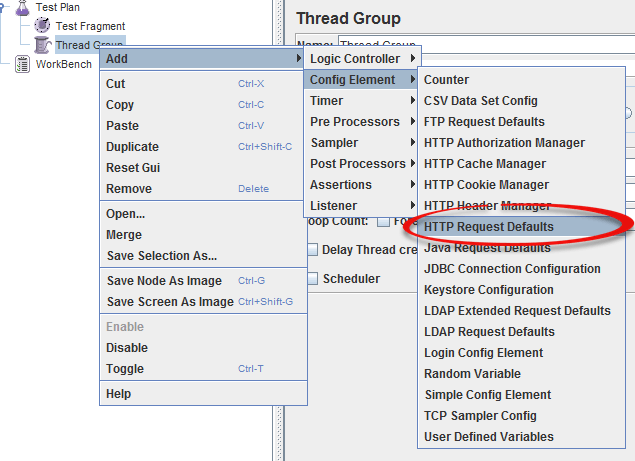
Add HTTP Request
Select the Thread Group; right click Add => Config Element => HTTP Request Defaults
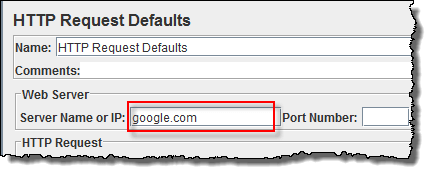
In new HTTP Request Defaults element: In Server name or IP, enter "google.com". You should keep the others fields blank
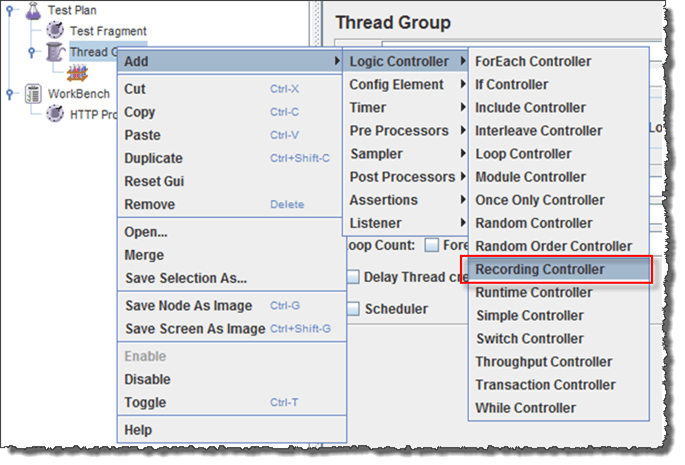
Add Recording Controller
Right click on the "Thread Group" and add a recording controller: Add => Logic Controller =>
Recording Controller
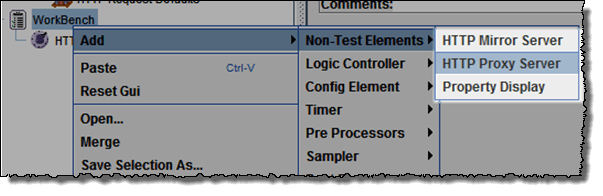
Add Proxy Server to WorkBench
Right click on the Workbench and add the http proxy: Add => Non-Test Elements => HTTP Proxy Server
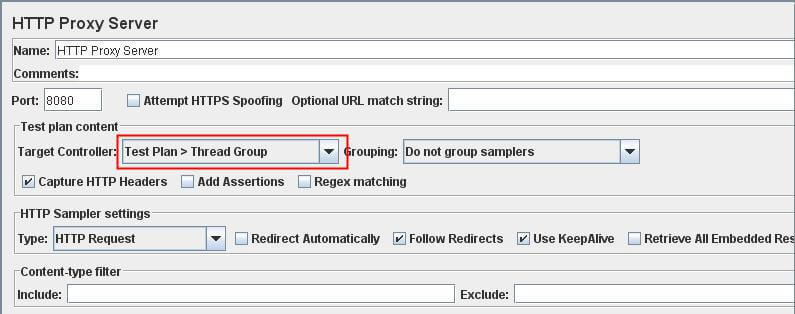
Set Target Controller where your recorded scripts will be added
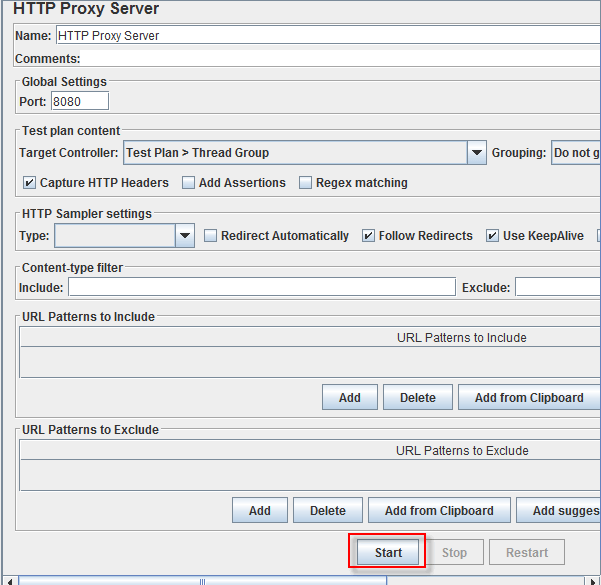
Start Proxy Server
Return to HTTP Proxy Server, and click the Start button at the bottom. Now your JMeter proxy server start
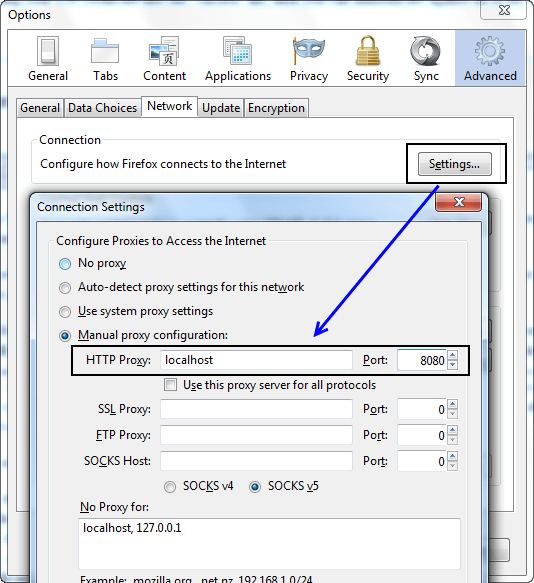
Start your Browser choose Tool => Option => Advanced => Network => Setting => Enter HTTP proxy as figure below
Step 2) Record your activity
Now Launch http://www.google.com in your web browser (JMeter still open)
Do activities search the keyword "apache".
Back to JMeter, in HTTP Proxy Server, click Stop when finished
After finishing recording, you will see JMeter automatically created a new HTTP request as the figure below
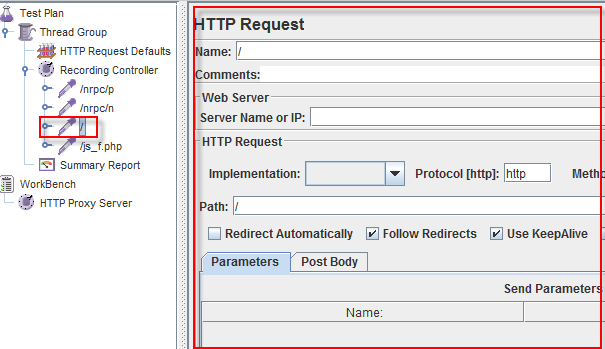
JMeter has already recorded a user request to the Home Page of Google website. Http://www.google.com/
The other HTTP requests display in above figure, you should remove them. Because sometime JMeter also records some advertising links while you are searching keyword on Google. We should ignore them in our Test Plan
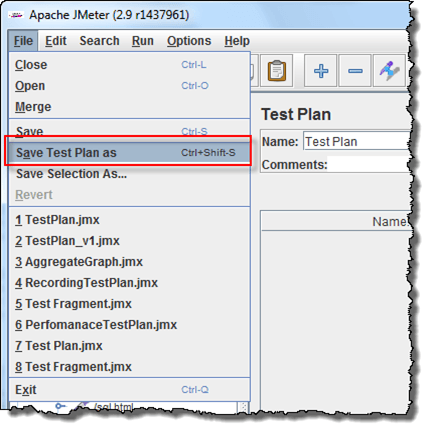
Click File => Save your Test Plan as
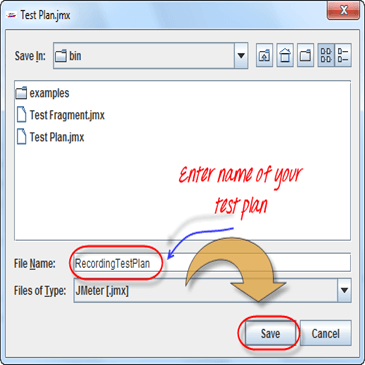
A Dialog box display => enter a name of your test plan at File Name field => Click Save Now your Test Plan is saved under name RecordingTestPlan.jmx
Step 3) Run your Test Plan
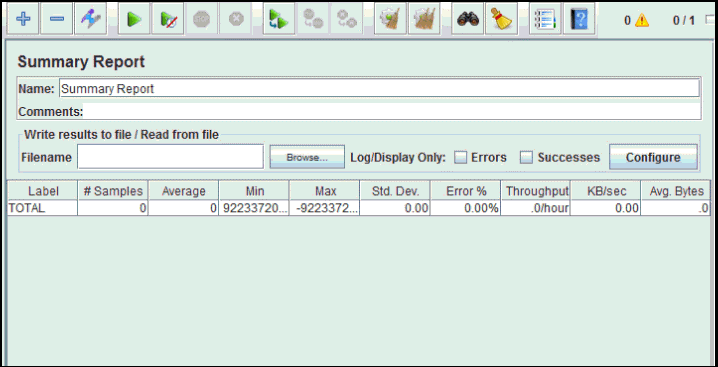
Select Thread Group => Add => Listener=> Summary Report
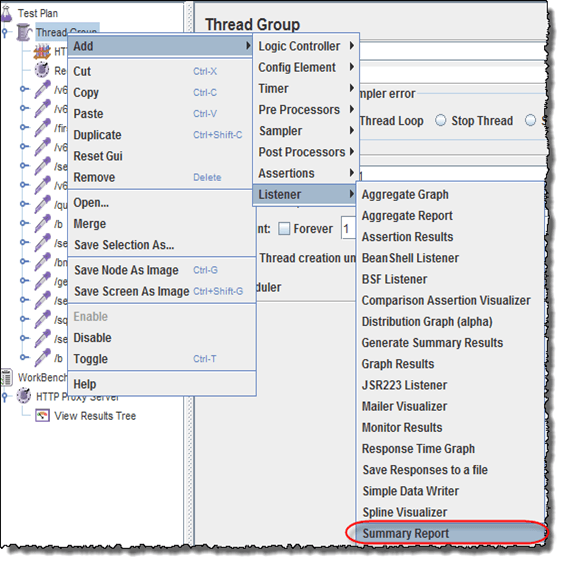
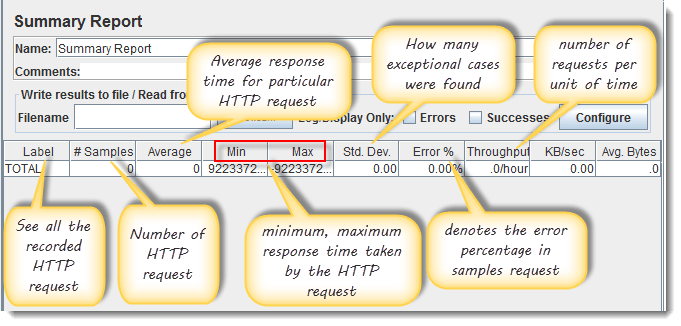
The Summary Report will show some basic statics
Select Thread Group, enter information as the figure below
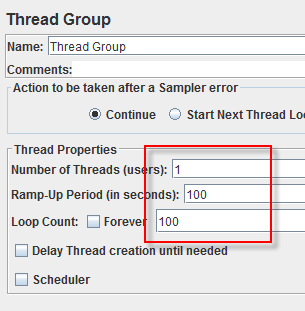
Before you start the test, select "Summary Report". When you ready to run a test, select Run => Start (Ctrl+R). JMeter will playback your activity in 100 times
As the test runs, the statistics will change until the test is done.
Step 4) Save your test result
Click Save Table Data to save test result to file
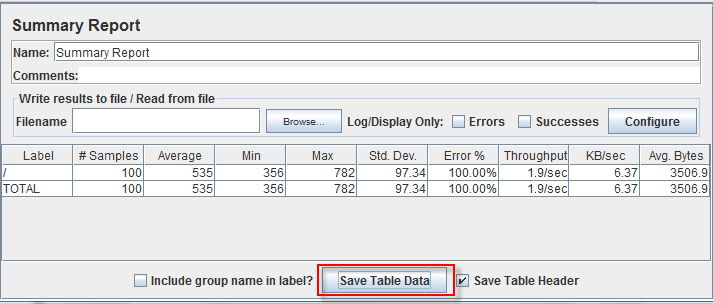
Enter the name of the test result and click Save. Test Result in JMeter is saved in *.csv format as default

Step 1) Setting the HTTP Proxy server
This is a step-by-step guide to setup proxy
Start JMeter
Select Test Plan on the tree
Add Thread Group
Right click on the Test Plan and add a new thread group: Add => Threads (Users) =>Thread Group
Add HTTP Request
Select the Thread Group; right click Add => Config Element => HTTP Request Defaults
In new HTTP Request Defaults element: In Server name or IP, enter "google.com". You should keep the others fields blank
Add Recording Controller
Right click on the "Thread Group" and add a recording controller: Add => Logic Controller =>
Recording Controller
Add Proxy Server to WorkBench
Right click on the Workbench and add the http proxy: Add => Non-Test Elements => HTTP Proxy Server
Set Target Controller where your recorded scripts will be added
Start Proxy Server
Return to HTTP Proxy Server, and click the Start button at the bottom. Now your JMeter proxy server start
Start your Browser choose Tool => Option => Advanced => Network => Setting => Enter HTTP proxy as figure below
Step 2) Record your activity
Now Launch http://www.google.com in your web browser (JMeter still open)
Do activities search the keyword "apache".
Back to JMeter, in HTTP Proxy Server, click Stop when finished
After finishing recording, you will see JMeter automatically created a new HTTP request as the figure below
JMeter has already recorded a user request to the Home Page of Google website. Http://www.google.com/
The other HTTP requests display in above figure, you should remove them. Because sometime JMeter also records some advertising links while you are searching keyword on Google. We should ignore them in our Test Plan
Click File => Save your Test Plan as
A Dialog box display => enter a name of your test plan at File Name field => Click Save Now your Test Plan is saved under name RecordingTestPlan.jmx
Step 3) Run your Test Plan
Select Thread Group => Add => Listener=> Summary Report
The Summary Report will show some basic statics
Select Thread Group, enter information as the figure below
Before you start the test, select "Summary Report". When you ready to run a test, select Run => Start (Ctrl+R). JMeter will playback your activity in 100 times
As the test runs, the statistics will change until the test is done.
Step 4) Save your test result
Click Save Table Data to save test result to file
Enter the name of the test result and click Save. Test Result in JMeter is saved in *.csv format as default

No comments:
Post a Comment
If you have any doubts or questions, please let us know.