The 4 quick setup steps:
- Create a Client Library Folder in the desired location, say, in a component as apps/myProject/components/myComponent/tests.
- Create Test Suite(s), which are just a collection of similar Test Cases. There can be more than one Test Suite in the Client Library Folder.
- Specify Test Cases for each Test Suite.
- Add Actions in each Test Case that will validate (or invalidate) the Test Case.
Writing Tests
Create a Client Library Folder
Create a directory called tests or anything else. In the example below, it is located in the geometrixx-outdoors-app and is already made for you.
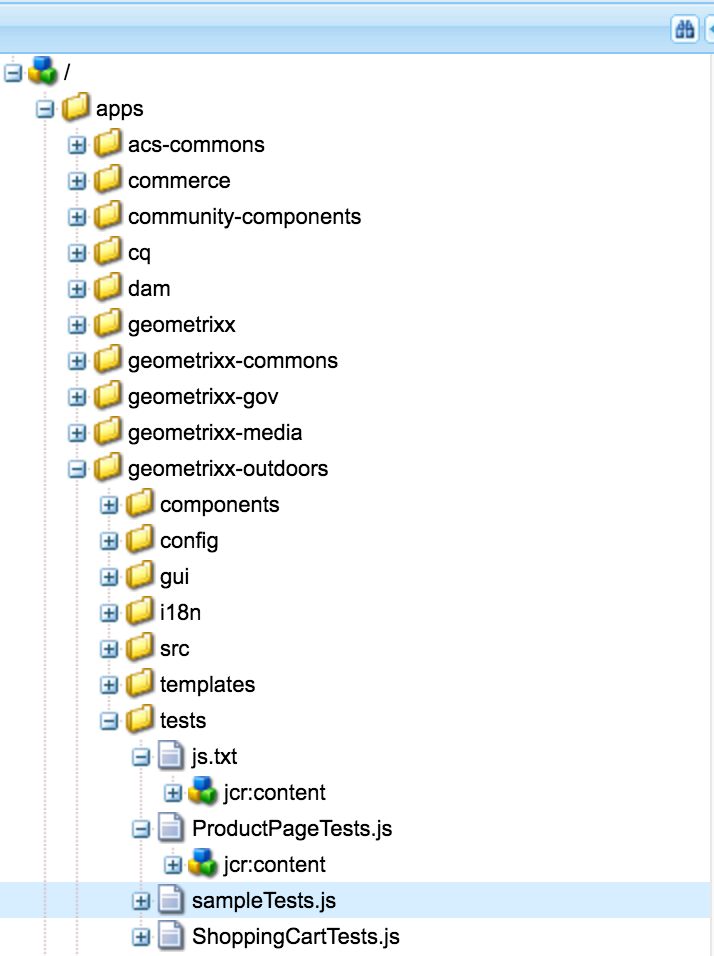
You should be able to see the details of the Client Library Folder with given Categories and Dependencies values. As mentioned, this example uses /apps/geometrixx-outdoors/tests. If you are making your own, add the properties accordingly.
Create a Test Suite (.js file)
A Test Suite is a collection of Test Cases which are similar to each other. A Test Suite creates an instance of hobs.TestSuite and will show up in the Left Panel of the AEM developer menu for execution. You may want to create different .js files for each Test Suite as it is specified here. Say, the developer is creating an AEM component, that component will have 1 Test Suite to test its functionalities with the help of various Test Cases within it. A Test Suite is actually a JavaScript file. We are adding our Test Suite file sampleTests.js in /apps/geometrixx-outdoors/tests and modifying the js.txt file accordingly. Paste the code sample from the given example in the Create one or more actions in each Test Case section to the new .js file.

Create Test Cases within the Test Suite
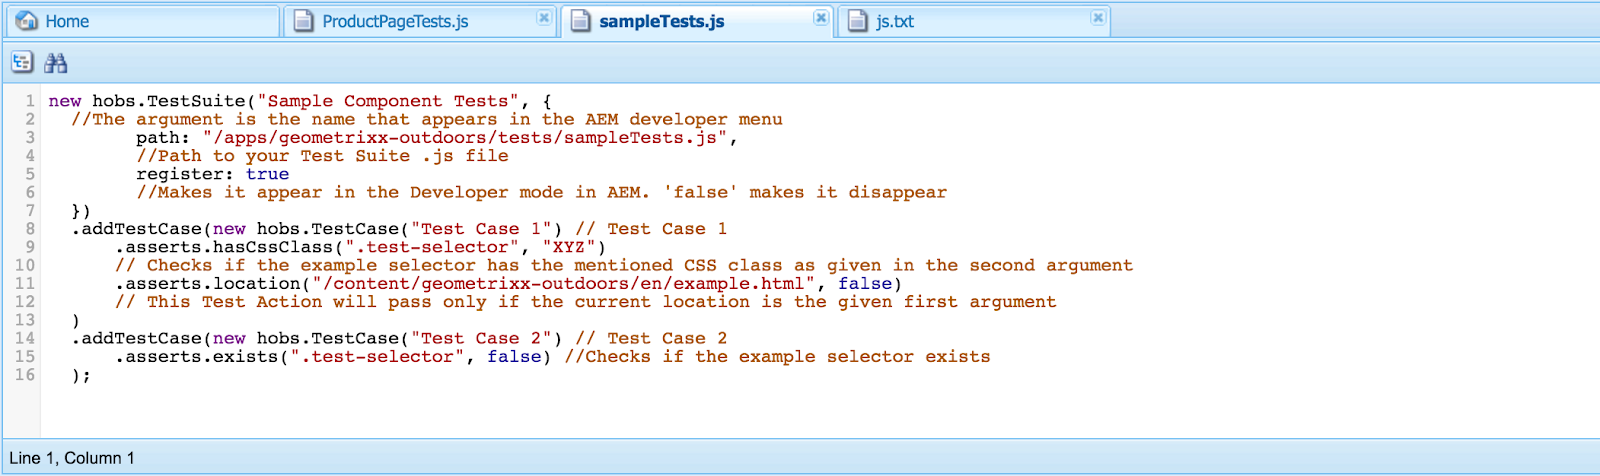
It is easy. If you have done testing in languages like Java before, you know exactly what you want. Two Test Cases are mentioned in the example , and yes, if you are wondering, chaining can be done. It should be noted beforehand that in the AEM developer menu you will see your Test Cases under your Test Suite name. A new hobs.TestCase object is created for each Test Case. The hobs.TestCase constructor takes two parameters. One is mandatory, which is the name of the Test Case. The second is an optional parameter and may contain things like delay in the execution.
It is easy. If you have done testing in languages like Java before, you know exactly what you want. Two Test Cases are mentioned in the example , and yes, if you are wondering, chaining can be done. It should be noted beforehand that in the AEM developer menu you will see your Test Cases under your Test Suite name. A new hobs.TestCase object is created for each Test Case. The hobs.TestCase constructor takes two parameters. One is mandatory, which is the name of the Test Case. The second is an optional parameter and may contain things like delay in the execution.
Create one or more actions in each Test Case
An action is, yes you guessed it right, an action that could be anything like verifying the current location or asserting some condition etc. You can see the action inside each Test Case in the code example below. A list of the actions can be found at here.
An action is, yes you guessed it right, an action that could be anything like verifying the current location or asserting some condition etc. You can see the action inside each Test Case in the code example below. A list of the actions can be found at here.
new hobs.TestSuite("Sample Component Tests", {
//The argument is the name that appears in the AEM developer menu
path: "/apps/geometrixx-outdoors/tests/sampleTests.js",
//Path to your Test Suite .js file
register: true
//Makes it appear in the Developer mode in AEM. 'false' makes it disappear
})
.addTestCase(new hobs.TestCase("Test Case 1") // Test Case 1
.asserts.hasCssClass(".test-selector", "XYZ")
// Checks if the example selector has the mentioned CSS class as given in the second argument
.asserts.location("/content/geometrixx-outdoors/en/example.html", false)
// This Test Action will pass only if the current location is the given first argument
)
.addTestCase(new hobs.TestCase("Test Case 2") // Test Case 2
.asserts.exists(".test-selector", false) //Checks if example exists, passes if it doesn't due to "false"
);
Note: Test Cases can be reused, delayed etc. For advanced usage please read this.
Executing Tests
For execution first one needs to go to the Developer Mode of the Touch UI by clicking on the following button to the Right Corner of the AEM page. In this case, http://localhost:4502/editor.html/content/geometrixx-outdoors/en.html

For execution first one needs to go to the Developer Mode of the Touch UI by clicking on the following button to the Right Corner of the AEM page. In this case, http://localhost:4502/editor.html/content/geometrixx-outdoors/en.html
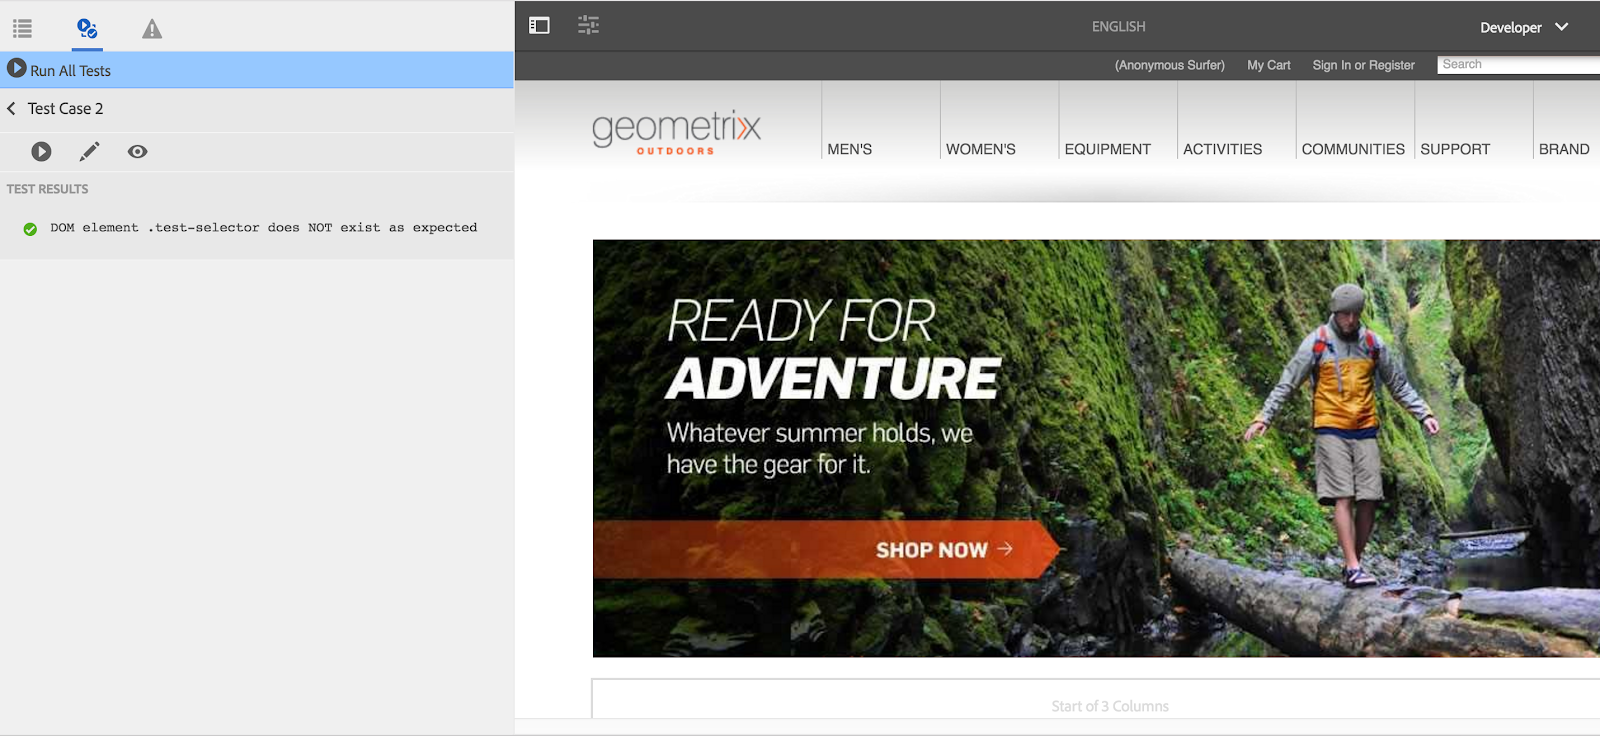
Next, a screen will show up in the left side of the page as shown below. The user will see the one or more Test Suite names (Sample Component Tests) and below it the Test Cases (Test Case 1 and Test Case 2).Here you should actually see grey colored icons and the green ( test passed ) and red ( test failed ) icons show up only after execution.
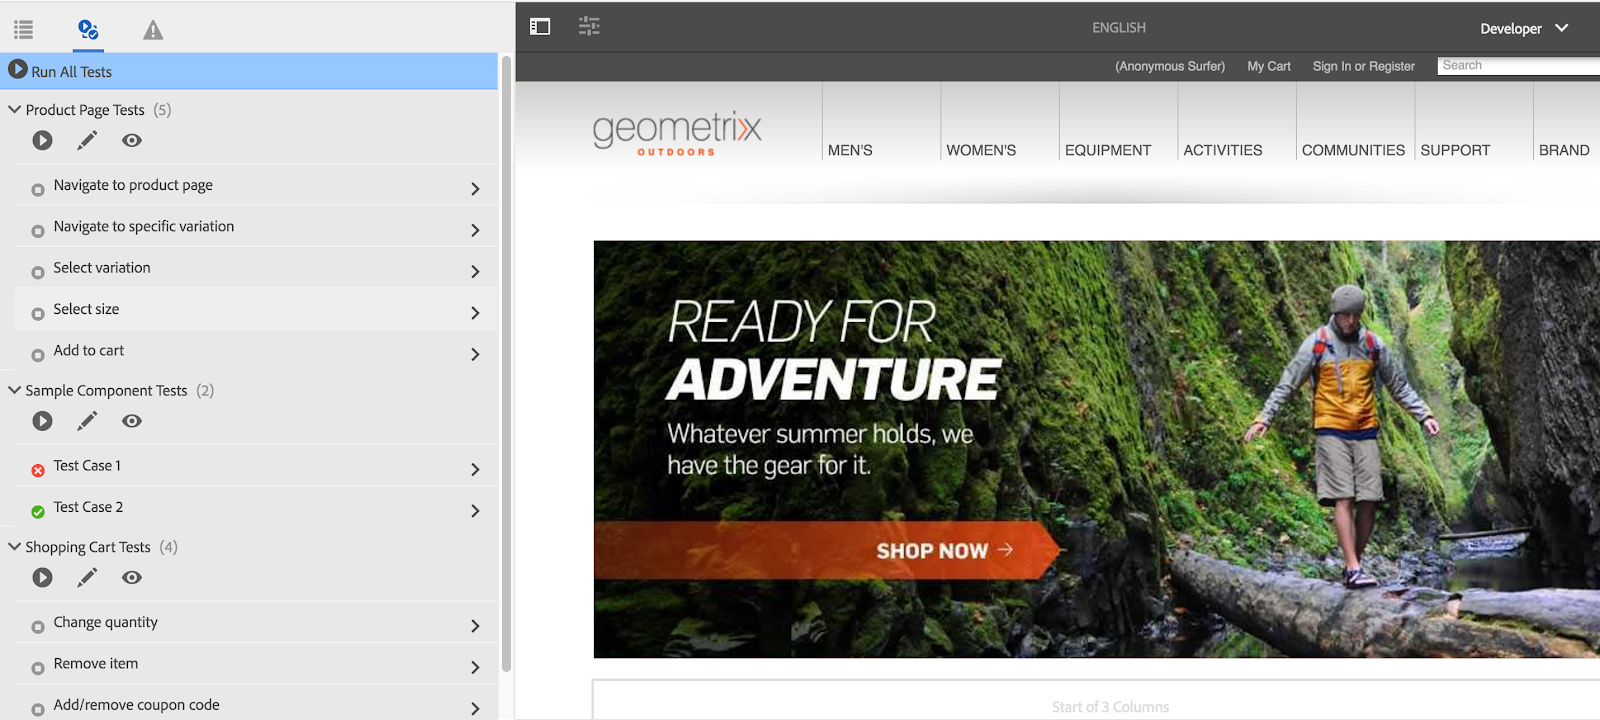
Next, you have to option to run ALL the tests in all Test Suites or just the tests in a specific Test Suite. The Play button runs the tests. If clicked, the tests will take a while to execute and may either pass or fail.
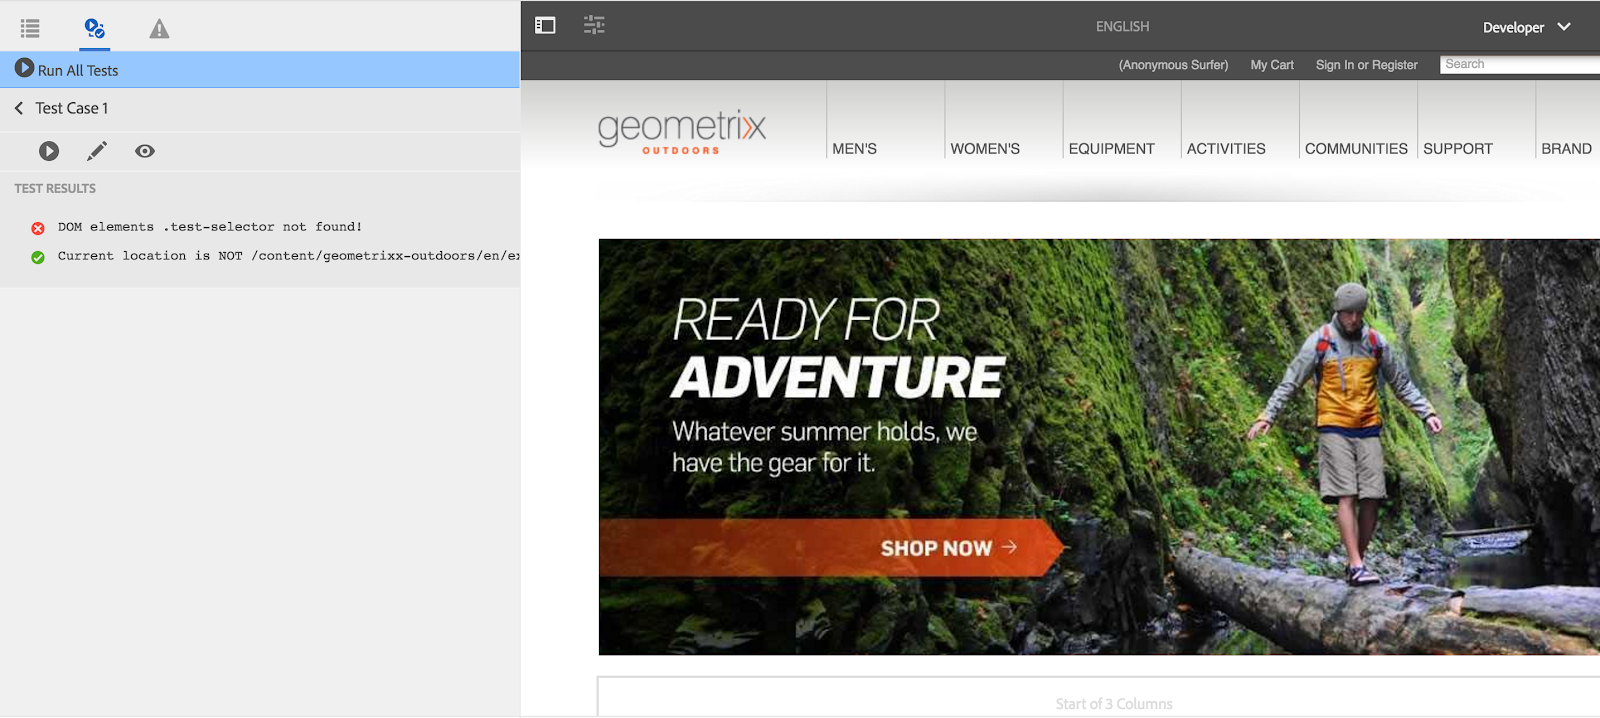
On being clicked on the failed ( or passed ) result, a detailed description of each failed and/or passed Test Case can be seen as below.
This is the end of basic Hobbes UI testing in AEM. Please read Adobe's documentation for more fun!
This is the end of basic Hobbes UI testing in AEM. Please read Adobe's documentation for more fun!

No comments:
Post a Comment
If you have any doubts or questions, please let us know.