Agenda of this post
- Creating custom process Step.
- How to use this custom process Step.
- Explanation of all arguments in the Workflow Process Interface execute() method.
- Use of all these arguments.
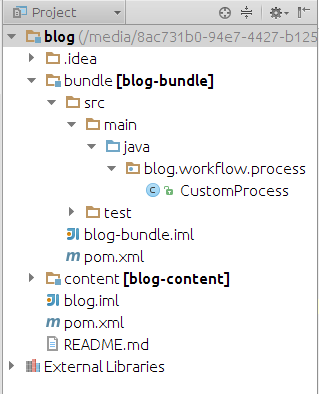
For creating a custom process step you have to implement the WorkflowProcess interface in your java class. It provides a method named as execute() with three parameters, I will explain to you all of these parameters.
Register your class as a component & add some properties as enabled, immediate, these property indicates-
That your service will be enabled immediately at the time of deployment of your project.
Now register your class as a service with some configurations –
i.e. add a property named as “process.label”. This property defines a name of your process i.e. in workflow process step, you are able to see this process in select process drag drop menu with a name define using this property.
your final code will looks like –
import com.adobe.granite.workflow.WorkflowException;
import com.adobe.granite.workflow.WorkflowSession;
import com.adobe.granite.workflow.exec.WorkItem;
import com.adobe.granite.workflow.exec.WorkflowProcess;
import com.adobe.granite.workflow.metadata.MetaDataMap;
import org.apache.felix.scr.annotations.Component;
import org.apache.felix.scr.annotations.Properties;
import org.apache.felix.scr.annotations.Property;
import org.apache.felix.scr.annotations.Service;
import org.slf4j.Logger;
import org.slf4j.LoggerFactory;
@Component(immediate = true, enabled = true, metatype = false)
@Service
@Properties({
@Property(name = “service.description”, value = “Service for Showing custom workflow demo.”),
@Property(name = “service.vendor”, value = “versatileankur@blogspot.in”),
@Property(name = “process.label”, value = “Blog Process”)
})
public class CustomProcess implements WorkflowProcess {
private static final Logger LOGGER = LoggerFactory.getLogger(CustomProcess.class);
@Override
public void execute(WorkItem workItem, WorkflowSession workflowSession, MetaDataMap metaDataMap) throws WorkflowException {
LOGGER.info(“nnnn==== Custom workflow Creation completed successfully. n thanks for creation”);
}
}
you have to add workflow dependencies i.e. com.adobe.granite.workflow.api into your bundle pom.xml file. Now after writing this code just use mvn clean install -P autoInstallPackage command. you are able to see in /system/console/bundle, search for a blog, you will get your bundle inactive state i.e. everything works fine.
Now go to your blog workflow model which is shown below and follow the steps as written below-
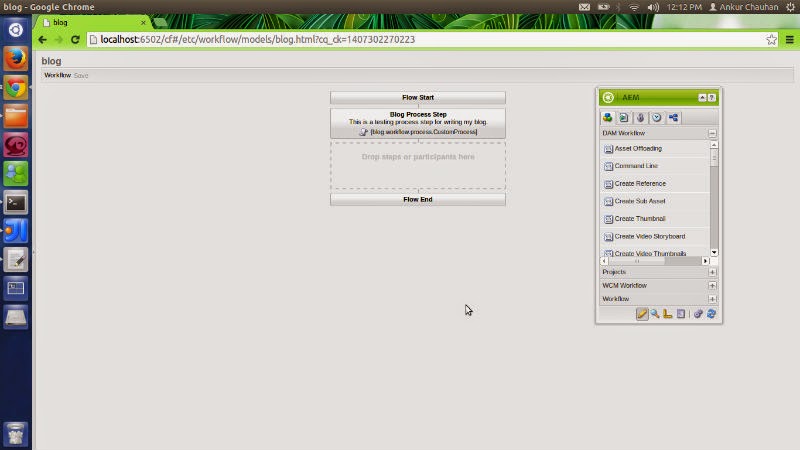
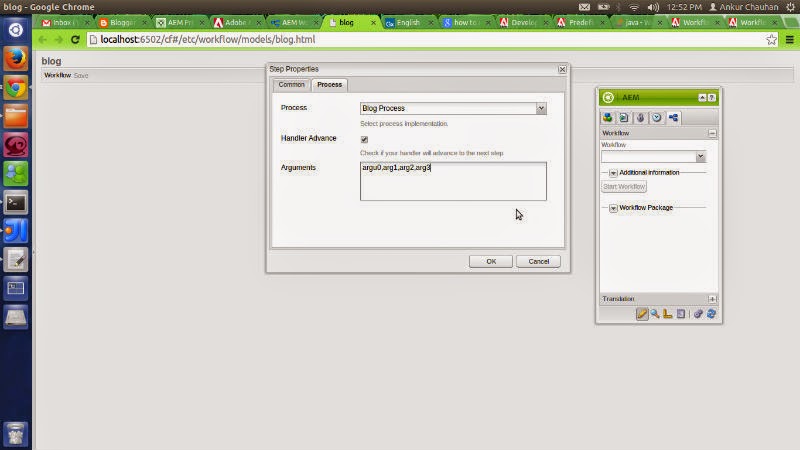
Select blog Process Step we will get a dialog select second tab your screen looks like-
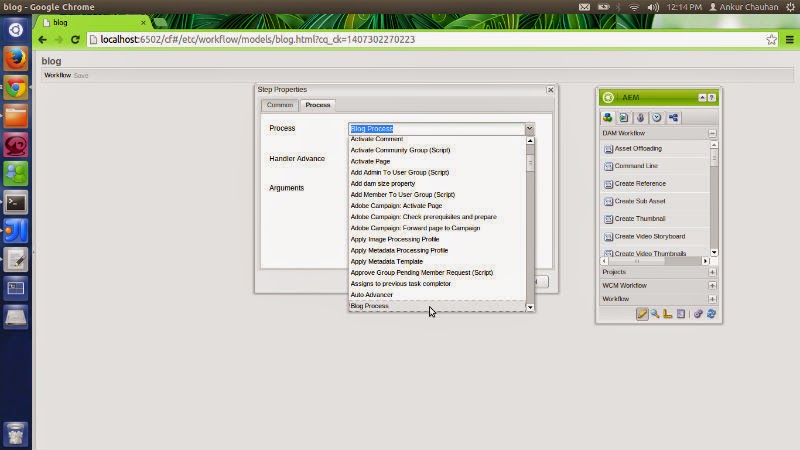
In Process drop-down, we will see your custom workflow with a name Blog Process,
Check Handle Advanced checkbox
Click OK.
Save your workflow.
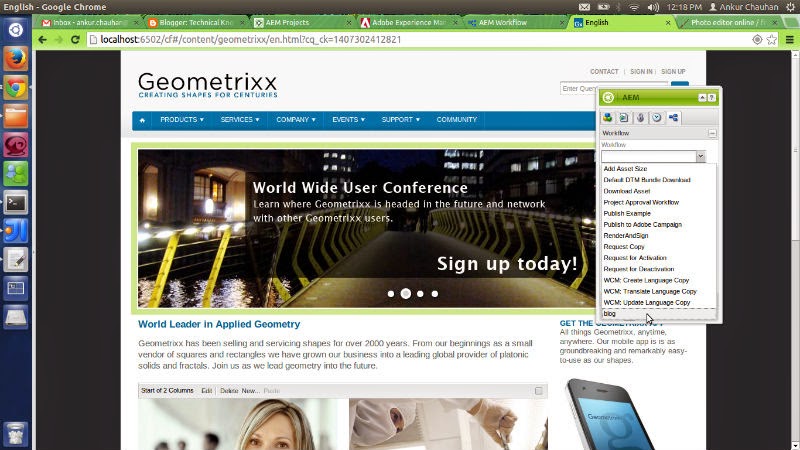
Go to any page in my case I select geometrixx/en.html page.
Select the workflow tab.
Select your blog, workflow model.
As shown below
Click on Start workflow you will see your page refresh and workflow field becomes empty it means your code run fine. Now go to your crx-quickstart/logs/error.log file.
Press Ctrl+End or search for “Custom workflow Creation” you will see your comment printed there. It means everything is fine & working. By following the above steps you are able to create custom workflow process steps.
Explanation of method arguments.
workItem
Check Handle Advanced checkbox
Click OK.
Save your workflow.
Go to any page in my case I select geometrixx/en.html page.
Select the workflow tab.
Select your blog, workflow model.
As shown below
Click on Start workflow you will see your page refresh and workflow field becomes empty it means your code run fine. Now go to your crx-quickstart/logs/error.log file.
Press Ctrl+End or search for “Custom workflow Creation” you will see your comment printed there. It means everything is fine & working. By following the above steps you are able to create custom workflow process steps.
Explanation of method arguments.
workItem
- workItem represents the workItem corresponding to the current step, it will be present till this step is running and not present in any other process or participant step. Using this workItem object you are able to access workflow instance or metaDataMap related to only this workItem.
- you can also access workflow metaDataMap using workItem object using workItem.getWorkflow().getMetaDataMap() method will return metaDataMap related to the whole workflow model.
- If you use workItem.getMetaDataMap() then it will return only that metaDataMap object which is related to this step only and not present in any other workflow step.
- You are also able to get the payload of this workflow using getWorkflowData() method of workItem.
- You can explore this API from this link- WorkflowData.
workflowSession
- workflowSession represent the session related to the whole workflow, using this Object you can deal with all node using the history node of the workflow instance. You can explore this interface using the given link WorkflowSession.
metaDataMap
PROCESS_ARG is of type String i.e. whatever you write in Argument text area it will be accessed as a single string & you can provide your custom logic to parse that string.
For testing all of these just write two line in execute() method of your CustomProcess class.
@Override
public void execute(WorkItem workItem, WorkflowSession workflowSession, MetaDataMap metaDataMap) throws WorkflowException {
LOGGER.info(“nnnn===== Custom workflow Creation completed successfully. n thanks for creation”);
LOGGER.info(“nnnn===============”+metaDataMap.get(“PROCESS_ARGS”, new String()));
LOGGER.info(“nnnn===============”+metaDataMap);
}
Use mvn clean install -P autoInstallPackage command your bundle is successfully deployed into the repository. Now go to blog workflow model -> select blog process step -> select process tab -> type any text in the Arguments text area as shown below.
Now go to your geometrixx/en.html page and go to workflow tab-> select blog workflow – > click on start workflow button. Go to crx-quickstart/logs/error.log
you will see Metadata map and PROCESS_ARG values which we provide form workflow model dialog. This is all done in this post.
github repository link
https://github.com/vietankur009/blog
- this metaDataMap object is related to dialog properties that you select in-process dialog. It provides you only those properties which are under process tab i.e. this will provide you information about –
- what process you selected?
- Either you select the Handle Advanced checkbox or not?
- & also provide you a list of arguments.
PROCESS_ARG is of type String i.e. whatever you write in Argument text area it will be accessed as a single string & you can provide your custom logic to parse that string.
For testing all of these just write two line in execute() method of your CustomProcess class.
@Override
public void execute(WorkItem workItem, WorkflowSession workflowSession, MetaDataMap metaDataMap) throws WorkflowException {
LOGGER.info(“nnnn===== Custom workflow Creation completed successfully. n thanks for creation”);
LOGGER.info(“nnnn===============”+metaDataMap.get(“PROCESS_ARGS”, new String()));
LOGGER.info(“nnnn===============”+metaDataMap);
}
Use mvn clean install -P autoInstallPackage command your bundle is successfully deployed into the repository. Now go to blog workflow model -> select blog process step -> select process tab -> type any text in the Arguments text area as shown below.
Now go to your geometrixx/en.html page and go to workflow tab-> select blog workflow – > click on start workflow button. Go to crx-quickstart/logs/error.log
you will see Metadata map and PROCESS_ARG values which we provide form workflow model dialog. This is all done in this post.
github repository link
https://github.com/vietankur009/blog

No comments:
Post a Comment
If you have any doubts or questions, please let us know.