Warning: Any digital assets, such as PDFs, that must be restricted should NOT be uploaded to the DAM. The DAM is a public resource, and any files uploaded to the DAM will be viewable/accessible to the public. To protect files from public view/access, visit the Restricting a Downloadable File page.
DAM File Formats
The AEM recommended DAM (Digital Asset Manager) file format for images is .jpeg.
Accessing the DAM
Click on the "camera" icon at the top of the WCM window to access the DAM.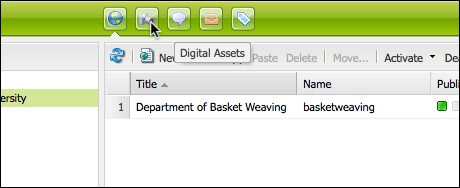
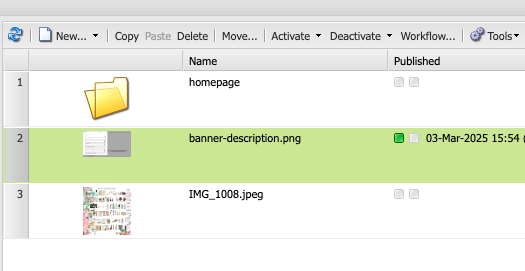
The DAM's interface is similar to the WCM; the folder structure on the left, and more information on items within the folders are displayed on the right panel.
The design of the DAM folder structure for your website is at your group's discretion. In many cases, the authors will find that the DAM folder structure will end up being similar to the site structure in the WCM. This enables more of a visual reference of where digital assets belong or are used on the website.
Creating a New Folder in the DAM
To create a new folder in the DAM, select an existing folder under which the new folder should be created in the DAM left panel.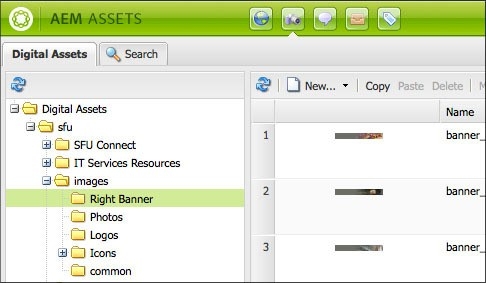
Click on the arrow beside "New..." to trigger the drop-down menu. Click to select "New Folder..."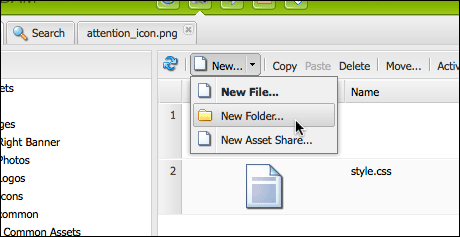
A prompt will appear. The Name of the folder is what will appear as part of the URL. For this reason, keeping it shorter and in all lower case letters is recommended.
The Title is an optional field. This is the folder label that will appear on the left side of the DAM. Click Create once you have finished.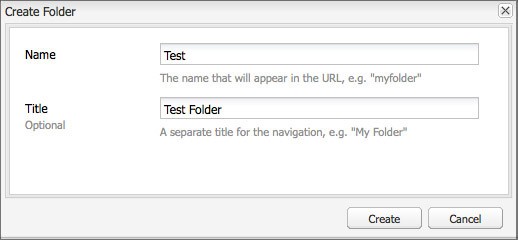
The new folder will now appear on the left side of the DAM under the parent folder you had selected and on the right panel.
If you would like to move this folder, drag and drop it into the new location within the left panel.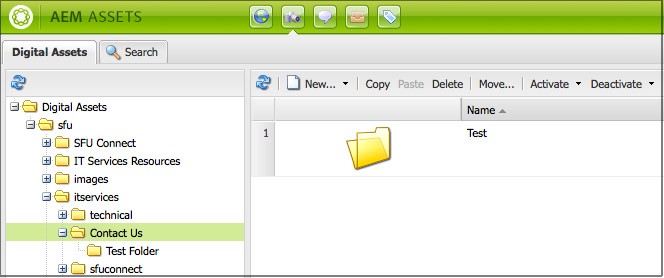
Changing Folder Properties in the DAM
To change the title of a file in the DAM:
1. Right-click on the folder and select Properties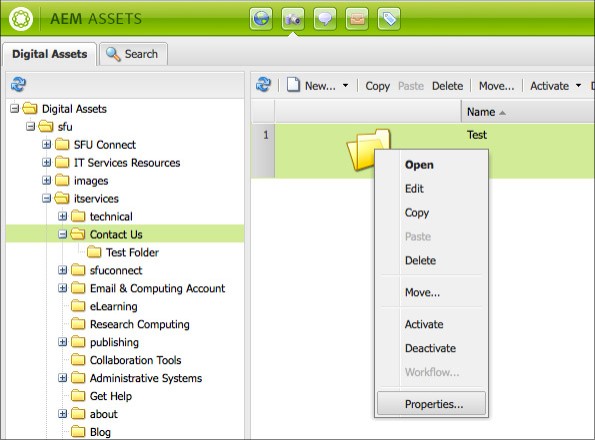
A prompt will appear with the current title.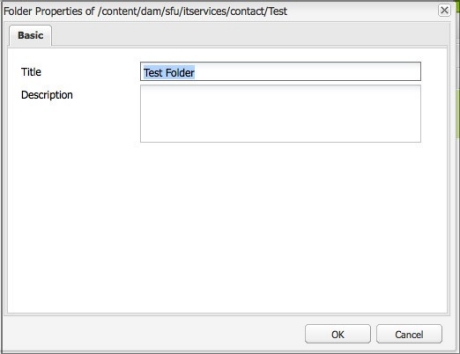
2. Change the title accordingly, and click OK.
The change will be reflected on the left.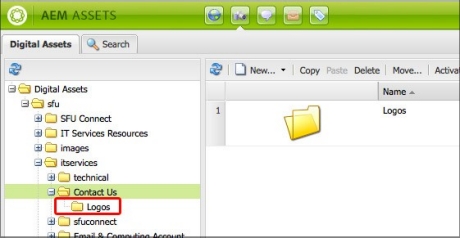
Uploading a File to the DAM
There are two methods for uploading files to the DAM:
Browse, and
Drag and drop.
To upload a file to a folder in the DAM, first select the folder in which you would like to place the file from the left panel of the DAM window.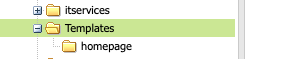
If you need to restrict content to particular pages, upload via the Download Component to individual Restricted Viewing Pages.
Browse Upload Method
1. Click on the "New..." button.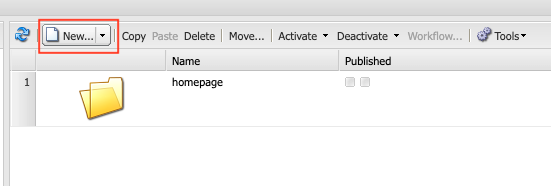
2. A prompt will appear. Click "Browse..." and select one or more files to upload.
3. After selecting a file, it will appear in the Upload Assets prompt. Once you have finished, click Upload.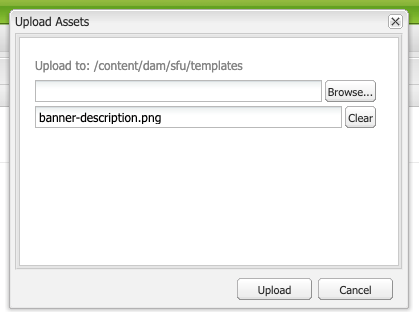
The progress of the upload will appear on the prompt and will close once it has completed.
After uploading, AEM will take a moment to process the file for its properties. If you wish, you may click on the Refresh icon (two circling arrows) on the top left of the right panel to update its status.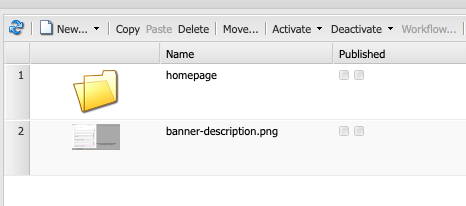
Drag and Drop Upload Method
To upload files via drag and drop:
Select the DAM folder for file upload
In the left panel of the DAM, navigate to the DAM folder where you'll be uploading the file.
Click on the folder to select it.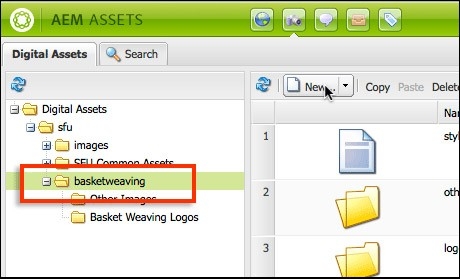
The folder's existing files will be displayed in the DAM right panel.
Upload the file from your computer to the DAM folder
1. Navigate to the file on your computer.
2. Click on the file to select it, drag it into the DAM right panel, then unclick.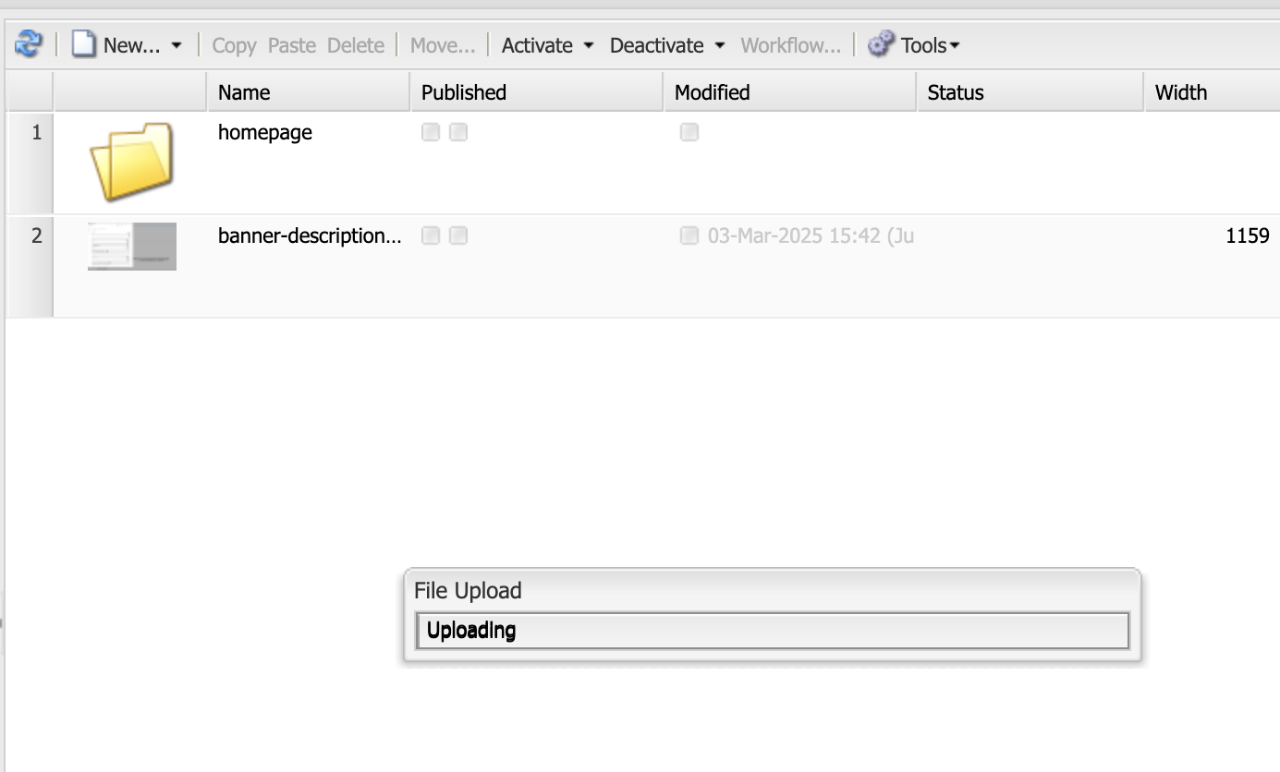
Your file is now uploaded and ready to be added to your AEM pages.
Uploading Multiple Files
Multiple files can be uploaded to the DAM at the same time. Using the Browse Upload method, the shift key can select multiple files to be uploaded.
For the Drag and Drop Upload method, either the shift key or dragging the cursor action will select multiple files. Once all the desired files are selected, drag and drop them into the DAM.
Warning: AEM may slow down if a large batch of files is uploaded to the DAM. For that reason, only upload a batch of 50 files maximum at a single time. If there are more than 50 files to upload, upload a batch and wait for it to finish uploading. Only after that should the next batch be uploaded.
For more information on how to add images to AEM using the Image component, see Using the Image component.
Linking a DAM File
After you've uploaded your image or document file to the DAM, add it to your AEM page as follows:
For document files:
Create a link on your AEM page.
Hyperlink the link to the document in the DAM.
For image files:
Drag & drop an Image component onto your page.
Hyperlink the image to the image in the DAM.
Activating a DAM File
Digital assets or DAM files, like AEM pages, need to be activated in order to be viewable by your website's visitors.
To activate your DAM file:
1. Locate it in the DAM right panel.
2. Click to select it.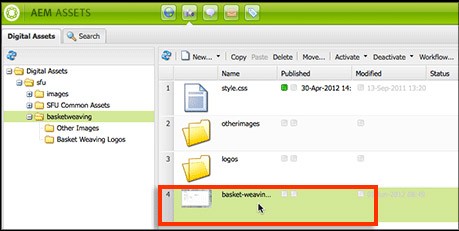
3. Click the Activate button on the top menu bar.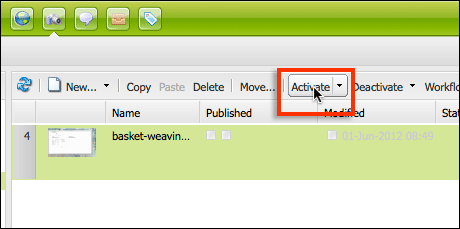
After clicking Activate, the left indicator box under the Published column will change to orange (activation pending) and then green (activation complete).
Once the left indicator box changes to green, your DAM file has been activated.
Deleting a DAM File
If you no longer require a file in the DAM, you may delete it. Once a file is deleted, it cannot be retrieved, so consider deactivating the file rather than deleting it from the DAM.
1. Select the file to be deleted in the right panel. Click the Deactivate button. A pop-up will appear asking for confirmation. Click Yes to proceed.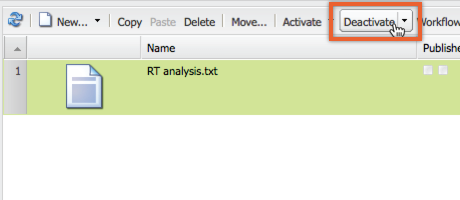
After clicking Deactivate, the indicator box under the Published column will change to orange (activation pending) and then red (deactivation complete). Sometimes the page needs to be refreshed to see the box change color to red.
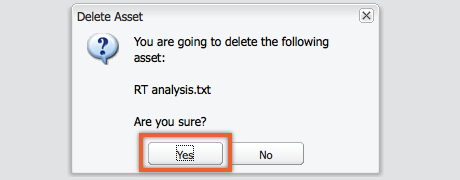
2. While keeping the file selected, click the Delete button.
A dialogue box will pop-up, asking for confirmation. Click Yes to delete the file. The file is now deleted. 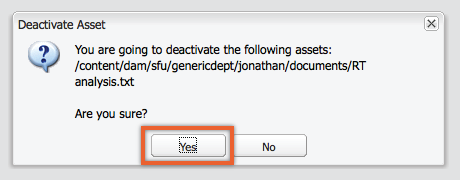
Please Note: A file, which is deleted but not deactivated can still be viewed on the live site by going directly to the file's URL.
Searching for Files in the DAM
The search tab allows the authors to look for files within the DAM internally. Click on the search tab located right beside the Digital Assets tab.
Note: All fields are optional.
Once in the search tab, you can fill in a series of information to assist the system in finding your files.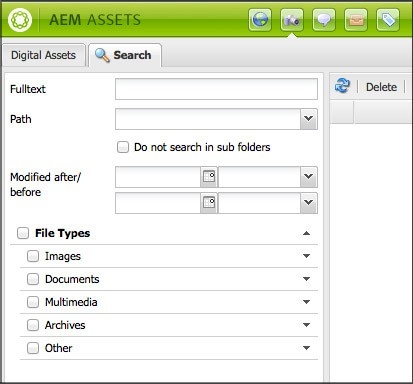
The Fulltext box allows you to quickly search the DAM files using keywords.
The Path box allows you to narrow down the scope of the search, by specifying the file system location.
A prompt will appear after clicking the arrow button. Click the plus symbol (+) beside "sfu" and navigate until you locate the appropriate folder, select it, and then click OK. This enables you to restrict the search to the chosen folder and its contents.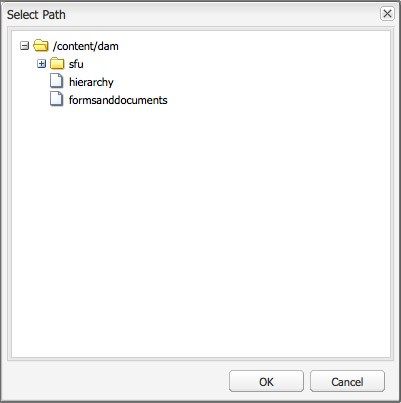
The Modified after/before field allows one to search for files within a certain time frame. Click on the calendar button, to set the date.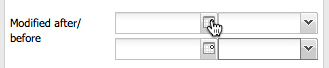
A date picker will appear, allowing you to choose the date.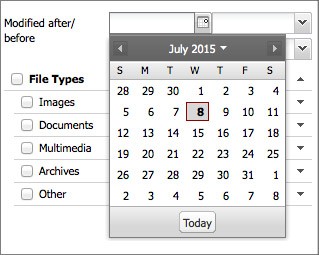
To be even more specific, you can enter a time followed by the date.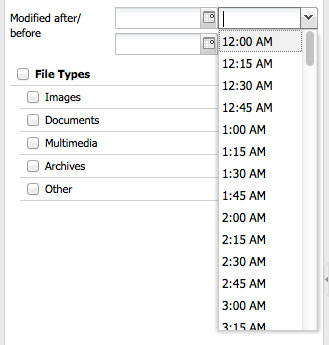
The second row allows you to enter the date and time of the modified before the field.
To specify what type of file you are looking for you can click the respective checkboxes.
Select the arrow button to further specify the file type.
After filling in the applicable fields for your search, click the Search button located at the bottom right corner.
Your results will appear to the right of the tab.
Source: https://www.sfu.ca/cms/howto/basics/adding_files.html

No comments:
Post a Comment
If you have any doubts or questions, please let us know.