Developers have used this ‘i18n’ feature to change the component’s fields and the same is being presented below in the form of use-case to understand the enablement of the ‘i18n’ in AEM more profoundly.
Here, we want to add multiple languages to the title and description component.
Step 1: Navigate to the component path in which you want to be multilingual.
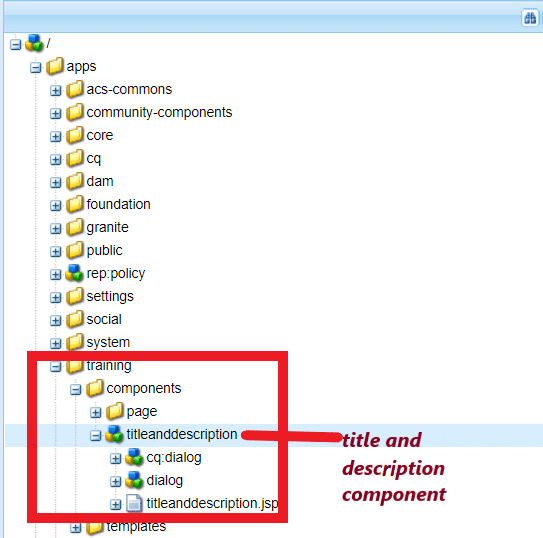
Step 2: Create a folder named ‘i18n’ under the component (here, it is ‘title and description‘).
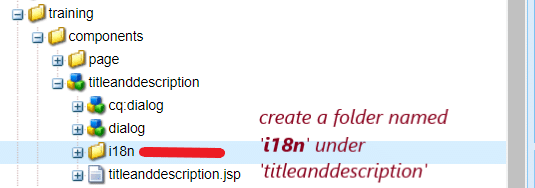
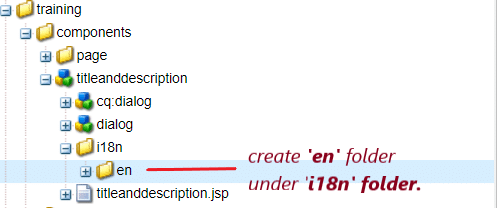
Step 3: Create a folder with a name as language code (ISO code). For ex: En for English, de for German, for French, etc.
Step 4: Click on the ‘Mixins’ from the toolbar.

Step 5: Click on the ‘+’ button in Mixins window and add ‘mix:language’ property and after that Click ‘OK’.

Step 6: Add ‘jcr:language’ property to the same ‘en’ node. And it’s value is the language code (ex: en)

Step 7: Create two nodes under ‘en’ node of type ‘sling:messageEntry’. Names of the nodes can be anything (preferably keep the FieldLabel names of the dialog), and later on, we will use this same Name for configuring the component’s dialog.
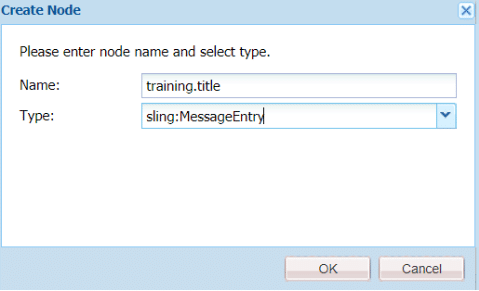
In this case, I have created ‘training.title’ and ‘training.description’ to give more sense to the names because my component has two fields ‘title’ and ‘description’.
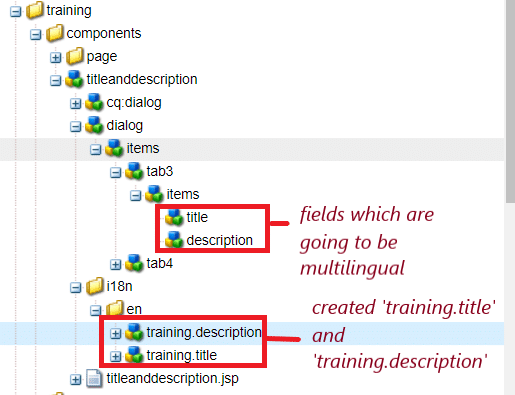
Step 8: Add ‘sling:message’ property with value. To recall, the value of respective language depends on the language node that you are in.
Here, as we are in ‘en’ node, writing the value as ‘Description’ in English. See the below images for more understanding.

Here, I am in the German(de) node. So, the value has ‘Description’ as ‘Beschreibung.

Step 9: Similarly, create the same folder structure from Step 6 to Step 8 for all the languages that you want to have for the component.
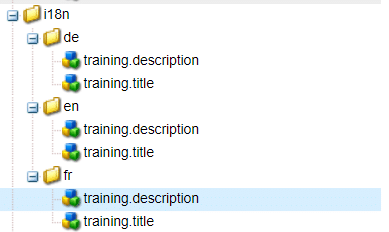
Step 10: Navigate to the component’s dialog fields and add values to the ‘fieldLabel’ property. Values are the node names under language folder.

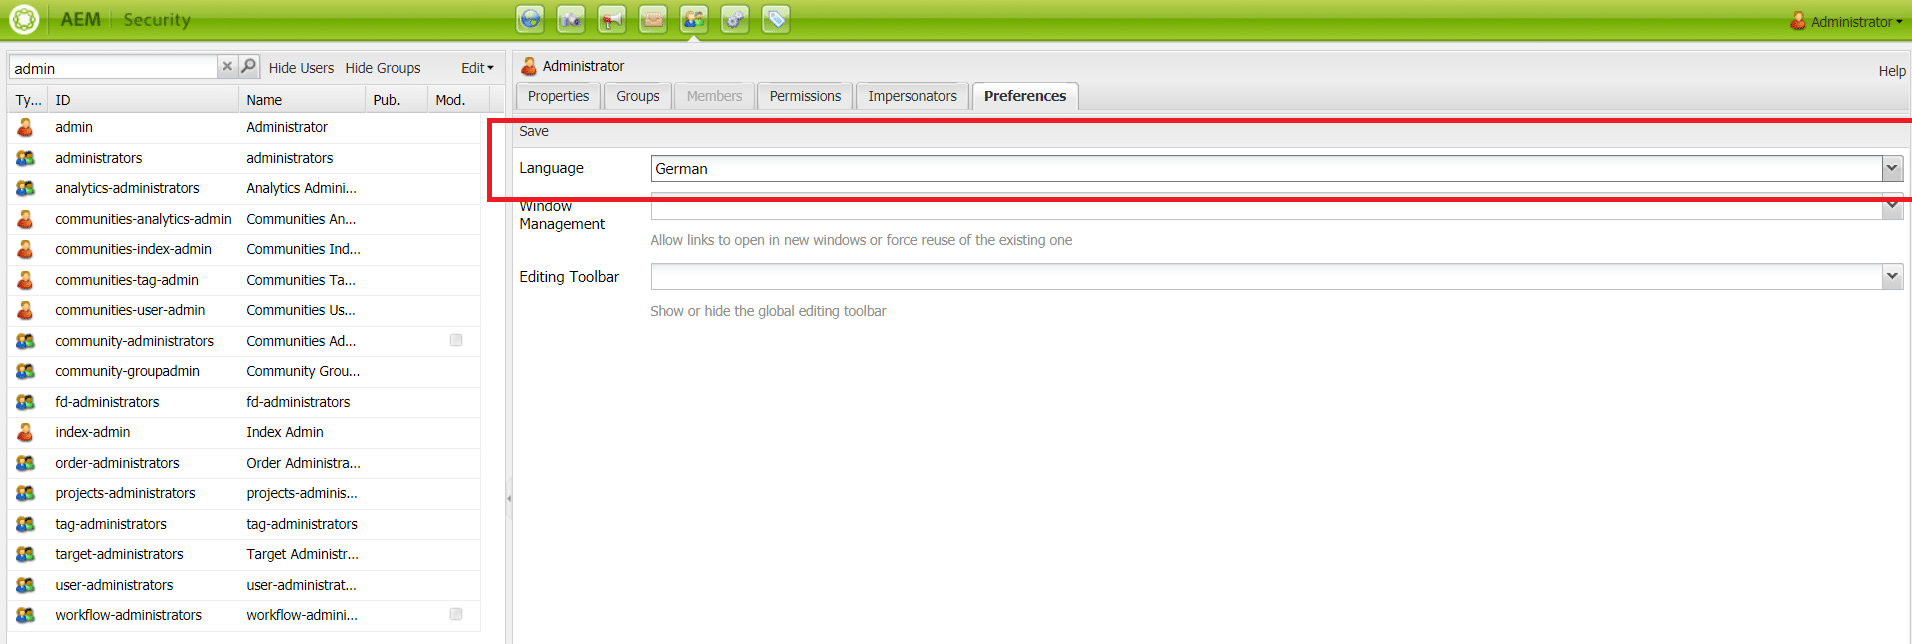
Step 11: Navigate to the User Admin page(‘http://localhost:4502/useradmin’).
Search for the username for which you are logged in ( by default it is ‘admin’). Click on the Preferences tab and select the language from the drop-down that you want the component to be displayed in.
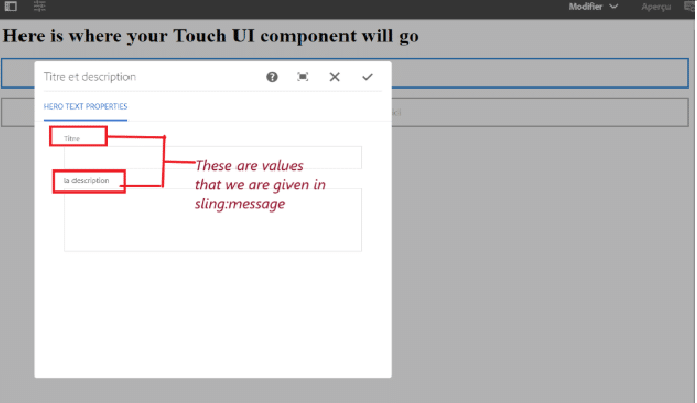
Step 12: Navigate to the page where your component is authored and click on ‘edit’ and here you can see that the field names are displayed in the language you have selected in user preferences. Here, I have selected display language as ‘French’.
Above, we have just presented a simple use case to understand the working process of i18n (Internationalization) for AEM. Apart from this, the ‘i18n’ can also be used by multi-national multi-lingual websites. These websites often use translation vendors for a page translation and they pay the vendors on the basis of word-by-word. In multi-national multi-lingual websites, there are always some labels/text-strings which remain the same and because of this, it doesn’t make sense to have them translated with a translation vendor every time they send a page for translation. To tackle this issue of those websites, the AEM provides a separate in-built ‘i18n’ translator tool, where all these labels/text-strings and their translated content is stored and can be used as many times as required (Of course, without any payment). In conclusion, we can say that i18n is a powerful, versatile tool that comes with AEM to Internationalize your components and dialogs to display UI strings in different languages. If you have any query then do let us know, we would be more than happy to help.
Source: https://www.nextrow.com/blog/adobe-aem-setup/usecase-il8n-converting-components-based-userpreference
No comments:
Post a Comment
If you have any doubts or questions, please let us know.