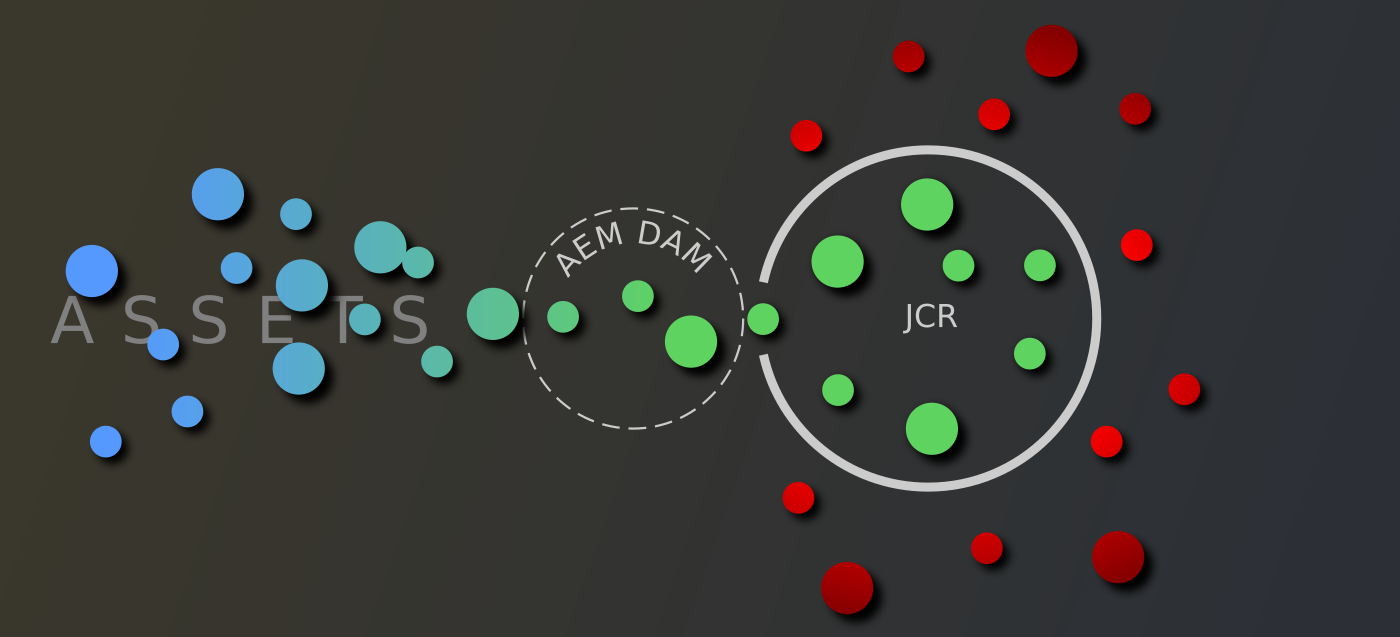
The DAM (Digital Asset Manager) is AEM’s asset management system and should be the single point of entry for all assets into the AEM platform and the one-stop-shop for using those assets in content.
The DAM goes beyond simply storing assets by providing useful features such as asset validation, license management, tagging, and analytics, among many others. Even if you do not use these features, there are many reasons why you’d want to make sure that all your assets are in one place and under the same management system:
- Assets are easy to find, especially if you have a common-sense directory structure or use the collections feature.
- If you want to run workflows (such as content validation) or do any kind of processing on new assets, this can be done upon DAM asset creation.
- If you need to move assets from or to another platform, integrations are made easy.
If the image of the loop above reminds you of a hangman’s rope, that’s no coincidence! Leaving these loopholes open can lead to a polluted JCR containing “floating assets”, which is can become a massive pain for any kind of batch job for example, and has a devastating impact on JCR size long-term.
AEM Sites Image component
Let’s look at the most flagrant loophole first: the browse option of the Image component.
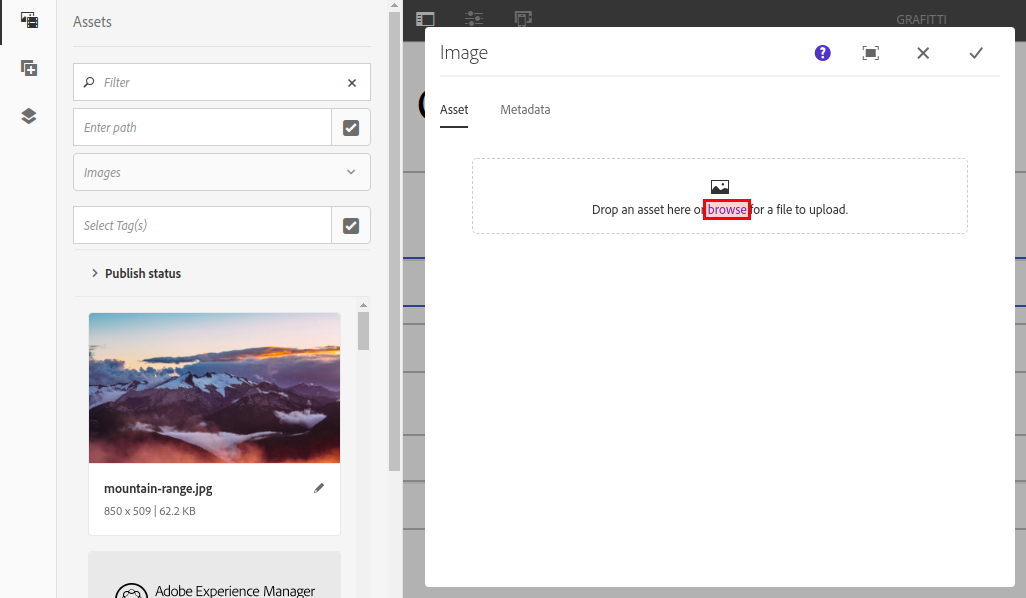
The browse button
This is what happens if you use the upload button to provide an image:
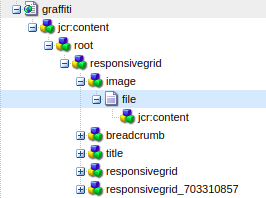
An image stored at the page level
The image gets saved at the page level rather than the DAM, which makes it very hard to find in the future. Imagine now that the same high-res image is used in 10 places and, each time, users are uploading from their system: you are now stocking 10 images instead of saving it once in the DAM and referencing it 10 times.
The size of the page in the CRXDE screenshot above is 7.3MB with a reference to the DAM and 3.1MB with an uploaded image (that’s a 424x increase)!
There is also a potential security risk with this method of providing images. A user who has access to confidential information and a chip on their shoulder could use the browse functionality to upload a text file masked as a JPEG which, after publication, would then be accessible to the outside world. I’ve played out this scenario in the GIF below:
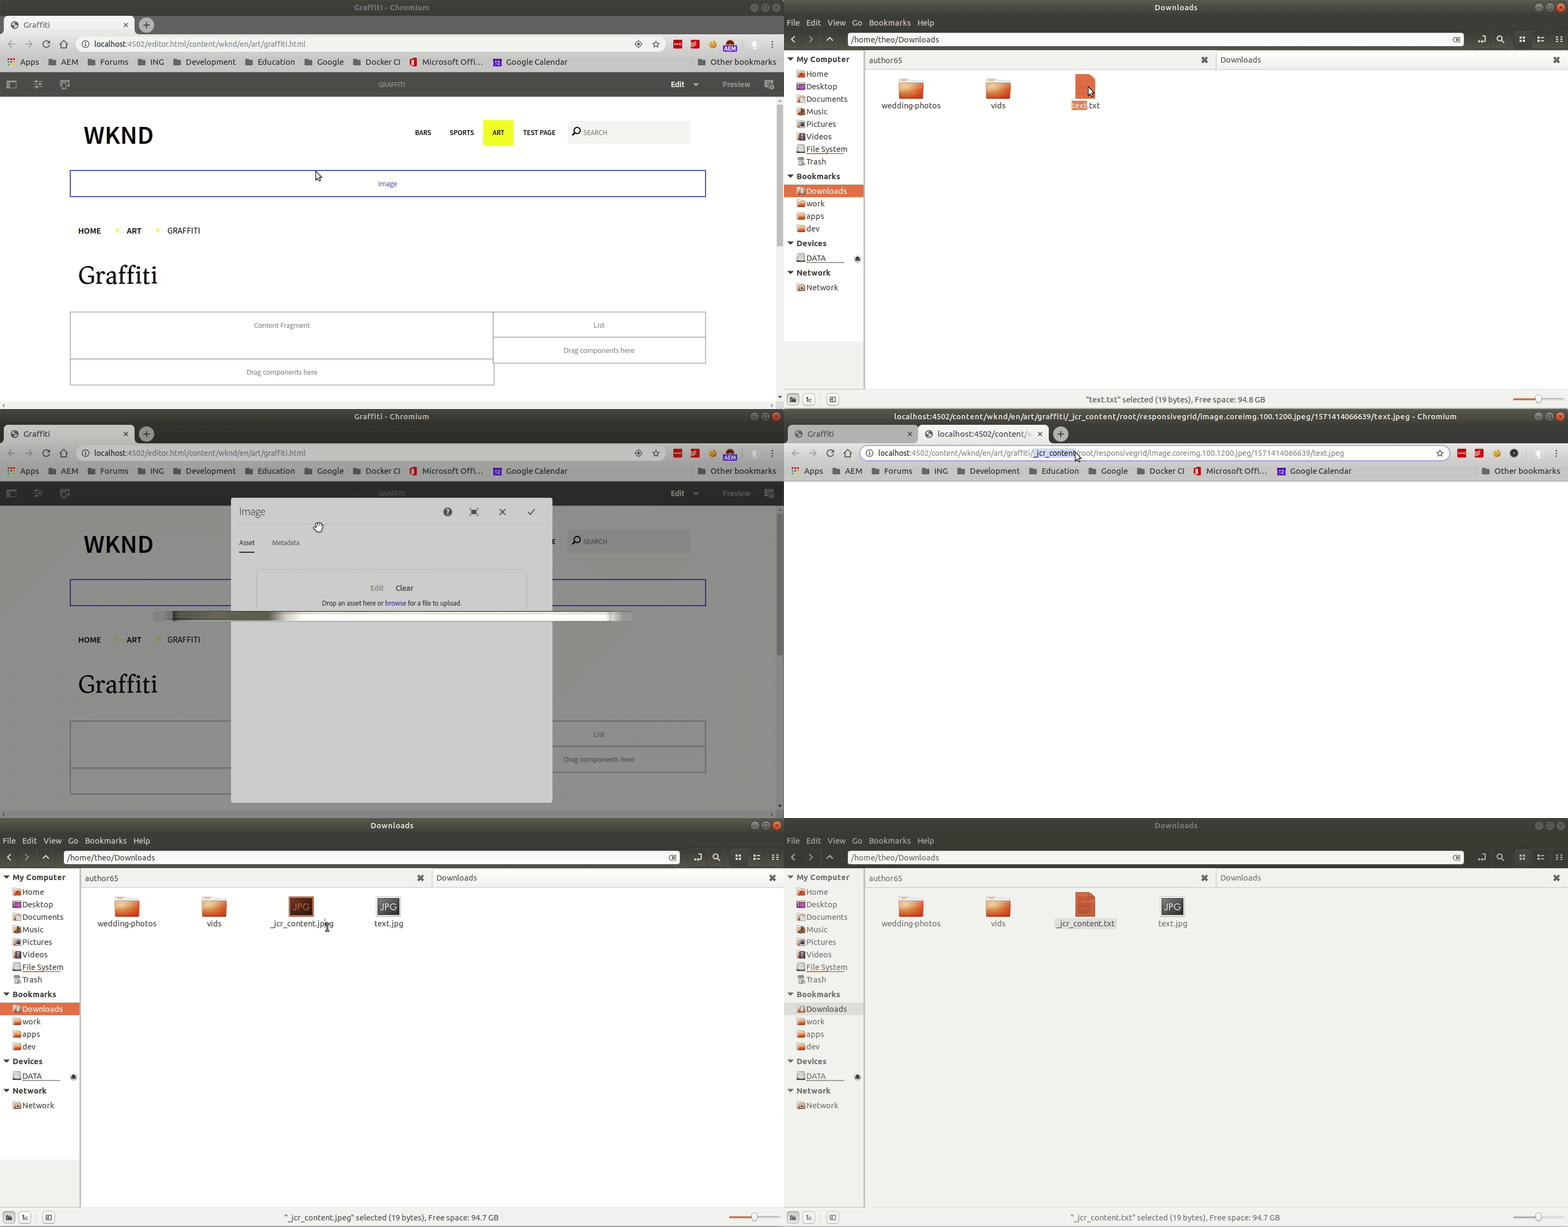
Exposing confidential information using the Image component
Of course, there are many security measures you could put in place to prevent this kind of abuse, but removing the browse option is a good start.
Convinced yet? Let’s take a look at how we can “de-activate” this feature.
Option 1: For a specific component
The “cleanest” way to do this is by using the allowUpload property of the /libs/cq/gui/components/authoring/dialog/fileupload component for your Image component. Setting this property to false will remove the browse button.
If you are using AEM Core Components, you can do this by copying the node at /apps/core/wcm/components/image/v2/image/cq:dialog/content/items/tabs/items/asset/items/columns/items/column/items/file to your Image component and simply adding the following property to it:
allowUpload - Boolean - false
Option 2: Globally
If you prefer to remove the functionality completely you can do so by overlaying the JSP at /libs/cq/gui/components/authoring/dialog/fileupload/render.jsp and simply removing the code which reads the allowUpload property and renders the browse button.
Here is a sample, but check out the GitHub repo for the complete refactor of the JSP

Removing the browse button from the JSP
AEM Forms Image and Image Choice components
The same concerns exist for the AEM Forms components Image and Image Choice:
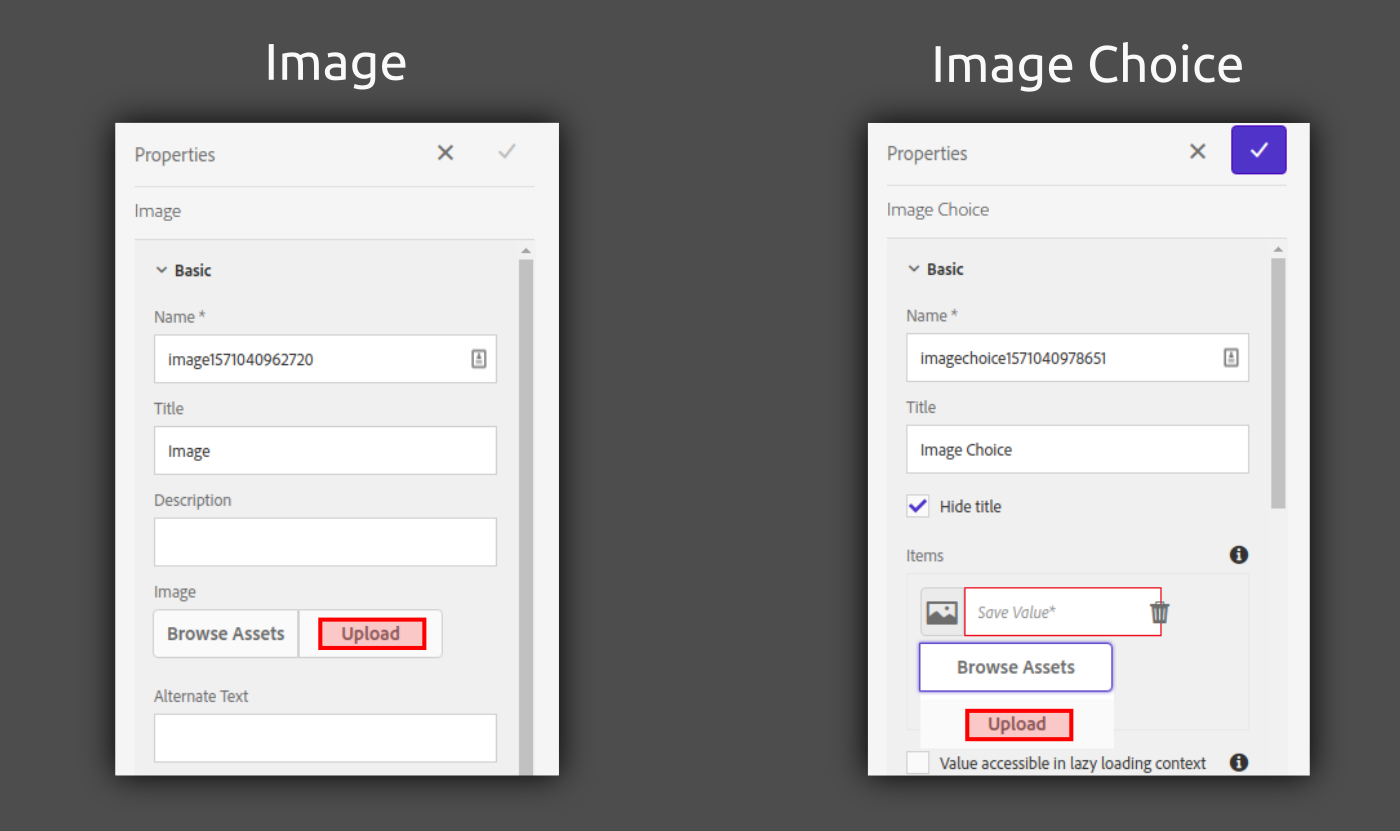
However, generally speaking, AEM Forms is much less customization-friendly that AEM Sites, so we will need to employ a workaround to make these buttons disappear.
Large portions of both components’ cq:dialog node trees have been marked with the granite:InternalArea mixin to indicate that they are not extendable and cannot be overlaid. This also makes them appear greyed-out in CRXDE:
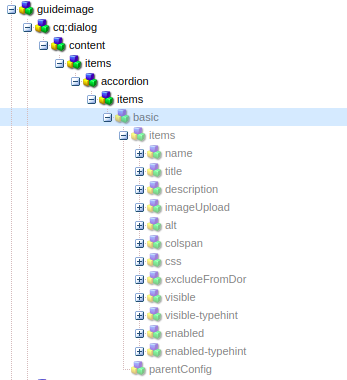
Nodes marked with granite:InternalArea mixin
Since we cannot modify these nodes directly, we will create a CSS clientlib to prevent the rendering of the buttons.
Create a similar node structure to the following:apps
\ — customization (nt:folder)
\ — clientlibs (nt:folder)
\ — restrict-asset-upload (cq:ClientLibraryFolder)
\ — css.txt (nt:file)
\ — css (nt:folder)
\ — restrictAssetUpload.css (nt:file)
Add the following to css.txt:
\ — clientlibs (nt:folder)
\ — restrict-asset-upload (cq:ClientLibraryFolder)
\ — css.txt (nt:file)
\ — css (nt:folder)
\ — restrictAssetUpload.css (nt:file)
Add the following to css.txt:
#base=css
restrictAssetUpload.css
We can modify the contents of restrictAssetUpload.css to implement our feature. The following CSS will hide the Upload buttons:
Now we must make sure this CSS is loaded with the rest of the clientlibs associated with the Forms Editor screen.
The existing styles for the two components are in the /libs/fd/af/authoring/clientlibs/granite/components/imageUploadStyles clientlib which is in theimageUpload category. In order to load our CSS at the same time, we will put it in the same category so it is picked up by AEM and merged in with the other styles. Add the following property to the restrict-asset-upload node:
We can modify the contents of restrictAssetUpload.css to implement our feature. The following CSS will hide the Upload buttons:
/* Hides the Image component file upload button */
.fdImageUploadGroup coral-fileupload.fdImageFileUpload {
display: none;
}
/* Makes the Image component Browse Assets button border properly rounded */
.fdpathfield .coral-InputGroup .coral-InputGroup-button > button.coral3-Button.coral3-Button--secondary {
border-radius: 0.25rem;
}
/* Hides the Image Choice component file upload button */
.fdImageUploadWithText .fdImageUploadWithTextList coral-fileupload {
display: none;
}
/* Removes ugly background overlap in the Image Choice component configuration */
.fdImageUploadWithText .fdImageUploadWithTextList.coral-Popover {
background-color: transparent;
}
Now we must make sure this CSS is loaded with the rest of the clientlibs associated with the Forms Editor screen.
The existing styles for the two components are in the /libs/fd/af/authoring/clientlibs/granite/components/imageUploadStyles clientlib which is in theimageUpload category. In order to load our CSS at the same time, we will put it in the same category so it is picked up by AEM and merged in with the other styles. Add the following property to the restrict-asset-upload node:
categories — String[] — imageUpload
Now reload your AEM Forms editor and open the configuration side-panel for an Image component and you should see that the Upload button is gone.
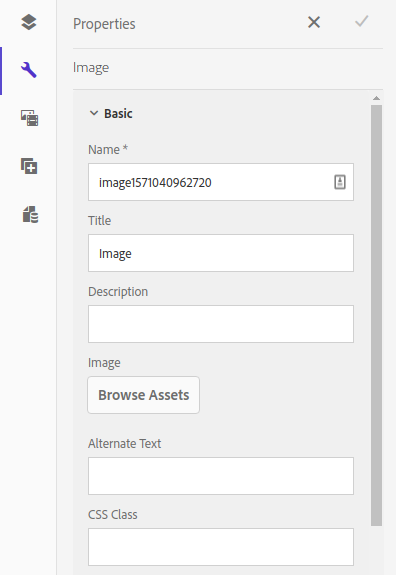
Now reload your AEM Forms editor and open the configuration side-panel for an Image component and you should see that the Upload button is gone.

No more Upload button
You will see the same for Image Choice.
Of course, this does not stop a tech-savvy user from inspecting the DOM in their browser, removing the display: none; CSS property, and clicking the Upload button, but it’s a good start. If you want to go the extra mile, the process is the same except you’ll be creating a JS clientlib that removes the Upload button from the DOM.
AEM Sites page thumbnails
Another time that users are allowed to upload files from their machine is when they set a thumbnail image for a page. This is less dramatic as the thumbnails are for internal use and are not typically accessible by website visitors. Furthermore, pages inherit their template’s thumbnail so there is rarely a need for users to manually set a thumbnail.
However, if you want to remove the feature you can do so as follows.
Option 1: For a specific page component
Create a the following node structure under your page component:
your-page-component/tabs/thumbnail/items/column/items/thumbnail
Then under that, create a node of type nt:unstructured named upload and give it the following property:
Create a the following node structure under your page component:
your-page-component/tabs/thumbnail/items/column/items/thumbnail
Then under that, create a node of type nt:unstructured named upload and give it the following property:
sling:hideResource - Boolean - true
Option 2: Globally
If you prefer to remove thumbnail uploads from all pages regardless of their page type or template, you can do so by overlaying the file at /apps/cq/gui/components/common/wcm/pagethumbnail/pagethumbnail.jsp and making the following changes to remove the button (see GitHub repo at the bottom of the article for code):

There you go, your JCR is now protected from “floating” assets!
To see the source code for the JSP modifications, head over to the GitHub repo for this tutorial.
If you can think of any other instances where users can upload images (or any asset) without using the DAM, comment below and I’ll add a fix to this article :)
No comments:
Post a Comment
If you have any doubts or questions, please let us know.