Gradle works with a few CI tools, such as Jenkins, Travis, and TeamCity. Its ideal for a lot of languages, even, it can be extended by plugins (developed mainly by the community). Another feature that I like is its simplicity. All commands and use are logical, so, you no need a lot of memory in your head to remember how it works and extend its functionality.
Installation in RedHat/Centos/Fedora distributions
Firstly, you need to install a JDK, for me, OpenJDK is the best option because It is into the repositories.
Firstly, you need to install a JDK, for me, OpenJDK is the best option because It is into the repositories.
sudo [yum|dnf] install unzip java-1.8.0-openjdk -y
Create the home directory for Gradle.
Create the home directory for Gradle.
sudo mkdir /opt/gradle
sudo chown gradleuser: /opt/gradle
Download the binary from the official site.
Download the binary from the official site.
wget -O ~/gradle-6.5-bin.zip https://services.gradle.org/distributions/gradle-6.5-bin.zip
Uncompress the archive file.
Uncompress the archive file.
unzip -d /opt/gradle/ gradle-6.5-bin.zip
sudo vi /etc/profile.d/gradle.sh
Add this variable declaration in the afore-mentioned file.
Add this variable declaration in the afore-mentioned file.
export GRADLE_HOME=/opt/gradle/gradle-6.5export PATH=$PATH:$GRADLE_HOME/bin
Logout from your current session and login again.
Test your installation.
Logout from your current session and login again.
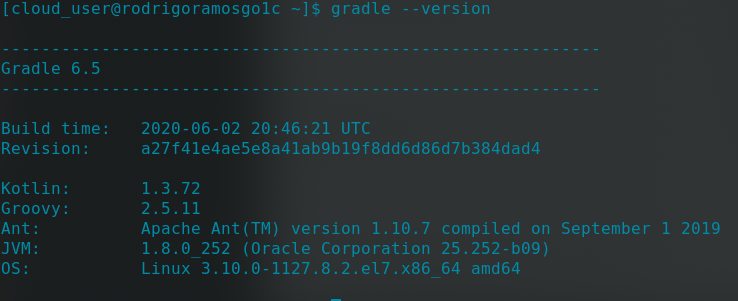
Test your installation.
gradle --version

Output
Gradle Basics
You have to put it into your project directory. So, once there, you must initialize with the following command. Be free to put where you want, surely you will discover a better way.
You have to put it into your project directory. So, once there, you must initialize with the following command. Be free to put where you want, surely you will discover a better way.
cd $MYPROJECTDIRECTORY/
gradle init
After that, some files would be generated.

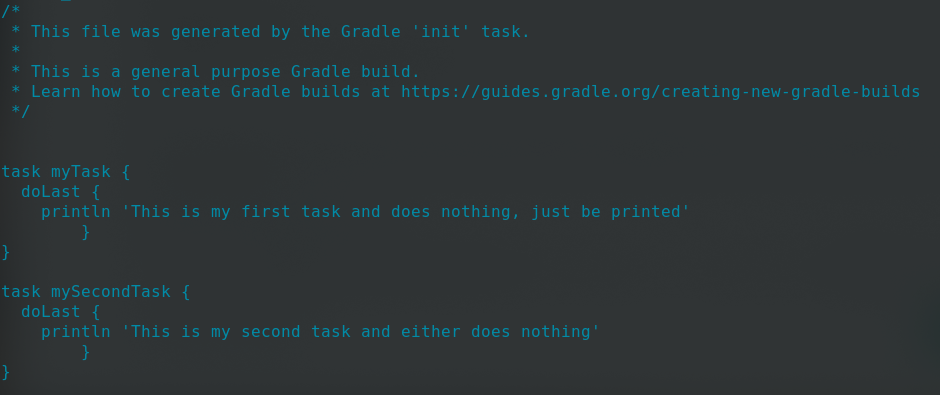
The file named build.gradle must contain all tasks to build our packages. In this example as the project does not exist yet, I will not build a package, I just only show how to use this file. In the next posts, I will use real examples.
I write two tasks and both just print a message.

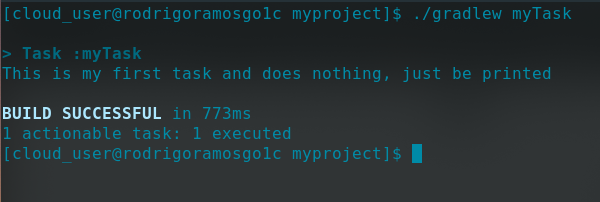
Then, I test them../gradlew myTask

Second test../gradlew mySecondTask

Surely at one moment, we will structure our build having dependencies inside the file between tasks.

The last line of the picture is where I have declared my dependency. “mySecondTask depends on myTask”. We will see.
gradle init
After that, some files would be generated.

The file named build.gradle must contain all tasks to build our packages. In this example as the project does not exist yet, I will not build a package, I just only show how to use this file. In the next posts, I will use real examples.
I write two tasks and both just print a message.

Then, I test them../gradlew myTask

Second test../gradlew mySecondTask

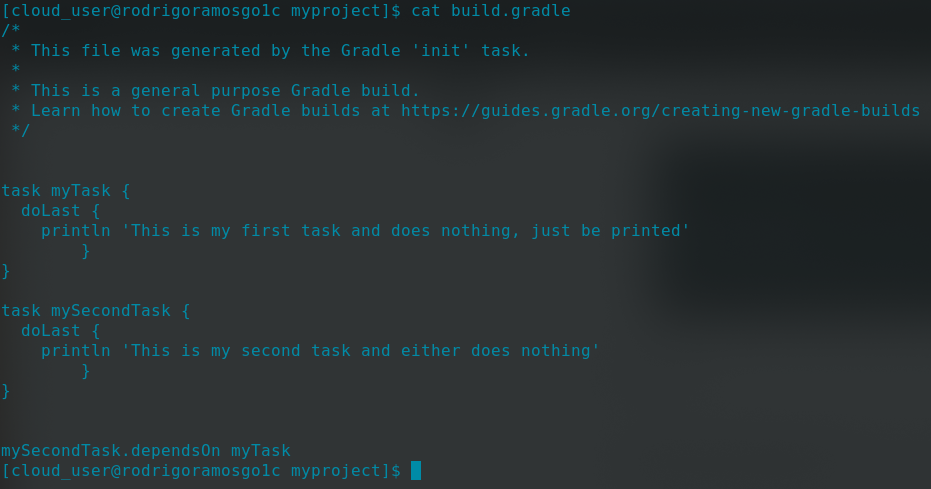
Surely at one moment, we will structure our build having dependencies inside the file between tasks.

The last line of the picture is where I have declared my dependency. “mySecondTask depends on myTask”. We will see.
No comments:
Post a Comment
If you have any doubts or questions, please let us know.