Below are the steps to create personalization in Latest AEM.
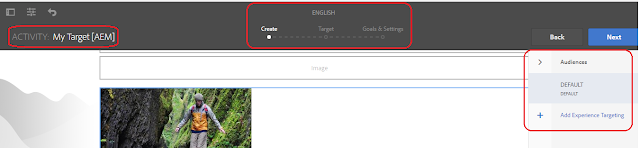
Once we open a Geometric Outdoors page we can see the Targeting option as below. By default BRAND is selected as 'Geometric Outdoors'.

- Add and configure ContextHub Segments
- Create a Brand and related Activity, (We need to select ContextHub as Engine and create its Experiences from the new segments);
- Add targets and relevant personalization components for each Experience.
- Configured the targeted component to use ContextHub as Engine;
Once we open a Geometric Outdoors page we can see the Targeting option as below. By default BRAND is selected as 'Geometric Outdoors'.
To create our own activity for the selected brand, click on the '+' symbol as shown below. In the new activity, form Enter a name (For eg:'My Target') and select the target engine. (Context Hub is selected to ensure we are using our own segmentation from AEM). We can also use Adobe Target configuration to create personalization.

Once the new activity is created, select the activity as shown below.

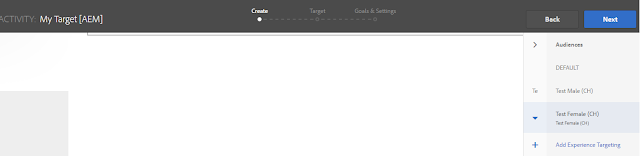
Now in Targeting mode, click on 'Start Targeting', A default experience will be always enabled. Now add new experience by clicking on '+ Add Experience Targeting'
Now in Targeting mode, click on 'Start Targeting', A default experience will be always enabled. Now add new experience by clicking on '+ Add Experience Targeting'
Select the Context Hub Segments which you have created referring to the Previous post. Basically, we have one male(Test Male CH) and one female(Test Female CH) ContextHub segments created as to experience.
Now author an image component in an empty area of the page.

Right-click, select Target so that the component is enabled for the target.

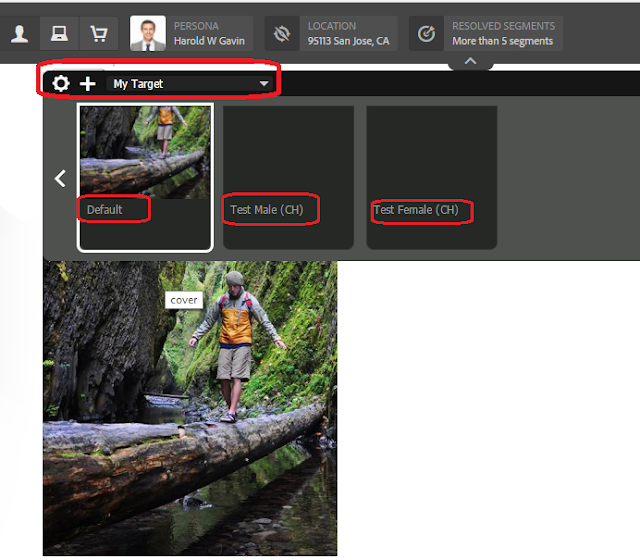
Now right-click and select Experiences,

Once you select 'My Target', you can see all the configured experiences appearing. ( We can disable any of them in case they are not needed.)
Now go back to targeting mode, start targeting, select the component and select the experience to be updated. Click on 'add offer'.
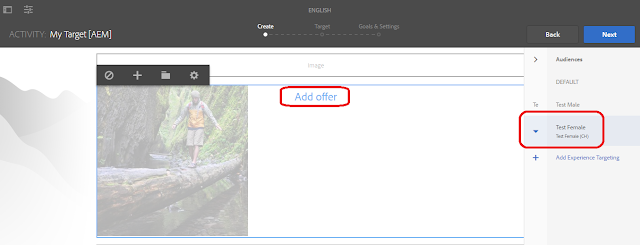
Select the new image to have appeared on the corresponding experience. Click 'Next' for 'Create', 'Target', 'Goals & Settings' and save the Targeting.

We are done with our targeting configuration.
Testing the configuration:
Now click on preview select the user/ Persona and change for male and female.

Once a male user is selected from PERSONA
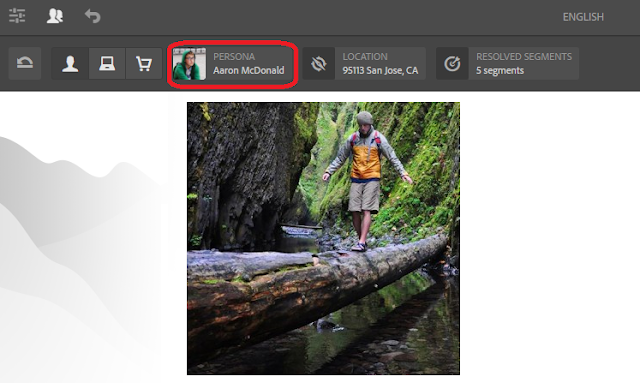
Once a female user is selected from PERSONA

We can test the persona, Geo-changes using Client context also.
Select the new image to have appeared on the corresponding experience. Click 'Next' for 'Create', 'Target', 'Goals & Settings' and save the Targeting.
We are done with our targeting configuration.
Testing the configuration:
Now click on preview select the user/ Persona and change for male and female.
Once a male user is selected from PERSONA
Once a female user is selected from PERSONA
We can test the persona, Geo-changes using Client context also.

No comments:
Post a Comment
If you have any doubts or questions, please let us know.