But sometimes clients want to deploy spring boot applications in the JBoss server and if the JBoss server is quite legacy like JBoss EAP 6.3 or older than this then the actual problem starts.
So my requirement was client wants me to make a spring boot application that can run on java 7 and 8 and can be deployed over JBoss EAP 6.3.
As spring boot 2 needs java 8 to run so I am not able to use that so I decided to use spring boot version 1.5.21.RELEASE as it works on both java 7 and 8.
Let’s create a basic application with spring boot and deploy it in JBoss 6.3.
Prerequisites:
Install JBoss EAP 6.3: You can download JBoss 6.3 installer from here. For step by step procedure to install it in windows, please go through this video. Create a sample spring boot project: To create a sample spring boot project, you need to create a project from here. You can see the whole video on how to create a spring project and deploy it in the JBoss container. Till here, I assume that you are already done with prerequisites and now you need to make a few changes to your spring boot project.
Let’s create a sample main class and a very basic hello world API here.
import org.springframework.boot.SpringApplication;
import org.springframework.boot.autoconfigure.SpringBootApplication;
import org.springframework.boot.builder.SpringApplicationBuilder;
import org.springframework.boot.web.support.SpringBootServletInitializer;
import org.springframework.web.bind.annotation.GetMapping;
import org.springframework.web.bind.annotation.RequestMapping;
import org.springframework.web.bind.annotation.RestController;
@SpringBootApplication
public class SampleJbossApplication extends SpringBootServletInitializer {
@Override
protected SpringApplicationBuilder configure(SpringApplicationBuilder application) {
return application.sources(SampleJbossApplication.class);
}
public static void main(String[] args) {
SpringApplication.run(SampleJbossApplication.class, args);
}
@RestController
class HelloController {
@RequestMapping("/hello")
@GetMapping
String hello() {
return "Hello World " + " !";
}
}
}
First change the artifact “spring-boot-starter” to “spring-boot-starter-web”, because to create API we need “spring-boot-starter-web” dependency and the web jar also contains the “spring-boot-starter jar in itself. So to avoid duplicacy we need to do it. You need to deploy this application in JBoss container so you need to exclude tomcat dependency from your mainspring boot starter web jar.
<dependency> <groupId>org.springframework.boot</groupId> <artifactId>spring-boot-starter-web</artifactId> <exclusions> <exclusion>
<groupId>org.springframework.boot</groupId>
<artifactId>spring-boot-starter-tomcat</artifactId>
</exclusion>
</exclusions>
</dependency>
As javax.servlet dependency was the part of tomcat API and in step 2 we have already excluded tomcat dependency, so we need to add this dependency externally only for compile-time as JBoss also has this dependency so at run-time JBoss will take care of it.
<dependency> <groupId>javax.servlet</groupId> <artifactId>servlet-api</artifactId> <version>2.5</version> <scope>provided</scope>
</dependency>
Add server.servlet-path=/* in application.properties file.
To deploy it in the JBoss container, we need to make a war for the project. To do that we need to add:<packaging>war</packaging>
Define context root: There are many ways to decide the context root of an application in the JBoss container.
Add <finalName> xyz</finalName> in pom.xml inside <build> tag.
Add jboss-web.xml inside project directory/webapp/WEB-INF/jboss-web.xml and add this line in the XML file.
<jboss-web> <context-root>/xyz</context-root>
</jboss-web
That’s all you need to do after that just run the maven command “mvn clean package” and deploy it in the JBoss container. After you follow the above steps and deploy the application in JBoss, the very first issue comes to you which is:
Caused by: org.jboss.as.server.deployment.DeploymentUnitProcessingException: JBAS018104: Deployment error processing SCI for jar: logback-classic-1.1.11.jar
To solve this issue, you need to exclude the log back dependency from the spring boot starter web dependency. Add this exclusion also in the step 2 exclusions list.
<exclusion> <groupId>ch.qos.logback</groupId> <artifactId>logback-classic</artifactId>
</exclusion>
After this, you again deploy the application in the JBoss container and hit the servlet to see the result.
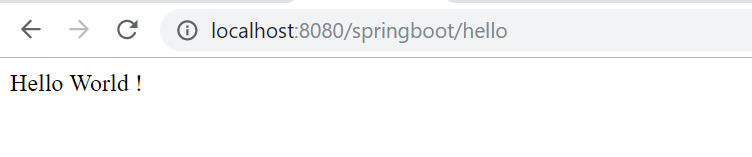
Fig 1: Test your sample API
Note: To see the admin console, JBoss Default Port is 9990 but to view the application the default port is 8080. So you will be able to see the API when you hit localhost:8080/context-root/API_URL
Note: The location of the server.log file is JBOSS_HOME/standalone/log/server.log.
Note: To see the admin console, JBoss Default Port is 9990 but to view the application the default port is 8080. So you will be able to see the API when you hit localhost:8080/context-root/API_URL
Note: The location of the server.log file is JBOSS_HOME/standalone/log/server.log.

No comments:
Post a Comment
If you have any doubts or questions, please let us know.