configuration procedures are for AEM 6.4 and higher. (If you are still using AEM Touch Connector version 4.0x for AEM 6.3 and lower, consult the configuration procedures here.) If you would like to migrate to AEM 6.4 and be able to use AEM Touch Connector version 5.0, you'll need to follow the procedures below.
In AEM 6.4, Adobe restructured the repository and moved the Translation Cloud Services configuration to a new location.
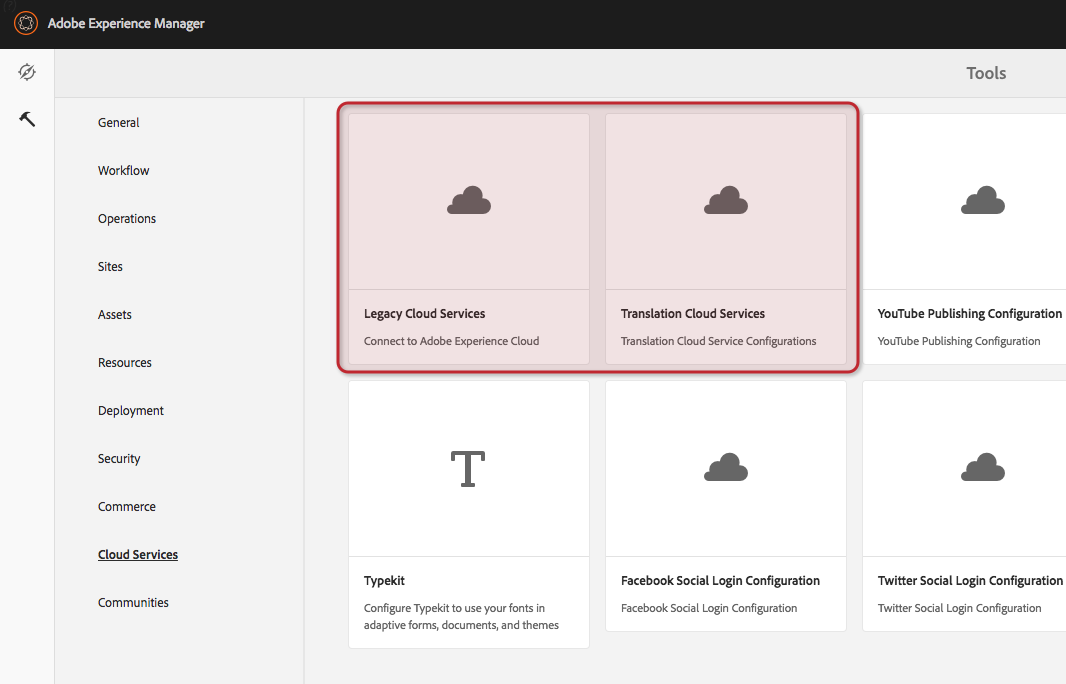
Adobe also changed the way that the translation configuration is assigned to sites\pages. We recommend deleting existing Smartling configuration(s) for AEM version 6.3 and below, and create a new one according to the steps outlined in the following sections. Highlighted in the screenshot below is where you can find legacy and new translation configurations.
Delete Smartling Legacy Configuration
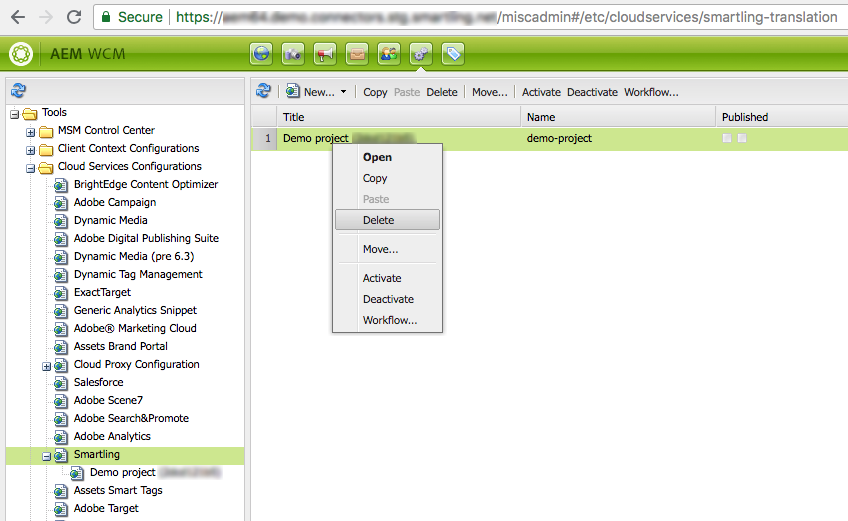
Open Tools from the AEM Classic UI, and select the following Cloud Service Configuration -> Smartling item miscadmin#/etc/cloudservices/smartling-translation.
Delete all of your Smartling configurations.
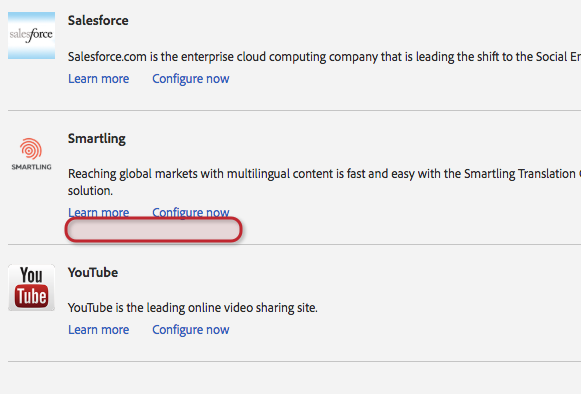
Ensure that all configurations were deleted via Tools > Cloud Services > Legacy Cloud Services /libs/cq/core/content/tools/cloudservices.html. There should no longer be any configurations.
You're now all set to create a new Smartling configuration.
Create a New Configuration
You'll be creating two configurations:
Translation Integration
Smartling Translation Provider
Create a Translation Integration Configuration
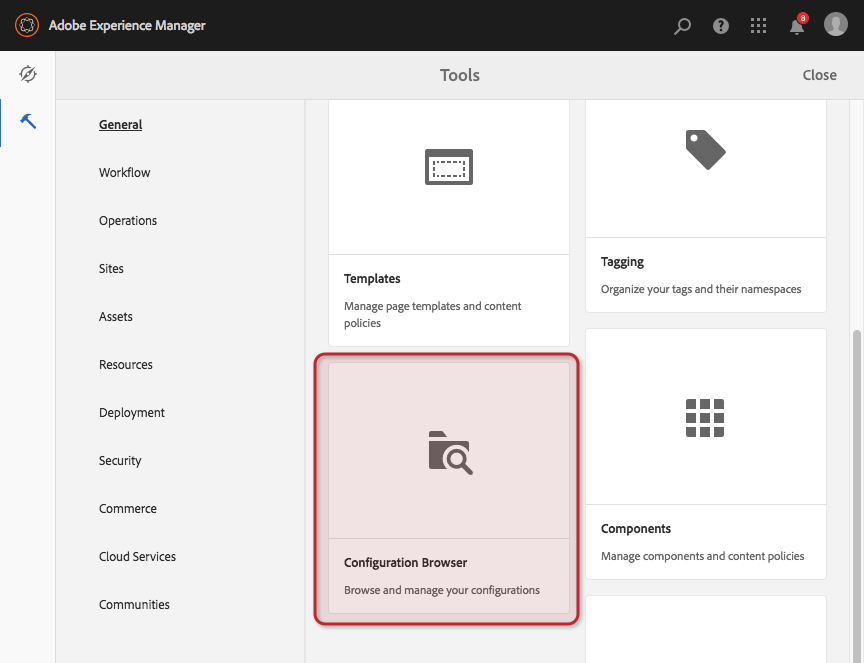
Optionally, you can create a new configuration (folder). To do this, open Configuration Browser.
Now you can create a configuration folder where you will add two translation configurations.
Open the new Translation Cloud Services (/mnt/overlay/cq/translation/gui/content/cloudservices.html)
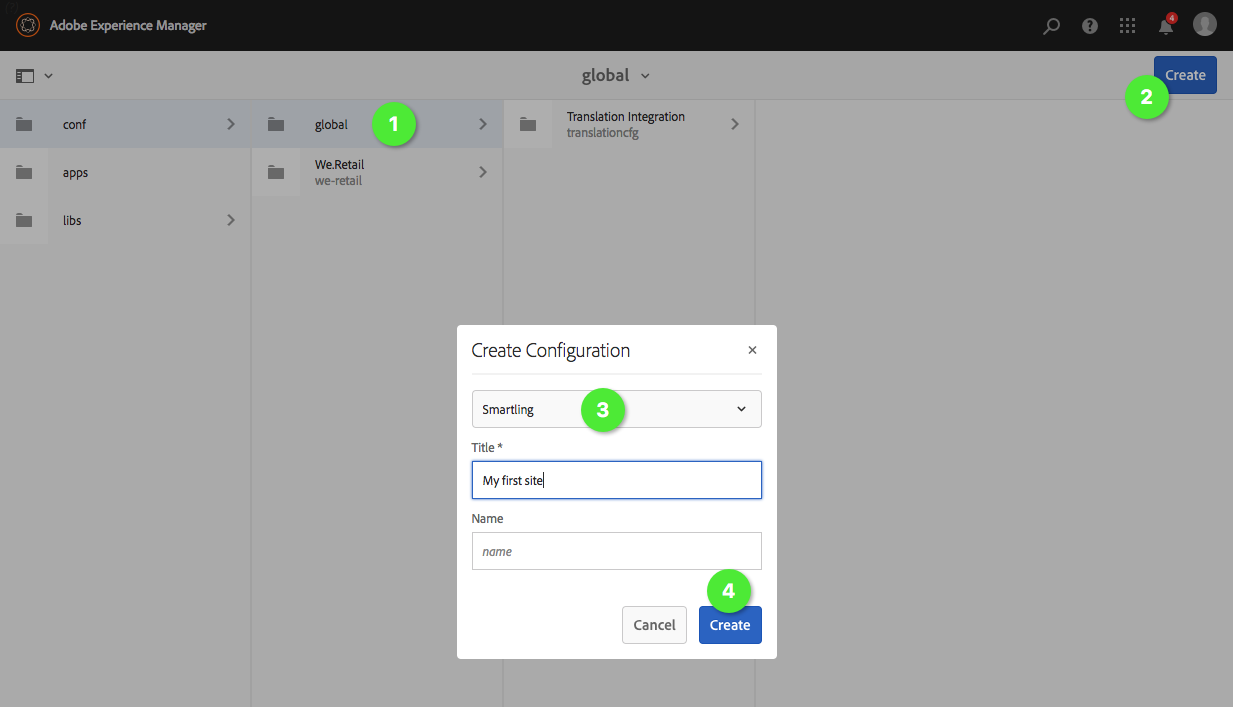
Select conf - global and click Create.
From the dropdown, select Translation Integration.
Check your configuration, and set it to the following:
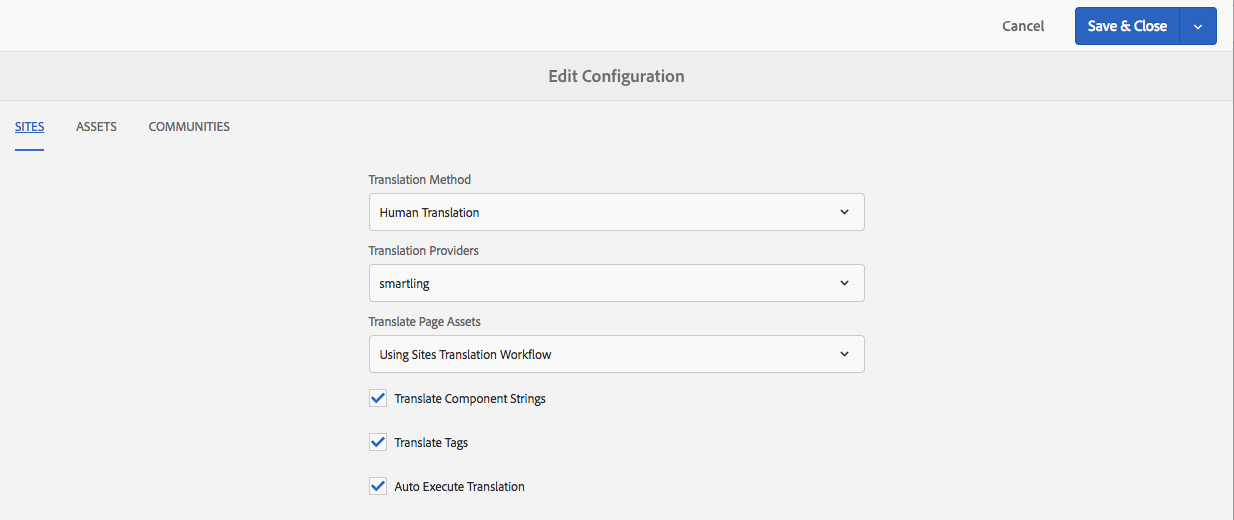
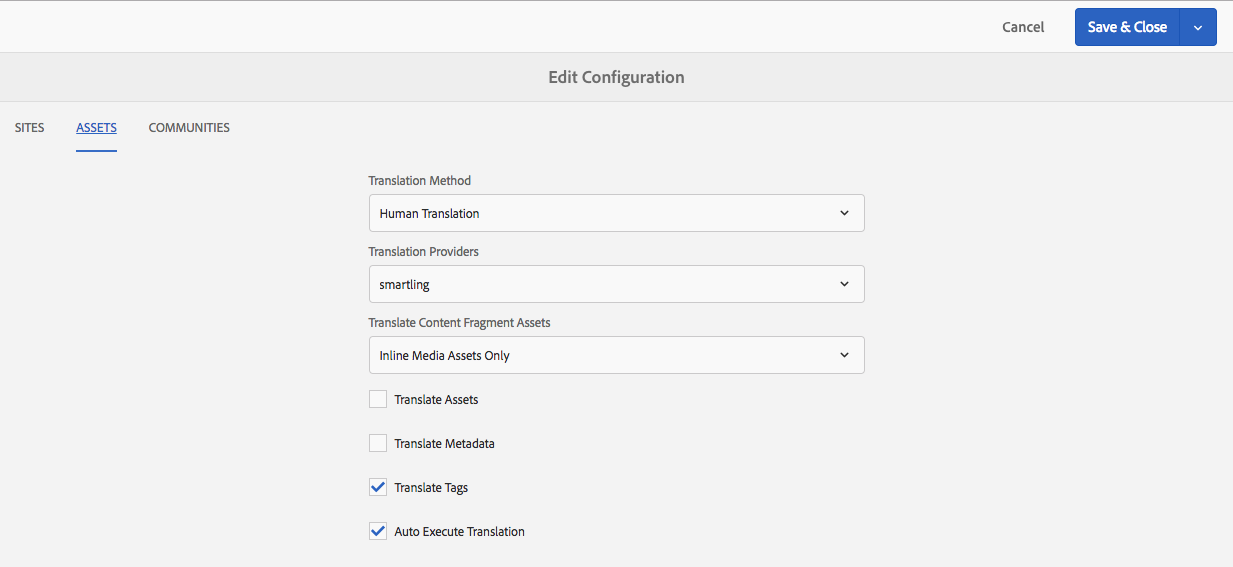
To learn more about available options, see the official AEM documentation.
Make sure that the Auto-execute Translation option is enabled for both the Sites and Assets tabs.
Create Configuration for Smartling Translation Provider
Open the new Translation Cloud Services /mnt/overlay/cq/translation/gui/content/cloudservices.html.
Select conf - global and click Create.
From the dropdown, select Smartling.
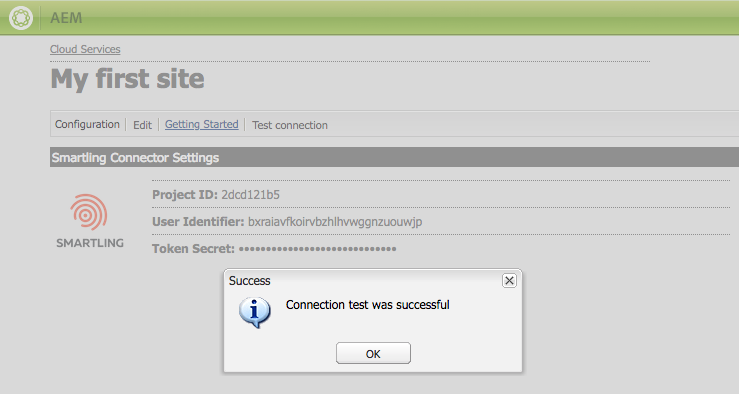
Retrieve your Project ID, User Identifier, and Token Secret from the Smartling Dashboard > API page. (Make sure you've selected the v2.0 tab.)

Click Edit and enter your Project ID, User Identifier, and Token Secret.
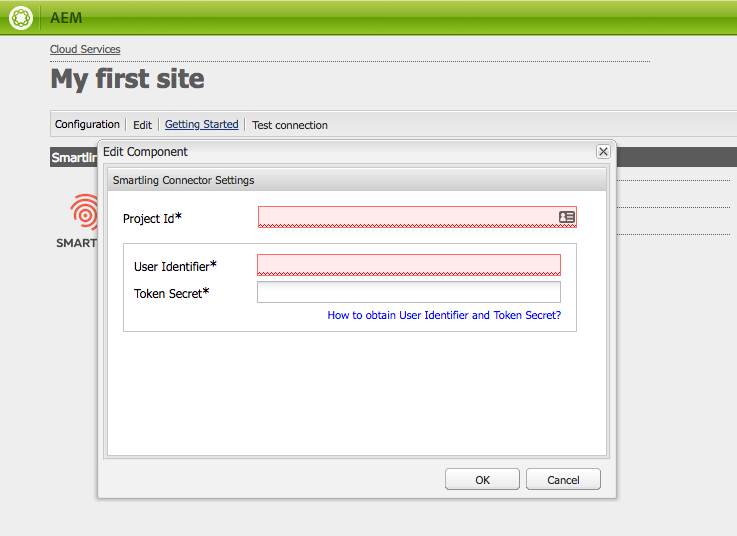
After saving the configuration, you can verify it by clicking Test connection on the toolbar.
Configure Site for Translation
To configure the translation of your source pages into other languages, associate the pages with the following cloud configurations:
The cloud configuration that connects AEM with the Smartling provider.
The Smartling configuration configures the details of the translation.
When you associate a page with a cloud configuration, the descendants of the page inherit the association.
Associate a Site with a Translation Provider
Associate a page with the Smartling provider that you are using to translate the page and its descendent pages.
1. In the Sites console, select the top page of your site to configure it, and click Properties.
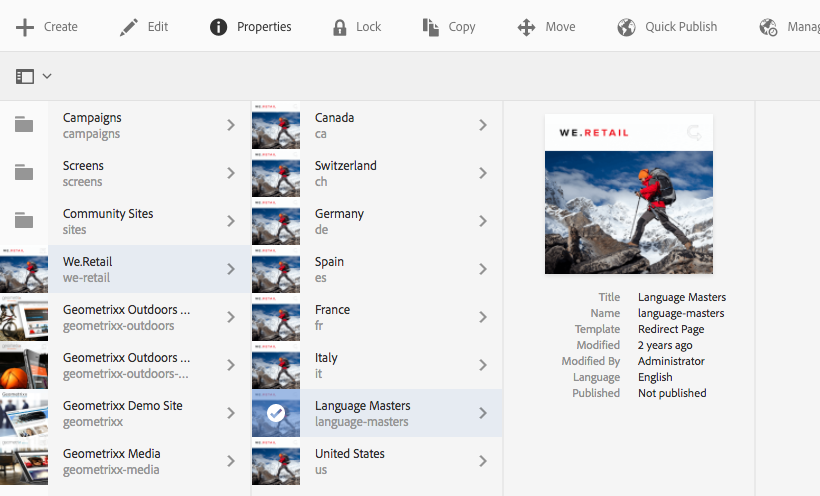
You should set the configuration for the page that is the parent of your sites (original and localized).
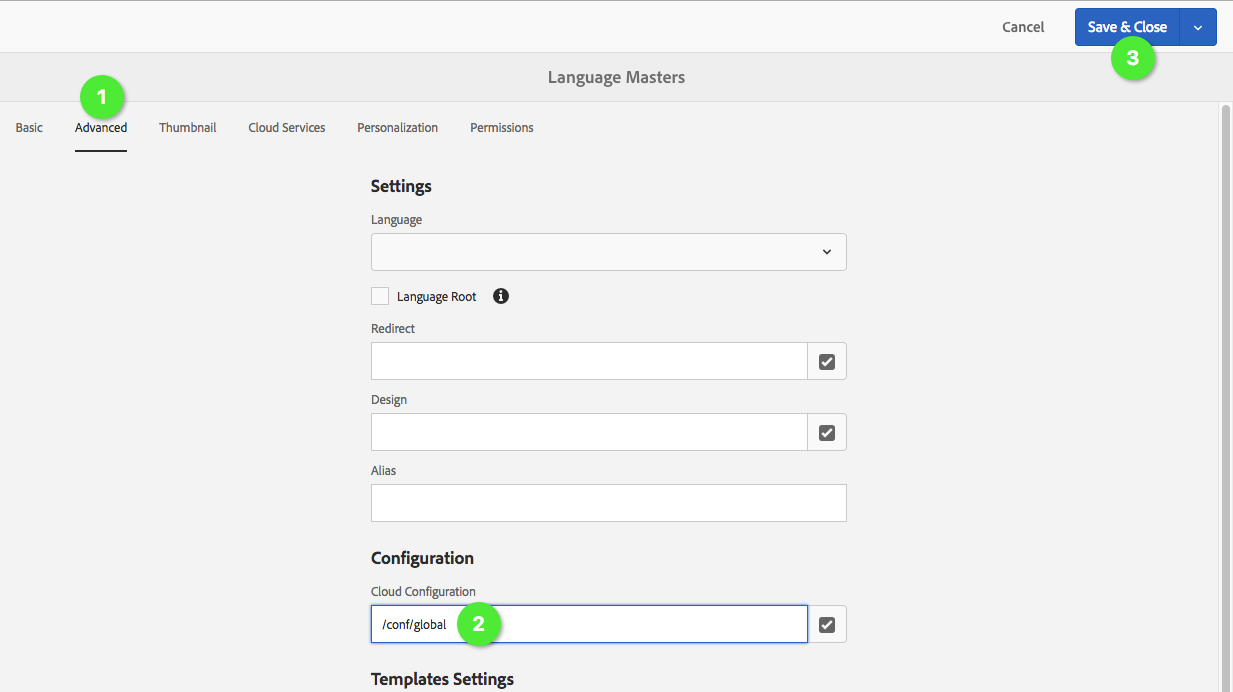
3. Select the Advanced tab.
4. Select the /conf/global configuration.
If the locales configured in you AEM site need to be remapped to different Smartling locales, see the AEM Touch Connector FAQ page for the locale remapping guide.

No comments:
Post a Comment
If you have any doubts or questions, please let us know.