How to Implement content personalization using ContextHub in AEM
Content personalization using Based on the profile information.
Solution:
Follow the below steps.
Follow the below steps.
Step 1: Create audiences.
Go to this URL http://localhost:4502/aem/start.html -->click on personlization-->click on audiences.
Select --> we retails under audience-->http://localhost:4502/libs/cq/personalization/touch-ui/content/v2/audiences.html/conf/we-retail
Go to this URL http://localhost:4502/aem/start.html -->click on personlization-->click on audiences.
Select --> we retails under audience-->http://localhost:4502/libs/cq/personalization/touch-ui/content/v2/audiences.html/conf/we-retail
Create new Audiences -->click on create -->create context hub-->Enter some name and click on Ok as shown in below screenshot. created two audiences one for Boy and another one for Girl.


Step 1.1: Assign Segment to Audiences for Boy and Girl as per below screenshots


Step 2: Create a Brand for audineces
Go to this URL http://localhost:4502/libs/cq/personalization/touch-ui/content/v2/activities.html
Click on create-->create Brand --> follow the below screenshot


Step 3: Create Activity
Go to this URL: http://localhost:4502/libs/cq/personalization/touch-ui/content/v2/activities.html/content/campaigns
Now select the already created brand i.e SampleCampaign -->click on create -->create activity--> follow the below screenhsots


Step 4: Click on Next to map Experience to Sampleactivity as shown in below screenshots -->click on + add experience to add the audiences created in earlier steps and map


Step 5: Enable target component for image
Go to this URL: http://localhost:4502/editor.html/content/we-retail/us/en/about-us.html
add image component and author an image

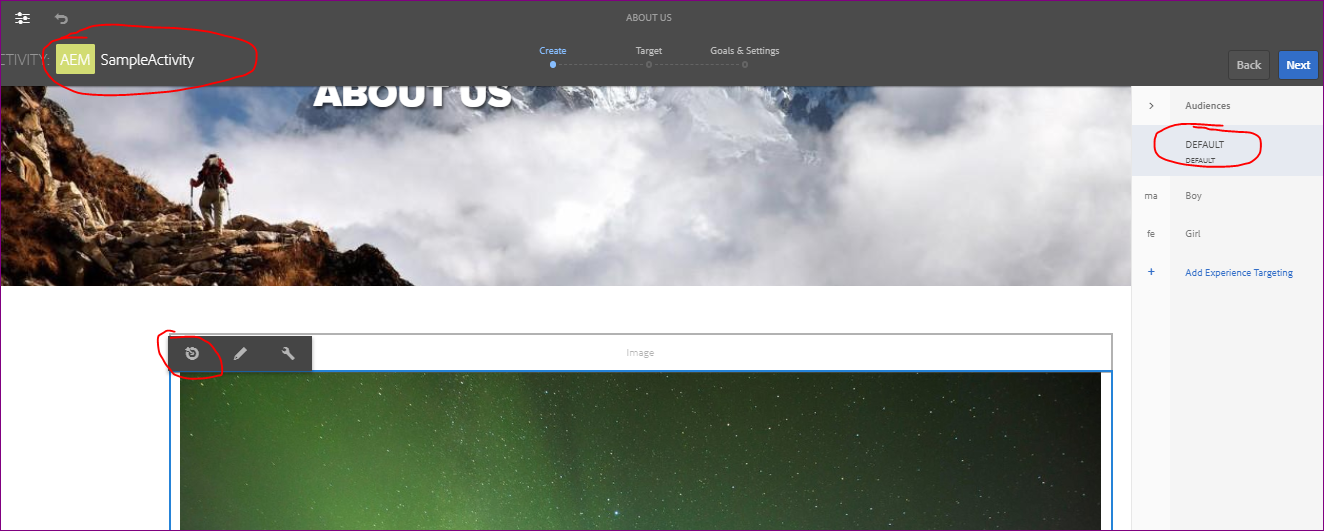
Switch edit mode to Target mode -->click on start target --> and select the authored image component to enable the target as shown in screenshot

Click on Start Targeting, Highlight image component while selecting the default target option and enable target-->click on target icon as shown below.

Now again select the same image component but select the target as Male Option and author different image as shown in below

Now again select the same image component but select the target as Female Option and author different image as shown in below

Click on Next


Click on Save

Switch to preview mode and switch profile to male/Female based on the profile selection you can see different images are shown. refer below screenshots.


That's All!.


Step 1.1: Assign Segment to Audiences for Boy and Girl as per below screenshots


Step 2: Create a Brand for audineces
Go to this URL http://localhost:4502/libs/cq/personalization/touch-ui/content/v2/activities.html
Click on create-->create Brand --> follow the below screenshot


Step 3: Create Activity
Go to this URL: http://localhost:4502/libs/cq/personalization/touch-ui/content/v2/activities.html/content/campaigns
Now select the already created brand i.e SampleCampaign -->click on create -->create activity--> follow the below screenhsots


Step 4: Click on Next to map Experience to Sampleactivity as shown in below screenshots -->click on + add experience to add the audiences created in earlier steps and map


Step 5: Enable target component for image
Go to this URL: http://localhost:4502/editor.html/content/we-retail/us/en/about-us.html
add image component and author an image

Switch edit mode to Target mode -->click on start target --> and select the authored image component to enable the target as shown in screenshot

Click on Start Targeting, Highlight image component while selecting the default target option and enable target-->click on target icon as shown below.
Now again select the same image component but select the target as Male Option and author different image as shown in below

Now again select the same image component but select the target as Female Option and author different image as shown in below

Click on Next


Click on Save

Switch to preview mode and switch profile to male/Female based on the profile selection you can see different images are shown. refer below screenshots.


That's All!.

No comments:
Post a Comment
If you have any doubts or questions, please let us know.