 Image credits: AEM, logs and cctv
Have you ever struggled to wait for the time it takes to deploy your changes to your AEM instance using maven commands for trivial file changes like styling or a line here and there?
There are plugins like Brackets and AEM Sling Development Tools which make development easy by allowing us to do this faster but they somehow restrict us to a specific IDE.
What if we could proxy an AEM server and have a WYSIWYG kind of environment which continuously monitors your changes the way it happens in Angular!
This idea led to the creation of aemfed npm module which does just that and a lot more! So what are we waiting for? Let’s get up and running with something fresh in AEM development.
Note: This is only to be used in non-production environments to speed up the development cycle.
Features:
Continuously listens to AEM changes and uploads to AEM instance using aemsync. Which means all changes are deployed to jcr_root on the fly.
Using browsersync keeps all browser instances (and not just one tab) updated with the latest changes.
Displays front-end related errors in the command line or IDE terminal using Sling Log tracer. A key advantage of this is that the exact file and location of the error gets shown up in the command line terminal.
Styling changes are immediately injected without a reload of the page. For other changes, a page reload happens for the changes to reflect.
What you would need at a minimum:
AEM 6.5
or
AEM 6.4 + SP2
or
AEM 6.3 + SP3
This has also been successfully tested on AEM 6.1 and AEM 6.2. So you can try on these versions as well.
I would be using AEM 6.4 + SP2 for demo.
2. Java 8
3. Maven
4. Node
How do we go about it?
Check if node and npm are working fine by entering the following in your IDE terminal or command line.
node -v
npm -v
You should see something like this:
 Check for node and npm
2. Install aemfed using pm.
npm install aemfed --global

3. For any help with aemfed you can type in:
aemfed -h
Which would give you this:

-t: the AEM instance to connect to.
-p: the port for aemfed.
-w: the path to watch. e.g. the location of ui.apps on your local.
-e: any paths to exclude. e.g. IDE or Git specific files.
The rest is self-explanatory. 4. Next, we will need an AEM project to test this with. For this let us create a new maven archetype project using:
mvn archetype:generate -
DarchetypeGroupId=com.adobe.granite.archetypes -
DarchetypeArtifactId=aem-project-archetype -DarchetypeVersion=17
 Parameters for maven archetype project
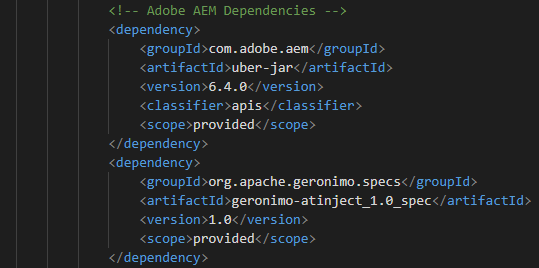
In the project so generated open the root pom.xml replace the old 6.3 uber jar dependency👇

AEM 6.3 uber jar
With a new one for AEM 6.4
<dependency>
<groupId>com.adobe.aem</groupId>
<artifactId>uber-jar</artifactId>
<version>6.4.0</version>
<classifier>apis</classifier>
<scope>provided</scope>
</dependency>
<dependency>
<groupId>org.apache.geronimo.specs</groupId>
<artifactId>geronimo-atinject_1.0_spec</artifactId>
<version>1.0</version>
<scope>provided</scope>
</dependency>
Please refer this if you are doing this for the first time.
5. Now that your project is created, let’s deploy it to our AEM instance by entering the following from the location where our parent pom resides:
mvn clean install -PautoInstallPackage
6. Next, let’s check the version for Sling Log Tracer on our instance. Open:http://localhost:4502/system/console/bundles/org.apache.sling.tracer
 Checking Apache Sling Log Tracer version
If it is greater than 1.0.0 feel free to skip to the next step, else if the version number is less or the configuration is missing in your instance see this.
7. Enable Sling Log Tracer in our AEM instance for aemsync to watch.
 Apache Sling Log Tracer configuration
 Enable the tracer and recording servlet for log tracing
8. To connect aemfed to our instance, let us open cmd from your project working directory or in your IDE navigate to the parent folder and enter
aemfed -t "http://admin:admin@localhost:4502" -w "ui.apps/src/main/content/jcr_root/"
I have used port 8888 for my AEM instance but the default port is 4502. Note the access URLs generated after running this command.

On the browser side, you can verify this by entering the following:
http://localhost:3000
which should open exactly the same AEM login page that opens for port 4502. Login using the default admin credentials and this is what would open up:
 Proxied AEM instance using aemfed
9. Now the best part
Open the default en.html page in your training project or any other page where you can apply a styling change from ui.apps directory.http://localhost:3000/editor.html/content/training/en.html
I am using the breadcrumb component for demo. Let us change the breadcrumb color to green for testing. Add the code below to the
.cmp-breadcrumb_item class.
color:green.cmp-breadcrumb__item {&:before {content: "\003e";display: inline-block;padding: 0 10px;}color: green;}
as shown below.
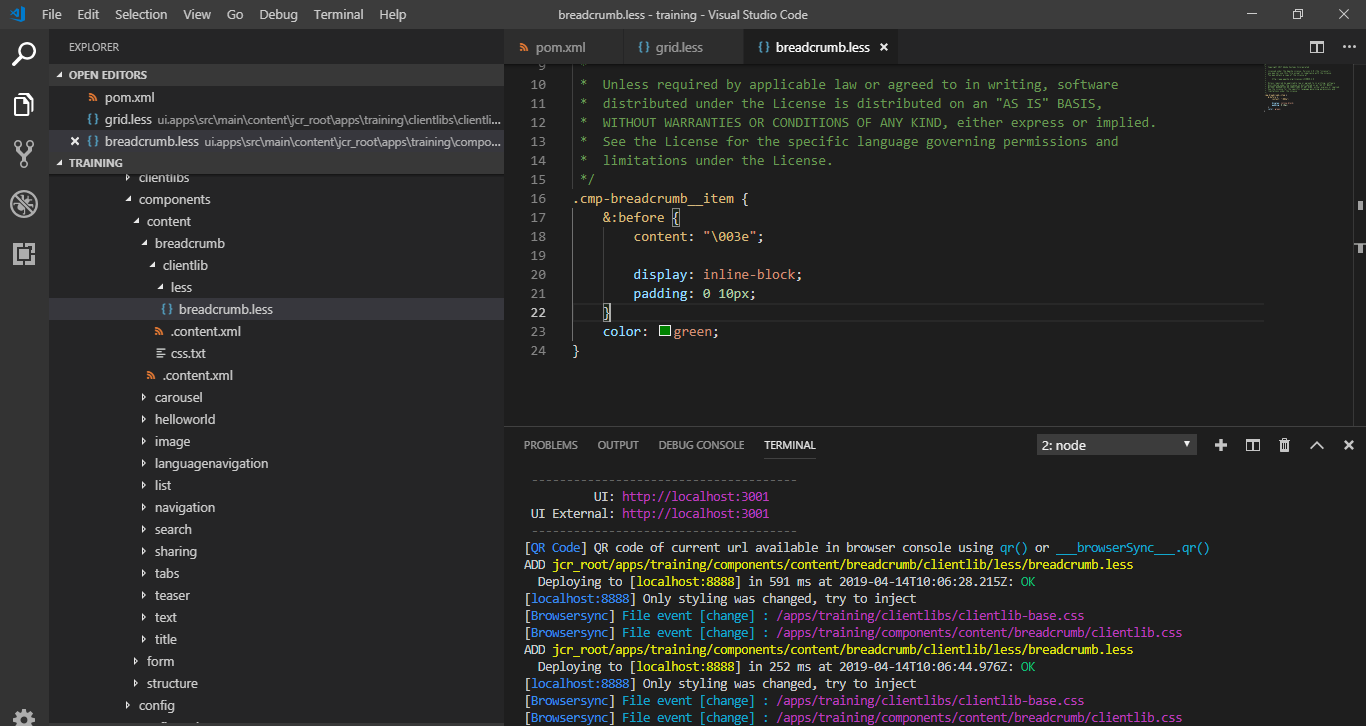 Added color:green in breadcrumb.less
Now open the en.html and without even a reload you can see the text has changed to green in color.
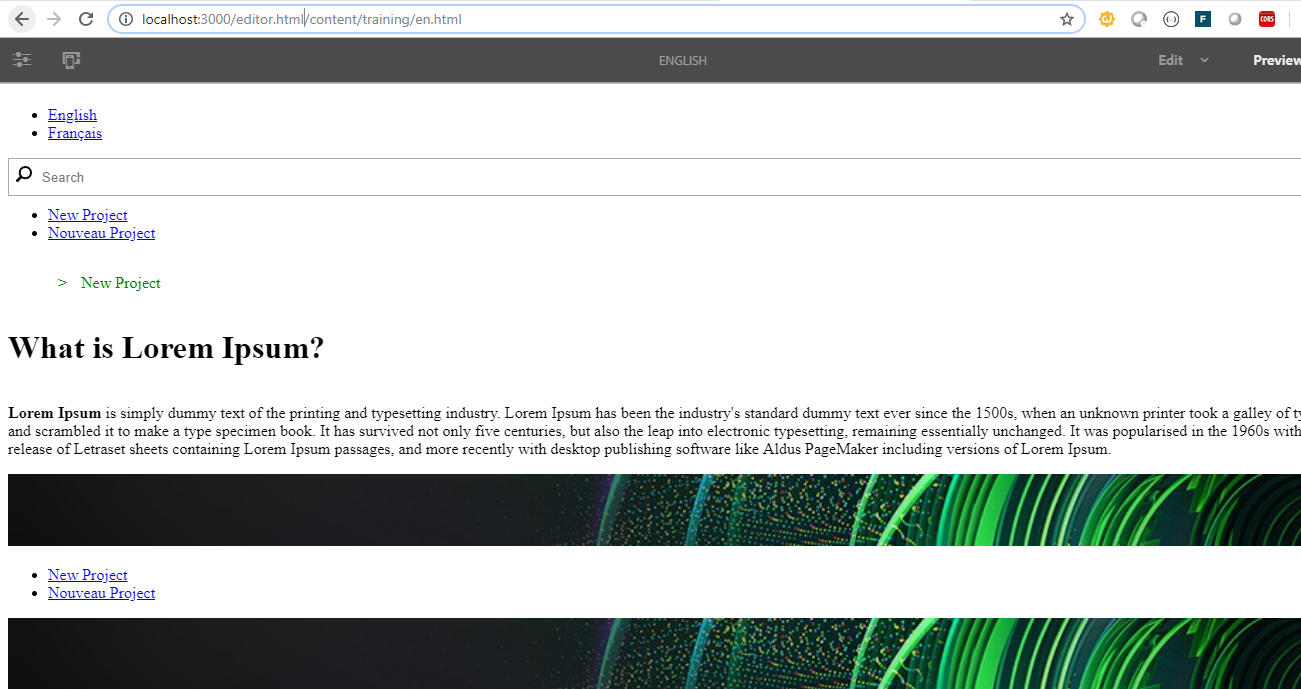 Text color changes to green since browser-sync notes the changes.
10. For the error scenario, I will just remove the end curly brace from the css file and this is what I get:
 Error highlighted in the terminal with a precise location in the file
No comments:
Post a Comment
If you have any doubts or questions, please let us know.