You can install a third-party connector a couple of different ways. Through the crxde package share and also uploading a package directly to the crxde package manager. I will walk through the steps to install the CrossLang-XTM connector as an example for this article (because that is what this customer wanted to use).
Installing the translation connector
To install a connector through the crxde Package Share navigate to http://localhost:4502/crx/packageshare/login.html and enter your adobe credentials. Once logged in search for your provider, in this case, “CrossLang”.
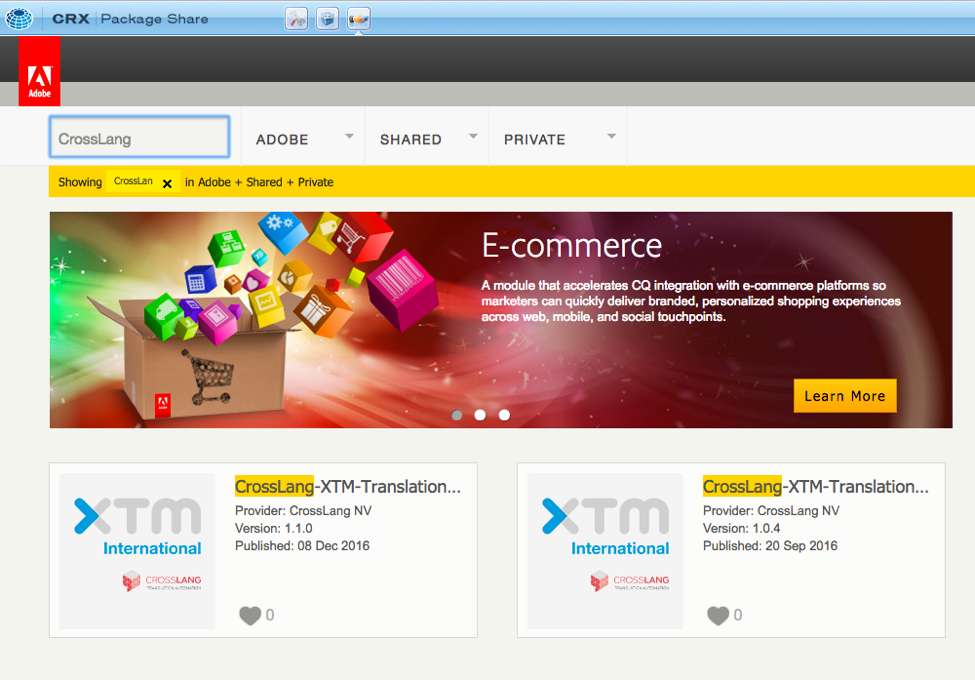
Click on the package that satisfies your version of AEM, in this case, Version 1.1.0 supports AEM version 6.2, so I can click that. Next, click on download and accept the License Agreement. Navigate to http://localhost:4502/crx/packmgr and the package should be listed looking something like this:

Click install to install this package. You can also upload the package directly to the crxde Package Manager if your translation provider provided you with an AEM package.
Configuring the third party translation connector
Navigate to http://localhost:4502/libs/cq/core/content/tools/cloudservices.html and under the Third Party Services we now see this cloud configuration:

Note: If the cloud service is not listed make sure you are using the correct version of AEM that the connector supports and also check to make sure the bundle is installed and active.
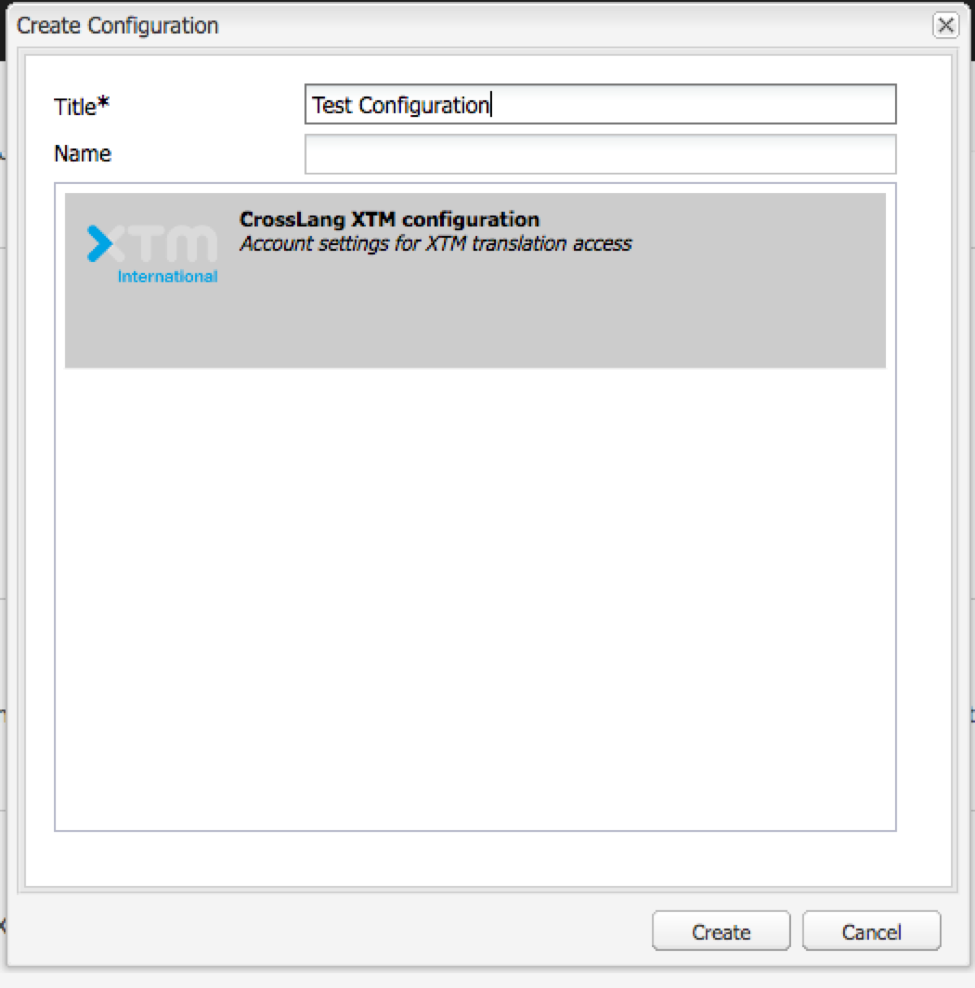
Click “Configure Now” to add a new cloud configuration. You will be presented with a dialog to name the cloud configuration you will create. Here we will call this configuration “Test Configuration”:
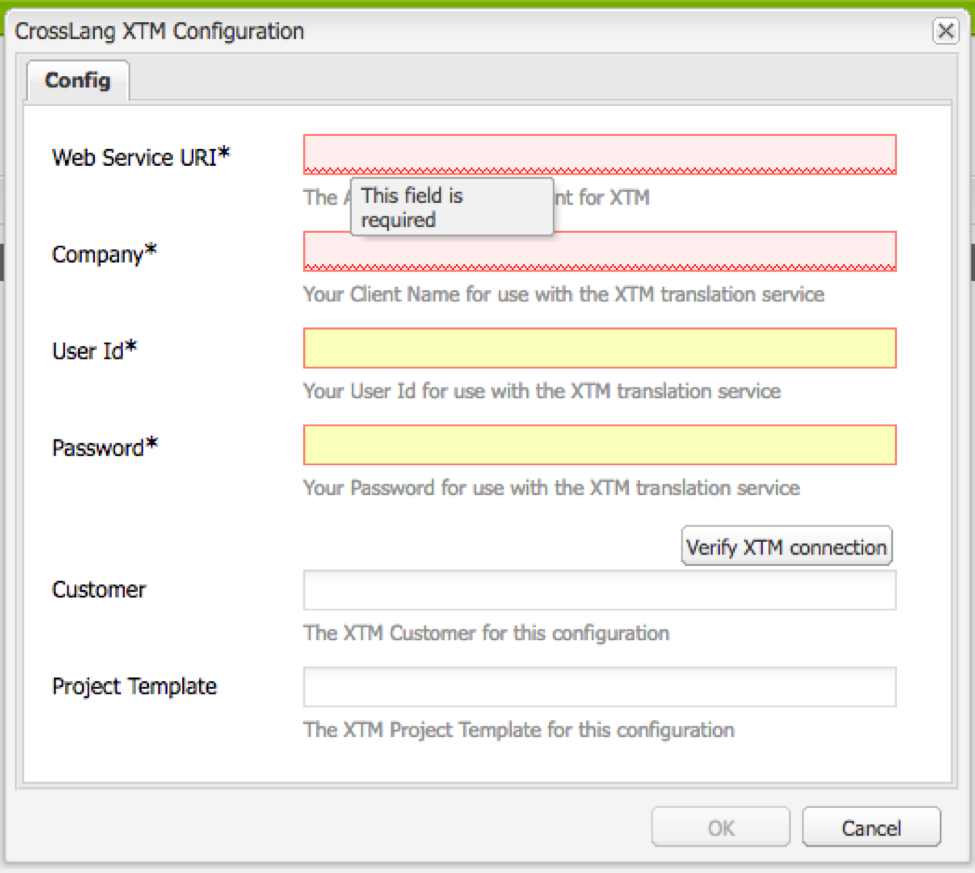
You will now be presented with a dialog that is specific to your third-party translation connector. The fields will vary here, nonetheless all the required info should be provided by your translation provider. Here is the example CrossLang XTM configuration dialog:
After you have filled in the required fields, your connector will now be ready to use. You have now tackled step one of translating content according to this Adobe documentation page: https://docs.adobe.com/docs/en/aem/6-2/administer/sites/translation.html and by following the next steps you can now begin sending content for translation through your translation provider!

No comments:
Post a Comment
If you have any doubts or questions, please let us know.